How to Verify a New-Home Plumbing Material Substitution Before Installation
Use a source-linked ledger to approve, hold, or reject a proposed new-home plumbing substitution before rough-in or concealment.
The short answer
Approve a plumbing substitution only when the exact item, intended use, size, temperature and pressure ratings, potable-water or DWV listing, mating system, installation method, local AHJ acceptance, warranty effect, and required test record all match the project. If any field is unknown, hold the substitution before installation. A part that fits is not automatically code-compliant, potable, warrantable, or testable.How to Verify a New-Home Plumbing Material Substitution Before Installation
Approve a plumbing substitution only when the exact item, intended use, size, temperature and pressure ratings, potable-water or DWV listing, mating system, installation method, local authority having jurisdiction (AHJ) acceptance, warranty effect, and required test record all match the project. If any field is unknown, hold the substitution before installation. A part that fits is not automatically code-compliant, potable, warrantable, or testable.
This guide is for a United States new-home project before rough-in or concealment. It helps a homeowner coordinate a builder and licensed plumber; it does not design a plumbing system, approve a code change, test a component, or replace an inspection. The actual jurisdiction is the state, county, city, town, township, tribal government, utility, or other authority named by the permit and project documents. Identify that authority before relying on any rule.
1. Treat the substitution as an approval decision, not a fit check #
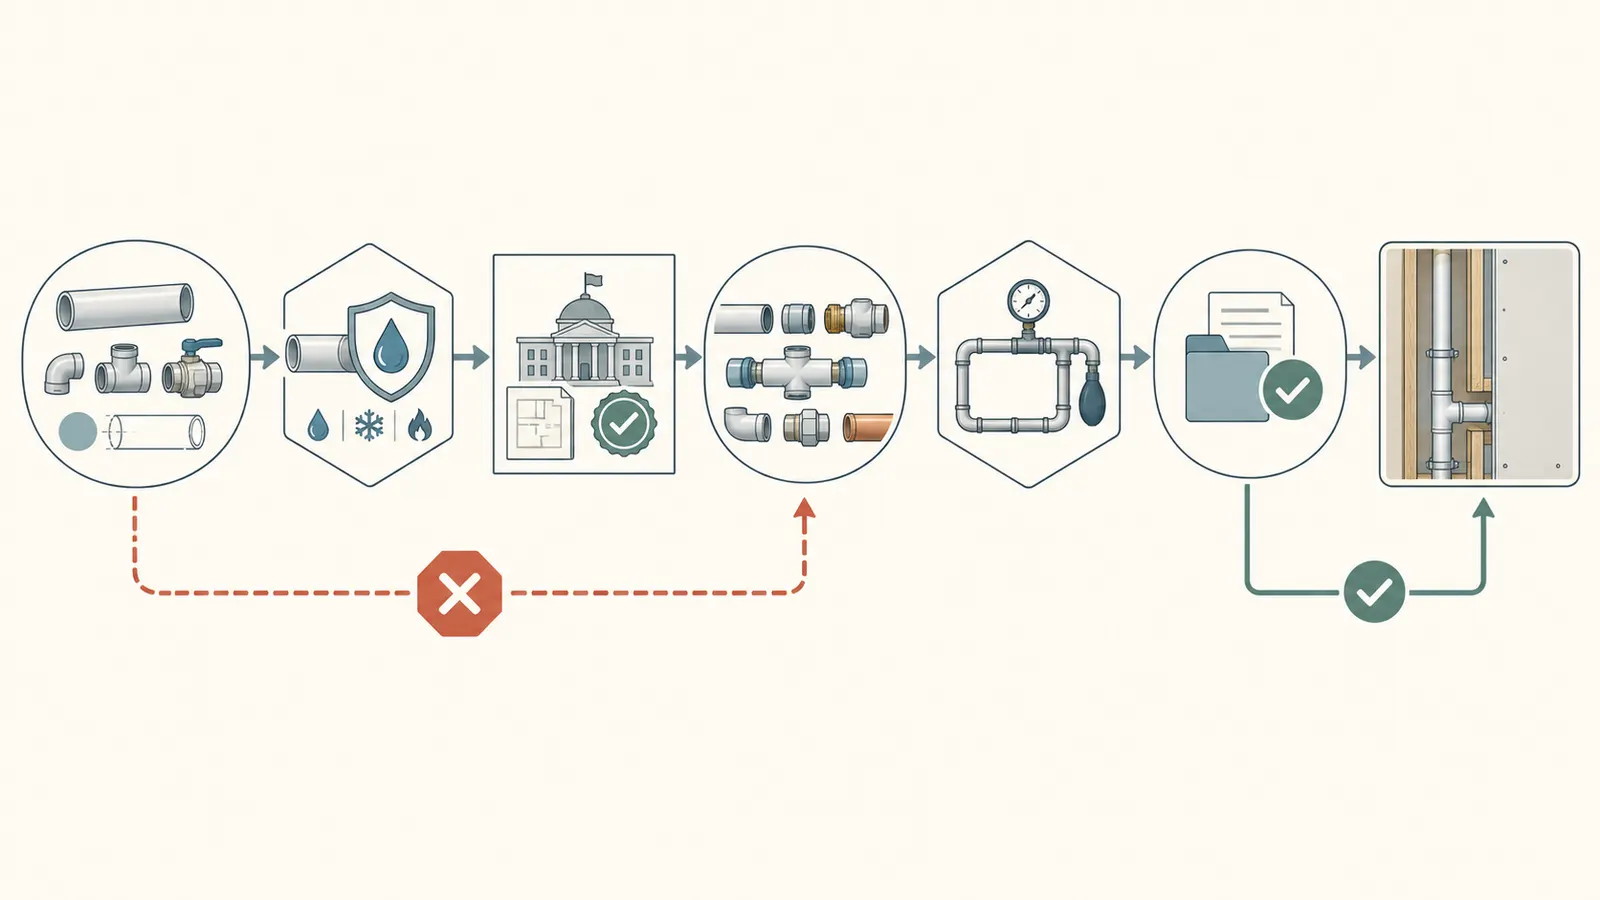
A substitution is ready for approval only when the proposed item is identified, permitted for the intended service, accepted by the project's AHJ, installable as a complete system, and covered by a recorded test and handoff plan. If one of those gates is open, the safest homeowner decision is hold: do not let the item be installed and do not let the work be covered.
The common shortcut is: “The replacement is the same nominal size, so it will work.” Nominal size answers only one physical dimension. It does not answer whether a pipe is intended for potable water, a fitting is certified for the water-contact use, a valve is rated for the system temperature and pressure, a transition joins the two materials using an approved method, the installer can follow the exact instructions, or the finished work can be tested before drywall, insulation, soil, or concrete hides it.
The decision has three possible outcomes:
| Decision | Meaning | What happens next |
|---|---|---|
| Approve | Every required field is supported by a document, listing, plan note, qualified review, or written AHJ response. | Builder and plumber release the item for the defined location, preserve the approval record, and schedule the required installation and test checks. |
| Hold | The item may be viable, but one or more facts, approvals, ratings, or records are missing or contradictory. | The builder keeps the item out of the work, obtains the missing evidence, and resubmits the ledger. No concealment clock should force a silent approval. |
| Reject | The item fails an applicable requirement, is outside its listing or manual, lacks an approved connection path, conflicts with the plans, or cannot be tested and documented. | Return to the original item or propose a new substitute. Correct installed work before cover if it was placed prematurely. |
This boundary is deliberately stricter than “the plumber has used it before.” Experience may be useful context, but it does not identify the exact model, establish the current listing, prove that a local official accepts the change, or create a record for the homeowner. A substitution is a project change. Treat it with the same discipline as a change to a window, roof assembly, structural connector, or electrical equipment: identify the change, understand its effects, obtain the responsible approval, and preserve the decision.
The manufacturer source has the same boundary. The current Uponor PEX Piping Systems Installation Guide describes general recommendations for Uponor products and explicitly directs readers to local codes for additional requirements; it is not a national code and does not approve another manufacturer’s product. The Uponor installation guide is therefore an input to the decision, not the decision itself.
What the homeowner should collect first
Before asking for a yes or no, collect the smallest complete evidence packet:
- the permitted plumbing plans, specifications, schedules, addenda, and approved product submittals;
- the change request showing the original item and proposed item, including manufacturer, trade name, model, material, nominal size, and location;
- the proposed product data sheet and installation manual, not a catalog page for a product family;
- the applicable certification listing or certificate for the exact item and intended service;
- the proposed connection diagram, including every fitting, ring, gasket, adapter, valve, support, sleeve, and transition;
- the working temperature, pressure, fluid, and whether the line is potable water, nonpotable water, heating water, gas, or DWV;
- the project's permit number, state and local jurisdiction, inspector contact or inspection process, and any written response already received;
- the test method, test pressure or water head, duration, isolation points, gauge location, result, date, and person responsible for the record; and
- the warranty language or written manufacturer response if the change crosses brands or systems.
If the proposal arrives as “use what is in stock,” ask for the exact item before evaluating it. “PEX,” “brass valve,” “PVC coupling,” and “transition fitting” are material or category descriptions, not traceable identities. A carton photograph can help preserve what was delivered, but the model number, marking, listing, and instructions are the controlling evidence.
2. Freeze the exact scope and identify the governing jurisdiction #
The first operational step is to freeze what is changing and identify the actual AHJ named by the permit; do not evaluate a generic product family or assume that a model-code example governs the project. The responsible builder or design professional should confirm the project’s adopted code, amendments, permit conditions, and inspection sequence before the plumber installs the proposed item.
Name the AHJ on the ledger
Write the jurisdiction in full, for example, “City of ___ Building Department, ___ County, ___ State,” or “___ County Development Services, unincorporated area,” plus the permit number and the plumbing inspection type. If the authority is a utility, water district, tribal authority, state agency, or other body with a specific material rule, name that body too. “United States code” is not a sufficient jurisdiction entry.
A home can have more than one relevant authority. A city may issue the building permit, a county may administer inspections in an unincorporated area, a water utility may control the service connection, and a state agency may impose a public-water or onsite-wastewater requirement. The builder should identify which requirement applies to the location and which party has authority to approve a substitution. The homeowner’s job is to make the identity visible and confirm the answer in writing when the change is material or disputed.
Do not use Mohave County, Arizona’s inspection checklist as a nationwide rule. It is useful because it shows the kind of local sequence a homeowner should look for: the checklist places DWV testing and water-line pressure testing in rough plumbing and also asks the inspector to verify that only approved materials were installed. Mohave County’s single-family checklist applies to Mohave County, Arizona, not to a house elsewhere.
The same limitation applies to the ICC source. ICC’s article is an explanation of 2018 Plumbing Code Essentials, not a substitute for the code edition and amendments adopted at the project location. ICC’s testing explanation is useful for understanding why testing happens before cover, but the permit documents and AHJ determine what the crew must perform and what the inspector will accept.
Establish the change boundary
Record the original design item in enough detail that another person could buy the same product. Then record the proposal with the same fields. At minimum:
| Field | Original design | Proposed substitution | Why it changes the decision |
|---|---|---|---|
| Manufacturer and legal product name | Exact manufacturer | Exact manufacturer | A trade name can cover multiple factories or revisions. |
| Model, series, and revision | Full model or catalog number | Full model or catalog number | A family-level brochure may not cover the item in the box. |
| Material and construction | PEX-A, PEX-B, copper, PVC, CPVC, ABS, brass, stainless, composite, or other | Exact material and layer construction | Similar appearance does not establish chemical, thermal, or pressure behavior. |
| Nominal and actual size | For example, 1/2-inch nominal | For example, 1/2-inch nominal | Nominal size does not prove inside diameter or connection method. |
| Service | Cold potable water, hot potable water, recirculation, hydronic, nonpotable, or DWV | Exact intended service | A product listed for one fluid or system may be unsuitable for another. |
| Location | Plan sheet, room, riser, branch, slab, wall, attic, crawlspace, or exterior | Exact location | Temperature, UV, access, freezing, burial, and concealment affect acceptability. |
| Connection path | Fitting, ring, gasket, thread, press, solvent, solder, or transition | Every mating component | A pipe and fitting can each be acceptable while the combination is not approved. |
| Test and inspection | Test named in plans or local requirements | Test proposed for the change | A new material may change isolation, gauge, duration, or test medium. |
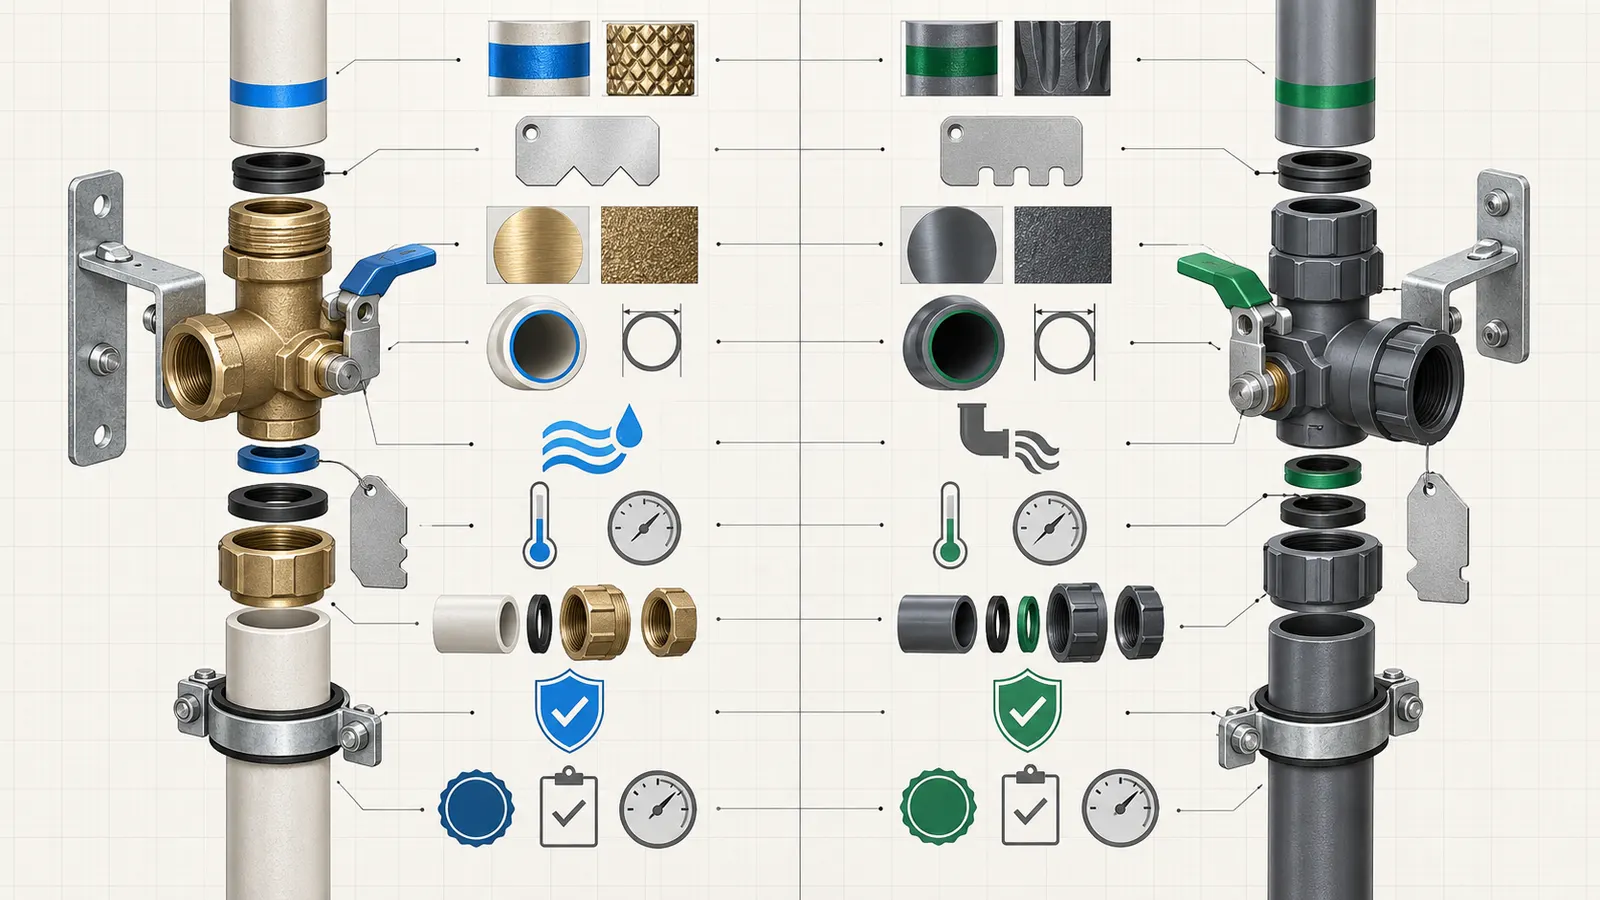
This field-by-field description is where many “equivalent” proposals stop being equivalent. A 1/2-inch pipe may match the drawings but arrive with a different SDR, temperature rating, oxygen-barrier layer, UV limitation, or connection system. A valve may be dimensionally interchangeable but not listed for potable contact, continuous hot-water recirculation, or the intended pressure. A transition may be a valid manufacturer assembly only when used with its specified insert, gasket, stiffener, crimp ring, press tool, or support.
Ask for a written answer when the change touches code or listing scope
The plumber can provide the technical submittal. The builder or design professional should compare it to the permitted documents and coordinate the change. The AHJ or inspector decides code acceptance within the authority’s process. The homeowner should ask for the response to be written in the change record rather than relying on a phone conversation remembered differently by three people.
An AHJ response may be an approved revised submittal, an inspection comment, an email, a permit revision, or a direction to submit an alternate-material request. The format depends on the jurisdiction. A response that says “looks okay” without identifying the item and location is weak evidence. Ask the builder to attach the exact proposed model and the question that was answered.
Do not ask an inspector to bless a product in the abstract. Ask a project-specific question: “For permit ___ at [location], may [builder] use [manufacturer, model, size] in [service and location] instead of [original item], using [connection method], with [test method], before [inspection or concealment]?” That gives the authority a defined decision rather than an informal compatibility debate.
3. Compare the item’s service, listing, ratings, and connection system #
The proposed item passes the technical comparison only when its exact evidence covers the intended fluid, use, size, temperature, pressure, connection, and location; a similar product or a component that merely fits cannot fill an evidence gap. Perform the comparison in this order so that a cheap or available part does not distract from a safety or code failure.
Step 1: classify the service before reading the brand
Mark exactly what the line carries:
- cold potable water;
- hot potable water;
- domestic hot-water recirculation;
- a water-service line before or after the meter;
- nonpotable or reclaimed water;
- hydronic heating or chilled water;
- a drain, waste, or vent system;
- a fixture connection or appliance supply; or
- another service identified by the design professional or AHJ.
Do not combine these categories because all of them contain “water.” Potable contact brings a different listing and contamination question from hydronic water. Hot water adds a temperature and continuous-operation question. DWV depends on drainage geometry, venting, support, cleanouts, and a leak test rather than only pressure performance. A component rated for a short event may not be suitable for continuous recirculation. The service classification drives which pages of the manual and which certification record must be reviewed.
If the line is a utility water service, ask whether the utility has a material, tracer-wire, burial, or transition requirement. If it is a private well, keep the material-substitution decision separate from water-quality testing and pump sizing. The pipe decision does not certify the well water. After the plumbing scope is accepted, a homeowner with a private well can use the existing private-well water-testing guide for the separate water-quality decision.
Step 2: verify the exact potable-water listing
For a line that carries drinking water, search the certification body’s current database using the proposed manufacturer and product designation. Do not stop at a logo printed on a box. Save the result or PDF with the date accessed, and compare the listing’s trade designation, product category, size range, temperature or water-contact scope, material, and any footnotes with the item proposed for the house.
The live NSF PEX listing shows why this matters: it displays fields for trade designation, size, temperature, and material, and it separates pipe records from fitting records. The NSF certified-products listing contains entries such as a trade designation, a size range, “C. HOT,” and PEX, but those fields must be checked against the exact proposed item. The database is not a generic statement that all PEX or every fitting in a brand is certified for every project.
Read the footnotes. On the displayed NSF records, footnote G identifies certification to NSF/ANSI/CAN 372 and says the product conforms to lead-content requirements for “lead free” plumbing under the named California, Vermont, Maryland, Louisiana, and U.S. Safe Drinking Water Act definitions. NSF’s listing footnote does not mean every product record has the same footnote, and it does not prove that a fitting is approved for every connection or service. Record the exact footnote that applies.
For a fitting or valve, check the fitting or valve record, not only the pipe record. For a transition, check the wetted parts on both sides and the complete assembly. For a ring, sleeve, gasket, or stiffener, determine whether the certification scope is for the component alone or only as part of a system. NSF’s page, for example, identifies PEX rings with a note that they are non-wetted components of PEX fitting systems. That NSF ring note is a reason to review the complete fitting system rather than treating a ring’s record as certification of every wetted part.
The listing check answers one narrow question: “Does this exact record cover this product and use?” It does not answer whether the item is allowed by the local code, whether the manufacturer permits it to mate with the original system, whether it was installed correctly, or whether the finished system passed its required test.
Step 3: read temperature and pressure as operating conditions, not marketing numbers
Record four different values when available:
- normal operating temperature;
- maximum expected or controlled temperature;
- normal and maximum working pressure; and
- the pressure and temperature used for the installation test.
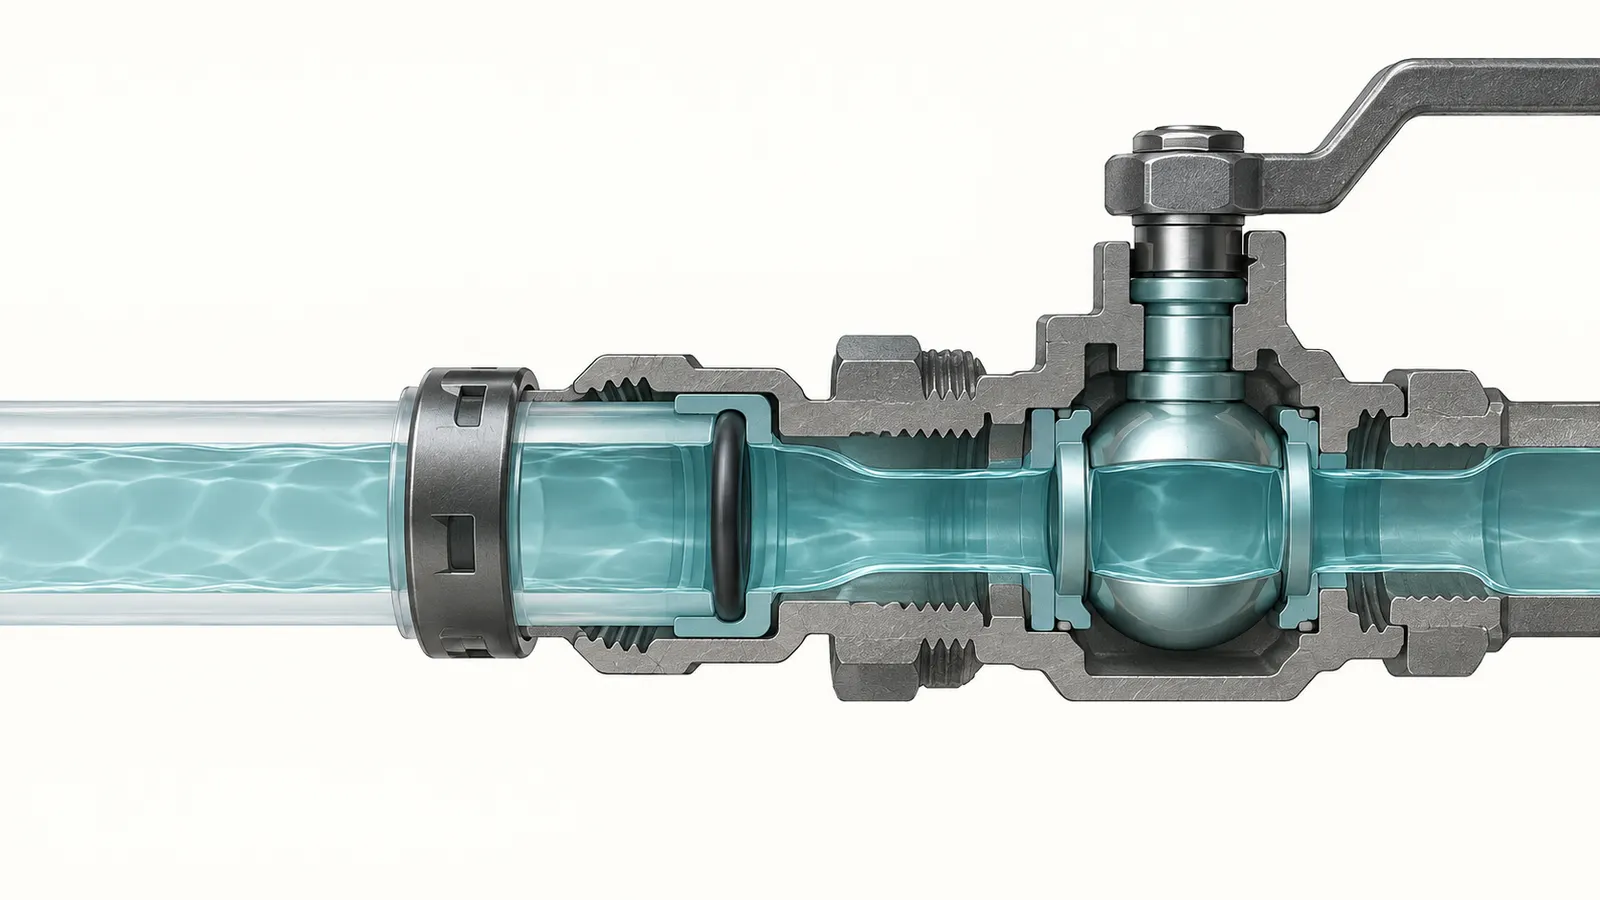
Keep the values separate. A hydrostatic pressure rating at one temperature may not be the operating limit at another temperature. A short-duration emergency capability is not permission to run the system at that value. A pressure-test value is not a normal operating pressure. A water heater setting is not proof of delivered temperature at the fixture.
The Uponor guide illustrates the distinction for its own PEX systems. It lists 140°F and 80 psi as maximum recommended design parameters for domestic hot-water piping and dedicated domestic hot-water recirculation piping, while its separate table provides temperature-and-pressure ratings for described water-service, domestic cold-water, and hydronic systems. It also warns that temporary capability up to 210°F at 150 psi for a maximum of 48 hours is not to be used as a system operating parameter. Uponor’s operating-parameter tables apply to the Uponor products and system types named there, not to a proposed substitute by analogy.
Ask the builder to show how the proposal handles the highest credible temperature and pressure at the proposed location. Questions may include whether a mixing valve controls delivered water, whether a recirculation loop is continuous, whether a pressure-reducing valve or expansion-control device is required, whether a valve or appliance has a lower limit than the pipe, and whether the test will isolate fixtures or equipment. The homeowner should not alter a water-heater control, regulator, relief device, or pump setting as an experiment.
Step 4: verify the connection as a complete system
The connection is approved only when the pipe, fitting, ring, gasket, adapter, tool, and installer method form a permitted assembly. “Both are PEX” is not a connection method. “The fitting slides in” is not a quality check. “The threads match” is not proof that the thread type, sealant, gasket, torque, or material transition is allowed.
For a proposed PEX change, record whether it is an expansion, crimp, clamp, press, push-fit, or another connection system; name the pipe classification and fitting series; identify the compatible tools and heads; and attach the exact installation steps. If the change crosses manufacturers, request a written compatibility or warranty response from the manufacturer whose warranty is being relied upon. If no manufacturer will support the combination, treat the proposal as hold or reject rather than asking the inspector to discover the risk after installation.
The Uponor guide shows why brand-neutral assumptions are unsafe. It describes ProPEX ASTM F1960 cold-expansion fittings, names specific expander tools, and states that some Milwaukee and Uponor heads are not compatible with each other. Uponor’s ProPEX connection instructions are evidence for the ProPEX system only. The correct question is not whether a tool can physically expand a pipe; it is whether the exact pipe, fitting, ring, tool head, procedure, and location are an approved assembly.
For metallic transitions, include the required dielectric, soldered, threaded, press, or mechanical components as applicable to the specified system. For solvent-welded DWV, record the primer, cement, cure conditions, pipe material, fitting standard, and access to the joint. For a valve, identify the flow direction, service, union or adapter arrangement, access, and whether the valve can be replaced without destructive work. For a concealed connection, the ledger should state why it is allowed to be concealed and what test occurs before it disappears.
The “listing versus approval” distinction
Use this short interpretation:
- Listed means a certification record covers a defined product and scope.
- Rated means the product documentation states a defined performance boundary under stated conditions.
- Compatible means the complete proposed connection is supported by the manufacturer or applicable system instructions.
- Code-accepted means the project’s governing requirements and AHJ accept the product and installation in that location.
- Installed correctly means the work followed the instructions and passed the required inspection or test.
No single word substitutes for the others. A listed fitting may be the wrong size. A rated valve may not be potable. A compatible assembly may not be allowed by an amendment. A code-accepted material may still leak because it was installed incorrectly. The ledger keeps these questions visible instead of allowing one “approved” label to conceal five different decisions.
4. Use the accept–hold–reject ledger with named responsibilities #
The substitution ledger is the original decision tool in this guide. It passes a proposal only when each required field has an evidence source, a responsible reviewer, and a next handoff. The homeowner can maintain the record, but the homeowner should not self-approve an engineering, code, or installation question.
Original contribution: The plumbing substitution accept–hold–reject ledger
Compact originality brief. Current answers cover individual manufacturer installation manuals, certification databases, model-code testing explanations, and contractor-oriented inspection checklists; they usually explain one product system or one inspection phase. The missing homeowner decision is whether to approve, hold, or reject a proposed substitute before installation or concealment while keeping code acceptance, certification scope, mating compatibility, warranty continuity, testing, responsibility, and handoff connected. This guide’s original contribution is the plumbing substitution accept–hold–reject ledger: a field-by-field decision matrix that records the evidence and owner for each gate. It can be checked by reproducing the comparison from the plans, exact model records, live listing, exact manual, project jurisdiction’s written response, warranty terms, installation photos, and pre-cover test record; any unresolved or contradictory field remains hold.
Method. Compare the original and proposed item against the plans, identified authority having jurisdiction, adopted code, exact manufacturer manual, certification listing, mating components, test conditions, warranty terms, and written approval; advance only when each required field has an owner and evidence. Assign every field to the person who can answer it. Mark each row approve, hold, or reject. The proposal advances only when the required rows are approved and the project record identifies the next action.
Limitations. This is a homeowner coordination worksheet, not engineering, code approval, a laboratory test, an inspection report, or proof that an installed system was made correctly. Product listings and paperwork cannot replace qualified installation or the AHJ's decision. A manufacturer’s guide may be revised, a database entry may change, and a local amendment may impose a requirement not visible in a national model-code explanation. Recheck the live documents before installation.
Use the following ledger as a working table. Add rows for project-specific requirements rather than deleting a row that is inconvenient.
| Gate | Required entry | Evidence to attach | Responsible reviewer | Pass condition | Failure action |
|---|---|---|---|---|---|
| 1. Change identity | Original and proposed manufacturer, product name, full model, series, revision, lot or date code if available | Change request, package label, submittal | Builder or construction manager | Another person can order the exact proposed item | Hold; no family-level description |
| 2. Location | Plan sheet, room, branch, riser, slab, wall, ceiling, crawlspace, attic, exterior, or buried segment | Marked plan or photo with location | Builder and plumber | The proposed item is assigned to a defined location | Hold; scope is not bounded |
| 3. Service | Potable cold, potable hot, recirculation, water service, nonpotable, hydronic, or DWV | Plan note and plumber’s service classification | Plumber; designer if needed | The fluid and duty are explicit | Hold; do not infer from color |
| 4. Material and size | Pipe/fitting/valve material, nominal size, actual connection size, wall or SDR where relevant | Product data and plan | Plumber | Dimensions and material match the permitted use | Reject or redesign if unverified |
| 5. Certification | Exact listing, standard, product category, size, temperature, material, and footnotes | Dated certification record | Builder and plumber | Listing scope covers the exact item and service | Hold; substitute a documented item |
| 6. Ratings | Working temperature, pressure, velocity or flow limits when applicable, and test limit | Exact manual or technical response | Plumber or design professional | All limits cover the project conditions | Hold; resolve rating conflict |
| 7. Mating system | Every pipe, fitting, ring, gasket, adapter, valve, stiffener, thread, cement, tool, and transition | Connection diagram and manual pages | Plumber | Complete assembly and tool method are supported | Reject unless complete system is documented |
| 8. Installation | Supports, bend radius, UV, burial, sleeves, clearances, insulation, access, and sequence | Manual, photos, marked plan | Plumber | Installer can follow the exact instructions | Hold; revise method or item |
| 9. Code and AHJ | Adopted code edition, amendments, permit condition, inspection stage, written response | Permit, AHJ email, approved submittal | Builder or design professional; AHJ | Project authority accepts the defined change | Hold or reject; do not nationalize another jurisdiction |
| 10. Warranty | Warranty owner, exclusions, cross-brand conditions, required installer or test records | Warranty and written manufacturer response | Builder and plumber | Change does not silently remove required coverage | Hold; obtain written confirmation |
| 11. Test | Test type, medium, pressure or water head, duration, gauge, isolation, acceptance, and photo/documentation plan | Test procedure and code/AHJ instruction | Plumber; inspector as applicable | Test can occur before cover and includes changed work | Hold; revise test plan |
| 12. Handoff | Approval date, people, signed or emailed decision, photos, test record location, open items | Final ledger and project file | Builder; homeowner receives copy | Homeowner knows what was installed and verified | Hold closeout; correct record or work |
The ledger’s strength is its failure branch. If the exact listing is missing, the row is hold. If the model is outside the listing’s size or temperature range, reject or choose another item. If the plumber says the fitting works but cannot identify the permitted connection instructions, hold. If the AHJ will inspect the work but has not accepted a material change where acceptance is required, hold. If the test will occur after drywall, reject the schedule and move the test before cover unless the AHJ expressly permits a different sequence.
Assign the people before asking for signatures
Homeowner. The homeowner supplies the decision boundary, asks for the change record, confirms that work is not concealed before the hold is cleared, keeps copies, and asks what future maintenance or warranty documents are affected. The homeowner does not select an unverified fitting, direct a pressure test, or overrule the licensed installer or AHJ.
Builder or construction manager. The builder controls the construction sequence, change process, trade coordination, submittal record, inspection request, and handoff. The builder should prevent procurement or installation from outrunning approval. If a material is unavailable, the builder proposes the change and owns the resubmission, not the homeowner.
Licensed plumber or plumbing contractor. The plumber identifies the full assembly, checks the exact manual, verifies ratings and connection method, performs the installation, isolates test-sensitive components, and produces the test record. The plumber should flag where the proposed item changes sizing, access, supports, disinfection, flushing, or future serviceability.
Designer, engineer, or architect. The design professional reviews changes that affect sizing, fixture demand, drainage, hot-water recirculation, hydronic performance, structural penetrations, fire-resistance, accessibility, or the design intent. A homeowner should not ask a field installer to silently redesign a system outside the installer’s scope.
AHJ or inspector. The AHJ interprets and enforces the adopted requirements through its process. The inspector may identify what must be visible, which test is required, what documentation is needed, and whether a revision or alternate-material request is necessary. The inspector is not the manufacturer’s warranty representative and should not be treated as a universal product-compatibility consultant.
Manufacturer or certification body. The manufacturer supplies current instructions, product-specific ratings, installation and warranty conditions, and a written compatibility response when requested. The certification body’s listing describes a defined certification scope. Neither one replaces the project’s AHJ or the installer’s responsibility.
Make the handoffs explicit: plumber to builder for submittal; builder to designer or AHJ for approval; builder back to plumber for release; plumber to inspector for visible work and test; builder to homeowner for the completed ledger, photos, test record, and warranty documents. A verbal “go ahead” that never reaches the person scheduling concealment is a process failure.
5. Verify installation, testing, and concealment in the right sequence #
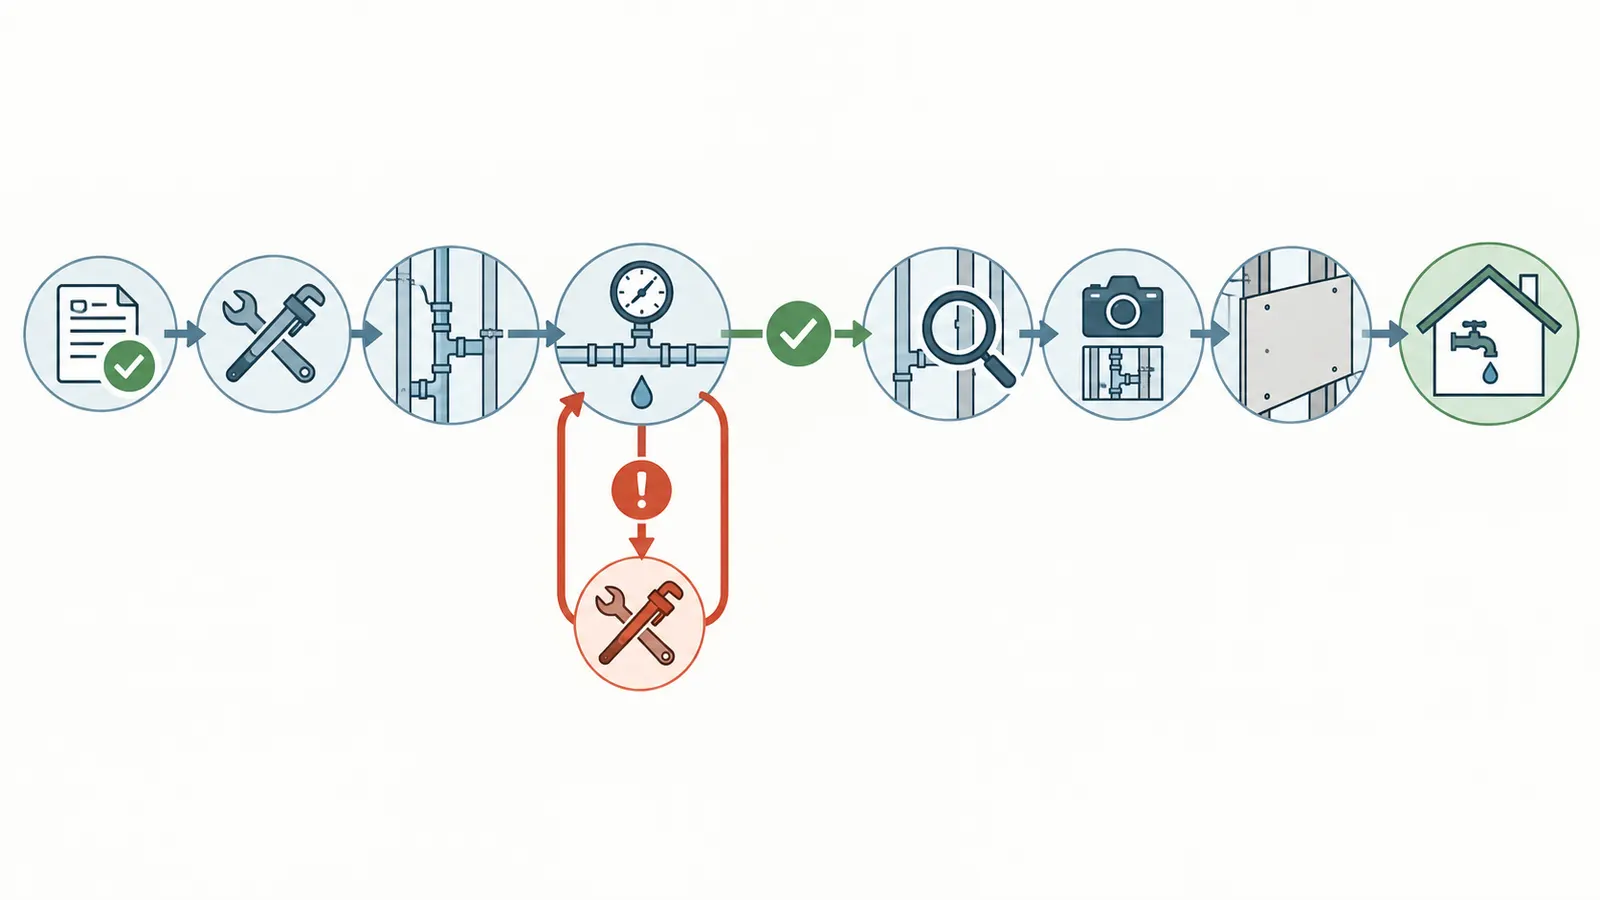
The substitution is not verified when the product is delivered; it is verified when the installed work matches the approved ledger, the required inspection or test has passed, defects are corrected, and the record is handed off before the work is concealed. The exact test depends on the service, adopted code, product manual, plans, and AHJ.
Sequence the work around the last visible moment
Use this sequence for a typical new-home change:
- Freeze the request. Stop the affected installation area long enough to identify what was originally specified, what is proposed, where it will go, and why the change is needed.
- Confirm prerequisites. Obtain the plans, permit information, jurisdiction, exact product data, listing, manual, warranty terms, and connection diagram.
- Review technical scope. The plumber checks service, size, ratings, complete mating system, installation conditions, and test implications. The designer reviews any design effect.
- Obtain project approval. The builder sends the defined request to the AHJ or design professional when required and preserves the written response.
- Release procurement. Buy or receive the exact approved item. Compare the label and markings to the ledger before opening or installing it.
- Inspect before connection. Check damage, contamination, wrong size, missing rings or gaskets, incompatible tools, storage damage, and visible revisions. Photograph the item and its markings.
- Install the changed work. The licensed plumber follows the exact instructions, supports the work, preserves access, and records concealed locations before cover.
- Inspect while visible. Confirm orientation, supports, bend or transition conditions, sleeves, penetrations, access, and the identity of the changed item. A photo should show context, not just a close-up.
- Test the applicable system. The plumber conducts the project-required test with the required medium, pressure or water head, duration, isolation, and gauge. The inspector observes or verifies when required.
- Correct and retest. A leak, pressure loss, missing support, wrong fitting, or incomplete record is a hold. Repair and repeat the required process; do not simply mark the first failed test as passed.
- Release concealment. The builder confirms the ledger, inspection, and test record are complete. Only then should the responsible person authorize drywall, insulation, slab placement, backfill, cabinets, or other cover.
- Handoff. The homeowner receives the final approved item, location, photos, test result, open maintenance notes, warranty documents, and any future service limitations.
This sequence protects the homeowner from a common scheduling trap: the crew announces that cover is tomorrow, so an unresolved substitution is treated as approved because there is no time to ask. Time pressure is a reason to hold, not evidence of equivalence. The builder can choose the original item, delay that segment, or submit a documented alternate. The homeowner should not accept a hidden change in exchange for keeping the schedule.
Separate potable-water flushing from leak testing
A leak test asks whether the assembly holds under a defined condition. Flushing asks whether the system has been cleared using the specified water and process before use. Disinfection, if required, is another process with its own chemical, concentration, contact-time, neutralization, and material-compatibility requirements. Do not record “flushed” as “pressure tested,” or “passed pressure test” as “safe for drinking.”
The Uponor guide recommends flushing plumbing systems and potable-water fixtures with fresh potable water before occupancy and says local codes may add requirements. Uponor’s flushing instruction is manufacturer guidance for its systems; the project’s water provider, public-health authority, specification, or AHJ may require a different or additional process. Keep the flush record separate from the substitution ledger’s structural and leak-verification record.
If chemical disinfection is proposed, the plumber should confirm that the chemical and concentration are allowed for every material in the assembled system and that the procedure will not void a warranty. Do not add chemicals to a new home’s plumbing based on an internet recipe, and do not open a pressurized or chemically treated system as a homeowner experiment.
Water-supply pressure testing
For a water-supply substitution, ask the licensed plumber to identify the required pressure test in writing before the test begins. The test record should include the test section, medium, starting and ending pressure, gauge location and range, test duration, ambient or water condition if relevant, components isolated, visible inspection result, and inspector or responsible person.
The Uponor residential procedure says to pressurize to 25 psi above working pressure or 100 psi and to test in accordance with local code. The residential pressure-testing section in the Uponor guide provides a product-system starting point, not a universal homeowner formula. For the ledger, record both the project working pressure and the manual’s candidate values, then record which value and procedure the plumber and AHJ actually selected.
Do not turn the manual into a DIY pressure-test instruction. The same guide says that components, fixtures, and equipment not rated for the test pressure must be isolated in its described procedure, and it discusses filling, conditioning, pressure release, visual inspection, and monitoring. The Uponor test procedure shows why the test is a system operation, not simply attaching a pump to a convenient valve. A stored-pressure release can injure a person or damage equipment; qualified workers should control it.
DWV testing before cover
For a DWV substitution, identify the applicable water or air test, test head or pressure, duration, openings to close, test section, and prohibition or permission for the proposed pipe material. DWV testing is not the same as pressurizing a water-supply line. Drainage slope, venting, cleanouts, access, fixture connections, supports, and transitions remain separate inspection questions.
ICC’s explanation of 2018 Plumbing Code Essentials says the DWV system must be tested for leaks before cover and describes a standing-water test of at least 15 minutes; it also notes that air testing is not allowed for plastic pipe in that explanation. ICC’s DWV testing discussion is limited to its model-code educational context. Mohave County, Arizona’s local checklist is a separate example that calls for DWV testing after rough piping and references water or air with a plastic-air exception. The Mohave County rough-plumbing checklist demonstrates why the project’s actual AHJ and adopted code must be named.
The safe homeowner action is to ask the builder for the applicable test instruction and a copy of the passed record, not to choose air or water by convenience. If a proposal changes plastic type, transition, or test section, the plumber should confirm whether the test medium or isolation arrangement changes. If the answer is unknown, the branch remains hold.
Leak verification after fixtures and equipment are connected
Once fixtures and appliances are installed, a second verification may be useful even if the rough-in test passed. A rough-in test can miss a later-installed valve, hose, appliance connector, fixture seal, or damaged exposed fitting. EPA WaterSense inspection guidance says no leaks should be detected from water-using fixtures, appliances, or equipment and describes compliance verification through pressure-loss testing and visual inspection. EPA’s WaterSense inspection guidance is a WaterSense verification protocol, not automatically the local rough-in requirement.
EPA’s technical sheet says that in its protocol pressure should remain constant after 5 to 10 minutes and that a pressure drop indicates a leak to find and fix with the builder before verification proceeds. EPA’s WaterSense leak technical sheet also points to visual checks at points of connection. Ask the builder to state which EPA or project protocol is being used, what isolation conditions apply, and whether the pressure check is a final leak screen or the legally required test. Do not use a short homeowner pressure-loss check to override a longer or different AHJ test.
6. Resolve common failure cases without losing the evidence trail #
When a proposal fails, keep the failed row, the reason, the responsible person, and the next decision in the record; do not delete the issue and replace it with a vague statement that the item was “approved.” A visible hold is cheaper than an undocumented leak behind finished surfaces.
Failure: the replacement fits the pipe
What to observe. The installer demonstrates that the nominal size matches and the part can physically be inserted, threaded, pressed, or solvent-welded.
What not to infer. Do not infer that the joint is approved, potable, pressure-rated, warrantable, or accepted by the AHJ. Physical fit is only a dimensional observation.
Safest next step. Require the exact connection system, complete mating components, manual page, certification scope, and written manufacturer or project approval. If the proposal is a cross-brand PEX connection with no written support, hold.
Failure: the box says “lead free” but no exact record is available
What to observe. A label or sales description uses “lead free,” “potable,” or an NSF logo.
What not to infer. Do not infer that the exact model, size, valve internals, coating, gasket, or transition is covered by the same scope. Do not infer that a listing for a pipe covers a separately supplied fitting.
Safest next step. Search the certification database, capture the exact record and footnotes, and compare trade designation, size, temperature, material, and product category. The NSF listing demonstrates these are separate fields and that lead-content footnotes have a defined scope. Review the current NSF record before approval.
Failure: the same brand appears on both products
What to observe. Both the original and proposed item carry the same corporate brand or distributor label.
What not to infer. Do not infer that every series, generation, factory, tool, fitting family, or warranty condition is interchangeable. A manufacturer can sell multiple connection systems.
Safest next step. Compare model numbers and the exact system manual. If the product is Uponor ProPEX, for example, the guide’s tool and head instructions govern the ProPEX assembly; they do not automatically authorize another series. Use the exact Uponor connection manual as the reference only when the proposed system is actually covered.
Failure: the pressure rating is higher than the original
What to observe. The proposed part lists a higher pressure number at one temperature.
What not to infer. Do not infer that the assembly is suitable for hot water, recirculation, the test pressure, chemical exposure, or the weakest adjacent component. The system limit is constrained by the least suitable part and the project conditions.
Safest next step. Record operating and test conditions separately, review the exact temperature-pressure table, and ask the plumber to check all connected valves, fittings, fixtures, and appliances. A manufacturer’s emergency or temporary capability is not a normal design limit. The Uponor guide explicitly separates its temporary excessive-temperature capability from operating parameters. Check the distinction in the Uponor guide.
Failure: the local inspector has not objected
What to observe. No one has stopped the work, or an inspector has not yet visited.
What not to infer. Silence is not a written approval. An inspection that checks visible portions may not decide manufacturer compatibility, concealed future service, or warranty coverage.
Safest next step. Ask the builder to submit the exact change through the jurisdiction’s process and to preserve the response. Confirm the inspection stage and what must be visible. If the work was covered before inspection, ask the builder and AHJ for the required corrective exposure or documentation; do not open finished walls yourself without coordinating the remedy.
Failure: a different county’s checklist is used as proof
What to observe. A person presents a checklist from another state, county, or city and says, “That is the rule.”
What not to infer. Do not infer national applicability. The Mohave County, Arizona list is a local document, and ICC’s public explanation is tied to a model-code context. Neither identifies the code adopted for a house in another location.
Safest next step. Use the example to form questions, then replace it with the actual permit and AHJ requirements. Put the actual jurisdiction in the ledger and link the project’s source document.
Failure: pressure falls during the test
What to observe. The gauge reading drops, a connection weeps, a test plug moves, or pressure cannot be maintained after the conditioning step.
What not to infer. Do not infer that the gauge is wrong, the material is defective, or the test is close enough. A pressure loss may come from a leak, temperature change, trapped air, gauge issue, isolated component, or procedure error; only the qualified tester can diagnose the cause.
Safest next step. Keep the section on hold, control the pressure safely, identify the cause, repair or replace the affected component, and repeat the required test. Record the failed and passed attempts. Do not conceal the work because the final reading eventually looks stable without a clear explanation.
Failure: the substitution arrives after the inspection request
What to observe. The crew bought the replacement late and says the inspector can decide at the rough inspection.
What not to infer. Do not infer that the inspector can substitute for a submittal review or that approval will be retroactive.
Safest next step. Pause the affected portion, notify the builder, and ask whether the jurisdiction requires a revised plan or alternate-material approval. If the original material is available, using the original may be the fastest safe path. If the substitute is installed anyway, photograph it before cover and make the record explicit rather than allowing it to disappear.
Failure: the test passed but the change is still not serviceable
What to observe. The pipe holds pressure, but a valve, union, cleanout, transition, or concealed slip joint cannot be accessed or identified.
What not to infer. Do not infer that a passed test makes future maintenance irrelevant. A pressure test is a moment in time; it does not create an access panel or a service label.
Safest next step. Ask the builder and plumber to compare access, supports, labels, and photo records with the original design. If the change makes future replacement destructive, ask whether the design professional or AHJ requires a revision. Record the maintenance consequence in the handoff even when no code change is required.
7. Close the decision with a documented handoff #
The final decision is complete only when the homeowner can tell what was proposed, what was approved, what was installed, who accepted it, which test was performed, what remains limited, and where the supporting documents live. If that handoff is incomplete, treat the package as hold for closeout even if the inspector has signed the rough plumbing.
Minimum handoff packet
Request a PDF or organized project-folder copy containing:
- the final ledger with each gate marked approve, hold, or reject;
- the original and final product identities, including manufacturer, model, series, size, material, and location;
- the current installation manual pages used for the exact system;
- the exact certification listing and access date for potable-water items;
- the approved change request, revised drawing, submittal, or AHJ correspondence;
- the name and license or company identity of the installer where the project records normally include it;
- photographs before concealment that show routing, transitions, valves, supports, sleeves, and identifying marks;
- the pressure, DWV, leak, or other required test record, including section, medium, gauge, duration, result, and inspector or responsible person;
- flush, disinfection, or water-quality records when required for the project;
- warranty terms, limitations, and any written cross-brand response;
- the date and condition under which the work was released for concealment; and
- open items, future access points, labels, and the next maintenance or inspection decision.
The goal is not to collect paperwork for its own sake. Each record answers a future question. If a leak appears behind a wall, the homeowner needs to know which connection system was used and who installed it. If a valve fails, the replacement must match the final assembly rather than the original schedule. If a water-quality concern arises, the homeowner needs to distinguish the material’s certification from a separate water test. If a warranty claim is made, the manufacturer may ask for model identity, installation conditions, and test or service records.
Final closeout matrix
| Observation at closeout | Interpretation | Next decision |
|---|---|---|
| Exact item, listing, connection, AHJ response, installation photos, and required test are complete | The substitution package is supported for the defined location and service | Approve closeout; retain the packet with the home records |
| Item and installation are complete, but listing, warranty, AHJ response, or test record is missing | The construction state may be unknown even if no leak is visible | Hold closeout; builder obtains the record or exposes/corrects the work as required |
| Item differs from the approved proposal | The approved decision no longer describes the installed system | Reject the record; resubmit the actual item or correct the installation |
| Test failed or acceptance condition is unclear | The changed work has not been verified | Hold concealment or closeout; diagnose, repair, and retest |
| Test passed but access, labeling, or maintenance consequence changed | The immediate verification may pass while future ownership risk remains | Builder and homeowner document access and decide whether design review is needed |
| The only support is physical fit, a sales claim, or another jurisdiction’s checklist | The evidence does not reach the approval boundary | Reject the substitution or restart the ledger with qualified review |
What to ask at the next decision
Use these questions in the final coordination meeting:
- Which exact material and model were installed in each changed location?
- Which document proves the proposed item’s intended service and size scope?
- Which certification listing applies to each potable-water pipe, fitting, valve, gasket, and transition?
- Which connection system was used, and does the manufacturer support every mating component?
- Which jurisdiction and adopted code controlled the decision, and where is its written response?
- Which test applied to the changed work, what was isolated, what were the starting and ending conditions, and who accepted the result?
- Was the work visible when inspected and tested, and which photos prove the concealed location?
- Does the substitution change warranty coverage, service access, labels, or future replacement parts?
- What is the next decision: release for cover, correct and retest, obtain an additional approval, or return to the original material?
If any answer is “we will figure it out later,” the correct state is not approve. It is hold with a named owner and due date. A hold is a project-control decision, not an accusation that the plumber is careless. It keeps the choice reversible while the evidence is still available.
Limits of remote homeowner review
Photos, product pages, and documents cannot reveal every field condition. A photo may not show a damaged pipe behind a fitting, a missing support, an incorrect test plug, contamination, a concealed transition, or an unrecorded change in size. A homeowner working remotely can check identity, documents, labels, dates, and handoffs, but should not infer installation quality from a tidy photograph.
Do not enter an excavation, crawlspace, attic, trench, or confined space to inspect an item without appropriate training and protection. Do not work around live electrical equipment, hot water, chemicals, pressurized piping, soldering or open flame, structural penetrations, or unstable excavation. Ask the builder or qualified trade to collect the evidence. If a test or correction could expose a person to stored pressure, contaminated water, heat, chemical disinfectant, falls, or confined-space hazards, the homeowner should stay out of the work area.
The ledger is designed to make a professional conversation precise. It lets a homeowner say: “I understand this proposed valve fits the line, but please show me the exact potable-water listing, temperature and pressure scope, mating-system instructions, AHJ response, warranty position, and pre-cover test record.” That is a practical decision boundary. It does not turn the homeowner into the inspector, engineer, or plumber.
The next decision after an approved substitution is not “forget it.” Retain the record with the home’s plans and handover documents, label unusual transitions or service parts, follow the final manufacturer maintenance instructions, and use the final as-built condition for future repairs. If the substitution is held or rejected, keep the failed proposal and reason so that a second proposal does not repeat the same missing evidence. The house should end up with a known system, not merely a system that happened to fit during construction.
Cite this guide
Brictale. “How to Verify a New-Home Plumbing Material Substitution Before Installation.” Published 2026-09-13; updated 2026-09-13.
https://brictale.com/build/materials/verify-new-home-plumbing-material-substitution · Read the Markdown version
Original contribution: The plumbing substitution accept–hold–reject ledger. A field-by-field record for deciding whether a proposed pipe, fitting, valve, or transition can be approved before installation or concealment.
Sources and scope
Evidence behind this page
- The 2025 Uponor PEX Piping Systems Installation Guide describes general recommendations for Uponor products and tells readers to refer to local codes for additional requirements.
PEX Piping Systems Installation Guide
Manufacturer guide for Uponor PEX piping products; it is not a national code or a project-specific AHJ approval.
Accessed · Link to this claim - For residential applications, the Uponor guide says to pressurize the system to 25 psi above working pressure or 100 psi and to test in accordance with local code.
PEX Piping Systems Installation Guide
Uponor residential PEX installation guidance; the project code, AHJ, component ratings, and exact system instructions still control the test.
Accessed · Link to this claim - The Uponor commercial pressure-test procedure requires components, fixtures, and equipment not rated for the test pressure, as well as other thermoplastic piping materials, to be isolated from the test system.
PEX Piping Systems Installation Guide
A system-specific manufacturer procedure; do not treat it as permission to test an assembled project without a qualified installer and local requirements.
Accessed · Link to this claim - The Uponor guide lists 140°F and 80 psi as maximum recommended design parameters for domestic hot-water and dedicated domestic hot-water recirculation piping, and separately warns that temporary excessive-temperature capability is not a normal operating parameter.
PEX Piping Systems Installation Guide
Specific to the Uponor PEX systems and system types described in the guide; other products, water heaters, recirculation designs, and codes may differ.
Accessed · Link to this claim - The Uponor guide identifies ProPEX ASTM F1960 cold-expansion fittings and gives connection instructions tied to specified expander tools and heads; it warns that some tool heads are not interchangeable.
PEX Piping Systems Installation Guide
Uponor ProPEX connection system only; physical fit between unrelated brands does not establish a permitted connection.
Accessed · Link to this claim - NSF International's certified-products listing displays potable-water product records with trade designation, size, temperature, and material fields, including separate entries for pipe and fittings.
NSF International Certified Product Listings: PEX
The live NSF listing page and its displayed PEX records; the reader must search the exact proposed product and scope, not a similar-looking brand or material.
Accessed · Link to this claim - NSF listing footnote G identifies products certified to NSF/ANSI/CAN 372 and says they conform to lead-content requirements for lead-free plumbing under the named California, Vermont, Maryland, Louisiana, and U.S. Safe Drinking Water Act definitions.
NSF International Certified Product Listings: PEX
The footnote's named certification and jurisdictional scope; it is not a blanket claim that every listed item is approved for every use or jurisdiction.
Accessed · Link to this claim - The NSF listing identifies PEX rings with a note that rings are non-wetted components of PEX fitting systems.
NSF International Certified Product Listings: PEX
The specific listing note for the displayed PEX ring records; it does not replace certification and compatibility review of the complete wetted fitting system.
Accessed · Link to this claim - EPA WaterSense new-home inspection guidance says no leaks should be detected, with compliance verified through pressure-loss testing and visual inspection; its example turns water off and compares pressure readings after approximately 10 minutes.
Inspection and Verification Guidance for WaterSense Labeled New Homes, Version 1.2
WaterSense labeled-new-home verification guidance; it is not automatically the rough-in test required by a project's adopted plumbing code.
Accessed · Link to this claim - EPA's WaterSense technical sheet says pressure should remain constant after 5 to 10 minutes in its leak protocol and that a pressure drop indicates a leak that should be found and fixed with the builder before verification proceeds.
WaterSense Labeled Homes Technical Sheet: Free of Water Leaks
EPA WaterSense verification protocol; timing and acceptance for a construction inspection remain subject to the project specification and AHJ.
Accessed · Link to this claim - ICC's 2018 Plumbing Code Essentials testing explanation says a DWV system must be tested for leaks before cover, generally by a standing-water test or an air test, and describes a standing-water test lasting at least 15 minutes; it notes air testing is not allowed for plastic pipe in that explanation.
Plumbing code essentials: Testing
ICC article explaining 2018 Plumbing Code Essentials; it is model-code educational material, not the adopted code for every U.S. project.
Accessed · Link to this claim - Mohave County, Arizona's single-family inspection checklist is a local example that calls for DWV testing after rough piping, pressure tests for water-line leaks, and verification that only approved materials were installed.
Single Family Dwelling Inspection Checklist
Mohave County, Arizona inspection outline; it is not a national rule and must not be substituted for the actual project's AHJ requirements.
Accessed · Link to this claim - Mohave County, Arizona's checklist gives an example that when main pressure exceeds 80 psi, an approved pressure-reducing valve is required on the domestic-water branch main or riser at the service connection.
Single Family Dwelling Inspection Checklist
Mohave County, Arizona example citing its referenced IRC provisions; it is not a universal U.S. threshold.
Accessed · Link to this claim