How to Compare Exterior Window and Door Trim Materials Before Design Freeze
Compare cellular PVC, fiber-cement, and painted wood trim by opening detail, movement, finish, warranty, maintenance, quote scope, and handoff before design freeze.
The short answer
Choose the trim system that your exact opening detail, climate-zone product, finish, flashing sequence, warranty, and contractor scope can support—not the material with the shortest maintenance slogan. Before design freeze, schedule every opening, record linear feet and exposure, obtain the exact installation and warranty documents, normalize quotes, assign each handoff, and calculate only reader-entered maintenance scenarios. Local code and permit decisions belong to the authority having jurisdiction and qualified professionals.How to Compare Exterior Window and Door Trim Materials Before Design Freeze
Choose the trim system that your exact opening detail, climate-zone product, finish, flashing sequence, warranty, and contractor scope can support—not the material with the shortest maintenance slogan. Before design freeze, schedule every opening, record linear feet and exposure, obtain the exact installation and warranty documents, normalize quotes, assign each handoff, and calculate only reader-entered maintenance scenarios. Local code and permit decisions belong to the authority having jurisdiction and qualified professionals.
This guide is for a United States homeowner planning a new custom home or a major exterior replacement before material selection or contract award. “United States” is the market scope, not a single code jurisdiction. The authority having jurisdiction (AHJ)—usually the city, county, or other permitting authority named for the project—controls local permitting and adopted-code questions. A state, tribal, or local agency may also control a renovation or environmental requirement. A licensed architect, engineer, window professional, siding contractor, trim installer, painter, or general contractor must resolve the site-specific design and installation questions assigned to that professional.
The decision is not “Which material lasts longest?” The defensible decision is: “Which specified opening detail can each responsible party install, finish, warrant, inspect, and maintain without an unpriced gap?” Cellular PVC, fiber-cement, and painted wood may all be reasonable in different openings. The right comparison keeps the opening, not the product brochure, as the unit of decision.
Freeze the opening detail before you compare materials #
Before comparing trim materials, define every window and door opening as a small assembly with a perimeter, profile, substrate, exposure, finish, flashing interface, and responsible installer. A material cannot be priced or checked fairly until the drawing and quote identify those inputs. If the opening is still only a rectangle on a floor plan, the comparison is premature.
The first deliverable is an opening schedule. It can start as a homeowner worksheet, but the final version should be reviewed by the designer and the parties who will install the window, weather-resistive barrier (WRB), siding, trim, and coating. The schedule does not tell those people how to engineer the wall. It forces the project to show where their instructions meet.
Use one row for each opening condition
Do not record only “18 windows and two doors.” That quantity hides the information that drives scope. A replacement window in an existing masonry opening may have a different sill, substrate, flashing and access condition from a new-construction flanged window in a framed wall. A porch door under a deep roof overhang may have a different exposure from an upper-story west-facing window. A large opening may need a different profile, backing or joint layout from a small opening even when the homeowner wants the same visual surround.
Use one row for each opening or for a group of openings that is genuinely identical. “Identical” means identical in at least these fields:
| Field | What to enter | Why it changes the decision | Who verifies it |
|---|---|---|---|
| Opening ID | W-01, W-02, D-01, and so on | Makes drawings, quotes, photos and punch-list notes refer to the same opening | Homeowner or designer |
| Type and condition | New window, replacement window, exterior door, garage door, masonry or framed wall | Changes access, removal, flashing and substrate assumptions | Designer, window professional, or qualified contractor |
| Width and height | Rough or finished dimension, with units and measurement date | Produces linear feet and exposes inconsistent allowances | Designer and installer |
| Quantity | Number of truly identical openings | Prevents a low per-opening quote from hiding exceptions | Homeowner and estimator |
| Trim profile | Board or moulding width, thickness, return, sill, head, side casing, drip detail | Controls material quantity, cut list, joint locations and appearance | Designer and trim installer |
| Substrate | Wood framing, solid backing, masonry, existing trim, or “unknown” | Fastener length and fastening location depend on what is actually behind the trim | Designer and installer |
| Wall layers | Window, pan or sill treatment, WRB, flashing, siding and trim order | Shows the water-management handoff | Window and WRB/siding installers |
| Exposure | North, south, east, west, direct sun, roof runoff, splash, coastal or high-wind context | Direct sun and weather can change movement, finish and inspection attention | Designer and homeowner; professional verifies design constraints |
| Material and exact product | Cellular PVC, fiber-cement, or painted wood plus manufacturer, line, profile and model | Category names are not enough to retrieve the correct instructions or warranty | Homeowner, designer, supplier |
| Finish | Factory finish, field paint, color, LRV if specified, primer and coating system | A substrate warranty may not cover a field-applied finish | Painter, supplier and homeowner |
| Quote basis | Product, linear feet, openings, labor, accessories, finish, removal, lift or scaffold, tax and exclusions | Makes competing bids comparable | Estimator or builder |
| Warranty record | Current URL or document name, covered product, substrate, finish, installer conditions and claimant | Separates material coverage from finish and workmanship responsibility | Homeowner and supplier |
| Handoff owner | Named party for design, flashing, trim, coating, inspection and maintenance record | Turns “someone will handle it” into an auditable scope | General contractor or owner-builder |
The exact measurements are not just a future ordering exercise. They are the inputs to the whole-life comparison. If the trim is a picture frame on all four sides, a simple perimeter in linear feet is:
opening linear feet = 2 × (width in feet + height in feet) × quantity
That formula is only a measurement convention. It does not include waste, joints, sill projections, returns, material thickness, corner build-ups, garage-door conditions, or a different door casing detail. Record those separately. A door may have a sill or threshold condition that is not equivalent to window casing. A wide head trim may require a drip edge or a backing detail that changes the actual scope. The estimator should convert the schedule into a cut list and installation plan rather than blindly multiplying a perimeter.
Keep rough, finished, and visual dimensions separate
A common failure begins when one person measures the visible face of trim and another prices the rough opening. Ask which dimension each drawing and quote uses. For new construction, the rough opening is not necessarily the installed window size; for replacement work, the existing opening, window unit and finished trim may each have different dimensions. Write the reference plane beside every measurement:
- rough opening;
- window or door unit;
- WRB/flashing plane;
- siding plane;
- visible trim face;
- interior finish, if the quote accidentally combines interior and exterior work.
If a quote uses “per opening,” request its implied width, height, profile and number of sides. If it uses “linear foot,” request the included profile, waste factor, corners, joint treatment and finish. If it uses “allowance,” request the quantity and performance assumptions behind the allowance. An allowance without a basis is not a comparable price; it is an unresolved decision stored in the budget. That unresolved item should move to the same decision log used for broader planning and budget comparisons.
Treat local requirements as a gate, not a score
The material comparison comes after the project-specific gate. Ask the AHJ for the permitting and adopted-code requirements that apply to the actual address and work type. Ask the designer or engineer whether a particular trim profile, support, fire-zone condition, wind exposure, opening size, or wall assembly needs a professional decision. The answer can vary by jurisdiction and by new construction versus replacement; this guide does not turn a manufacturer recommendation into a national rule.
The installation documents themselves reinforce that boundary. AZEK says its trim should be installed using good building principles, local building codes, and its guidelines, and says the installer is responsible for determining requirements for each unique application; it recommends review by a licensed architect, engineer, or local building official. Read the AZEK Trim & Moulding Install Guide as a product instruction, not as a permit approval.
The practical gate is a written line in the decision record:
“The proposed opening detail has been reviewed for the project address, adopted local requirements, wall assembly, window or door manufacturer instructions, and any applicable fire, structural, wind, or hazardous-work conditions by the responsible qualified parties.”
The homeowner can collect the address, drawings, opening schedule, product literature and questions. The homeowner should not sign off on a structural or code interpretation simply because a sample board looks right. The next decision is whether each candidate material can be described at the same opening detail. If not, compare the details as systems and label the scope difference instead of awarding a material based on an incomplete quote.
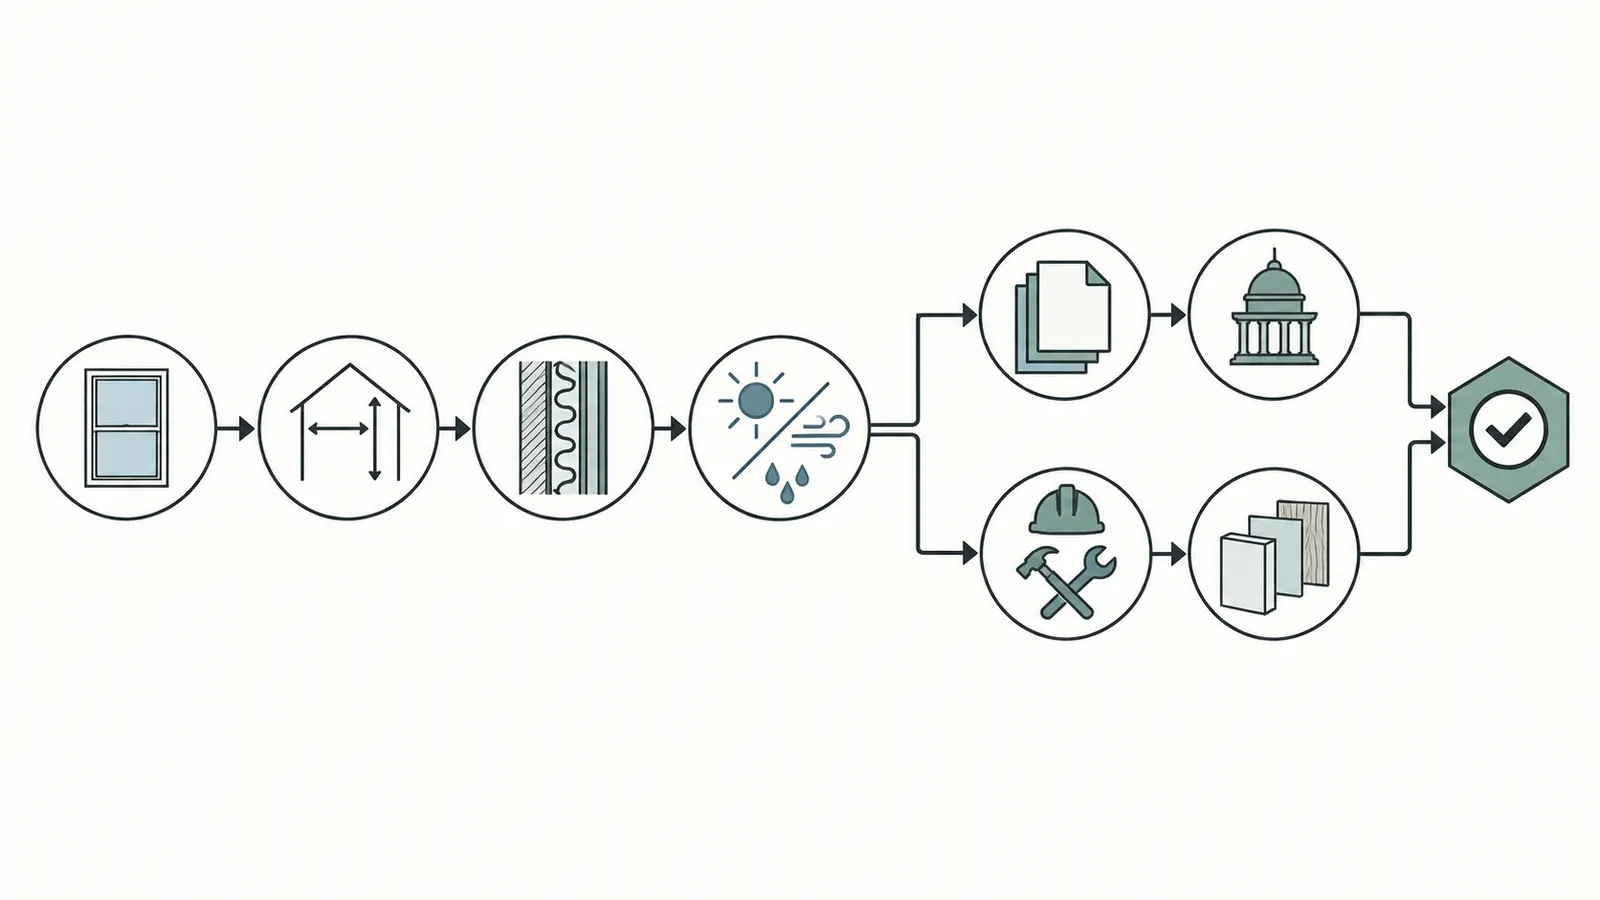
Compare cellular PVC, fiber-cement, and painted wood by job #
Cellular PVC, fiber-cement, and painted wood should be compared as specified products and installed assemblies, not as three abstract materials. Cellular PVC and fiber-cement documents can publish product-specific movement, fastening, joint, moisture, coating and warranty rules; painted wood requires its own species, moisture, primer, coating, joint and maintenance instructions. The matrix should therefore show what is known, what is conditional, and what is still a supplier or professional question.
There is no nationally valid winner in the evidence reviewed for this guide. The source set is manufacturer-specific and does not provide comparable national installed costs or a service-life test across the three categories. Its value is different: it makes the hidden requirements visible before they become a change order or a warranty argument.
Start with the material’s non-negotiable fields
Use the following comparison as a first-pass screen. The “decision use” column is Brictale’s synthesis of the cited documents; it is not a manufacturer ranking.
| Decision field | Cellular PVC example: AZEK | Cellular PVC example: VERSATEX | Fiber-cement example: James Hardie | Painted wood candidate | Decision use |
|---|---|---|---|---|---|
| Product identity | Record exact AZEK Trim, Moulding, PaintPro or specialty profile | Record exact VERSATEX Trimboard or Stealth profile | Record exact Hardie Trim product and climate-zone family | Record species, grade, thickness, profile and supplier | Never quote only “PVC,” “Hardie,” or “wood” |
| Base protection finish | AZEK says Premium Trim does not require paint for protection; PaintPro must be painted | VERSATEX says trim does not require painting for protection | The Hardie page describes ColorPlus factory-applied finishes; other finish paths need the exact guide | Assume nothing until supplier and painter specify the system | Separate substrate coverage from coating obligations |
| Dark-color condition | AZEK gives LRV 55 guidance and warns dark colors may increase movement | VERSATEX gives LRV 50 guidance and warns some dark paint choices can void warranty | Exact color and climate-zone documents control | Paint maker and wood supplier must define color and exposure limits | Put color, LRV and warranty language in the schedule |
| Movement | AZEK states 1/8 inch per 18 feet when properly fastened and warns dark colors may increase movement | VERSATEX says direct-sun and south exposures are more prone to movement and publishes product-specific properties | Follow the exact Hardie installation document for the model and method | Obtain species, joint and coating instructions; do not borrow PVC values | Let joint layout and exposure be visible in the quote |
| Window surround | The AZEK guide names window surrounds in its AZEK-to-AZEK joint guidance | VERSATEX publishes a Stealth picture-frame sequence and flashing interface | The Trim-Over page says the method has a window application overview | Detail sill, head, jambs, returns and flashing with the designer and installer | Compare the opening drawing, not a board sample |
| Fastening | The AZEK guide calls for solid substrate engagement and product-specific fastener spacing | The Stealth detail states fastener type, penetration and maximum spacing | The exact Hardie guide controls fasteners and cutting | Supplier and designer specify corrosion resistance and substrate | Write who proves the substrate exists |
| Water interface | Specialty AZEK products may incorporate a drip edge, but the wall WRB and opening flashing remain separate responsibilities | The handbook calls for AAMA method A1 or local-code flashing and header drip flashing | The Trim-Over page says flashing goes over WRB at named corners and directs local-code compliance | Must be drawn and assigned; paint is not water management | Make the water path reviewable before trim delivery |
| Finish warranty | AZEK excludes purchaser- or third-party-applied painted finish performance from the cited trim warranty | VERSATEX says it is not liable for paint results and lists dark-color conditions | James Hardie distinguishes substrate warranty from ColorPlus finish warranty | Coating, prep, and workmanship responsibilities must be written | Ask “what is excluded?” before asking “how long?” |
| Maintenance input | Record cleaning, touch-up, repaint and replacement triggers without assuming a national interval | Same, using the exact product and coating record | Record finish inspection, touch-up and any stated finish coverage | Record inspection and repaint triggers from the supplier and painter | Use entered events, not a generic “low maintenance” score |
The AZEK and VERSATEX documents are especially useful for showing why “cellular PVC” is too broad a label. AZEK’s guide gives one movement allowance and one LRV threshold for its named products. VERSATEX’s handbook gives a different paint threshold and a different published material-property table for Stealth. Those differences are not contradictions to be averaged; they are a warning to specify the model and follow that model’s current instructions.
VERSATEX also publishes a product-specific coefficient of linear expansion of 3.24 × 10^-5 in/in/°F and water absorption below 0.50% for the material table identified in its handbook. Use that table as a source record for the named product and test methods, not as a generic number for every cellular PVC trim board. The VERSATEX Contractor Handbook is valuable here because it exposes the units and scope that a short product roundup usually omits.
James Hardie’s product page takes a different approach. It presents Hardie Trim Boards as region-specific through its Engineered for Climate positioning, says local dealer availability can vary, and describes a 30-year non-prorated, transferrable substrate warranty. That is not the same as a 30-year promise for every field-applied coating or installation labor. The exact product, HZ5 or HZ10 applicability, finish, installer requirements and current warranty document belong in the project record. See Hardie Trim Boards and the James Hardie installation guidance library before selecting a product.
Painted wood deserves a disciplined “unknown until specified” row. Do not mark it as automatically high maintenance or automatically appropriate for a traditional design. Ask the wood supplier for the moisture condition required at installation, end-grain treatment, primer sequence, compatible topcoat, joint and sealant instructions, storage limits, fasteners, and warranty boundary. Ask the painter who owns surface preparation and future touch-up. A wood choice can be attractive or appropriate, but the evidence set for this page does not contain a comparable wood manual. The correct editorial answer is to expose that missing document, not to fill it with a stereotype.
Compare the opening detail, not just the substrate
A trim board sits at the visible edge of a wall, but the opening’s performance depends on layers and sequence. The decision matrix must show at least:
- the window or door unit and its manufacturer’s installation method;
- the sill or threshold condition;
- the side and head flashing or membrane treatment;
- the WRB plane and its lap direction;
- the siding cut or overlap;
- the trim profile, return and fastener path;
- the sealant or joint treatment;
- the finish and touch-up path.
If one bidder includes a preassembled surround and another includes board stock assembled on site, the quotes are not equivalent. If one bidder includes a sill pan or head flashing and the other assumes the window installer owns it, the lower price may only be a handoff gap. If one product’s profile receives siding in a pocket and another product requires a different siding sequence, the material comparison must show the labor and inspection consequences.
This is why the next decision after the matrix is not “pick the cheapest row.” It is “can the designer issue a detail that all affected trades can price and install?” If the answer is no, keep the material decision open and resolve the drawing.
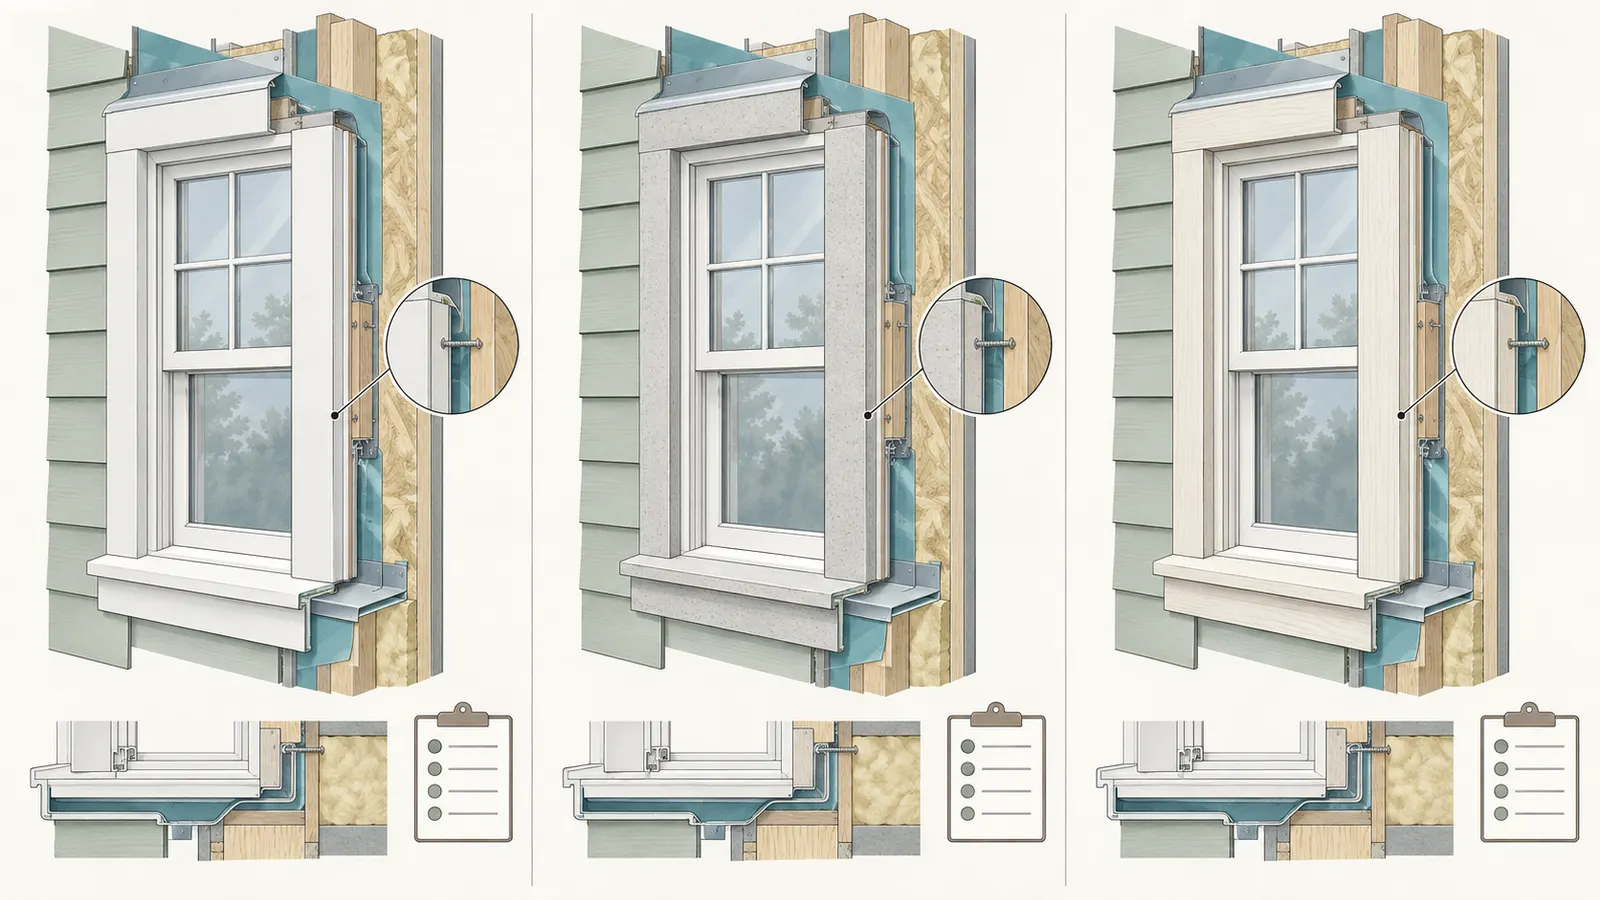
Resolve movement, joints, and finish obligations #
Movement and finish obligations must be converted into visible drawing notes, joint locations, color rules, and warranty records before design freeze. Cellular PVC movement is not eliminated by choosing a product marketed as low maintenance, and a factory or substrate warranty does not automatically cover field paint, caulk, installation, or water intrusion. Fiber-cement and wood require the exact same discipline: identify the product, joint, coating and responsible party.
Use movement to design the joint map
Movement is a design input because the trim is attached to a wall that is exposed to changing temperatures and sunlight. The project record should show the length of each continuous run, the temperature or exposure concern, the joint type, the joint location, the fastening path, and the party who will inspect it.
AZEK states that its trim expands and contracts with temperature changes and gives an allowance of 1/8 inch per 18 feet when properly fastened. It also says joints should be glued to eliminate joint separation and warns that dark colors may increase movement. That instruction creates a specific design question: where will a long run end, how will the ends accommodate movement, and what part of the joint is glued versus left as a movement accommodation? Read the full AZEK movement and joint guidance for the proposed profile.
VERSATEX says direct sunlight or a southern exposure is more prone to movement, recommends more fasteners together with expansion joints, and places expansion/contraction joints in inconspicuous locations along long runs. It also describes shiplap joints as a superior option for long runs and provides a joint method that uses adhesive and double fastening at the joint. A west-facing surround or a long horizontal band should therefore not inherit the same joint assumption as a shaded north-facing piece merely because both are white in the rendering. The relevant VERSATEX movement and joint sections belong in the installer’s scope.
The phrase “inconspicuous” also deserves an owner decision. A joint hidden at a corner may be less visible but could be closer to a water-shedding transition or a difficult repair. A joint centered over a window may be easy to align visually but more noticeable. The designer and installer should agree on a location that preserves the opening detail and access for future inspection. Do not move a joint solely for appearance without checking the manufacturer’s joint method and the water path.
For painted wood, ask for the joint map rather than assuming a board can be run continuously. The supplier’s instructions may depend on board length, profile, end treatment, grain, moisture and coating. If the answer is “the carpenter will decide in the field,” the decision is not ready for a fixed-price exterior package. The contract can allow field fitting, but it should not leave the material-specific movement and joint responsibility unnamed.
Distinguish four kinds of gaps
People often use “gap” to mean four different things. Put the correct kind on the drawing:
| Gap type | What it is for | Typical owner of the decision | What to verify |
|---|---|---|---|
| Movement allowance | Space that allows a product or run to move | Trim designer and installer under product instructions | Length, temperature, color, exposure and manufacturer value |
| Joint reveal | A deliberate visual line between pieces | Designer and installer | Alignment, backing, sealant or adhesive and maintenance access |
| Sealant joint | A flexible weather or finish interface | Window/WRB/siding/trim professional, depending on layer | Compatible sealant, substrate, width, prep and warranty |
| Installation clearance | Space required for the window, door, siding, flashing or trim to fit | Window and wall-system installers | Exact model instructions and the local detail |
Do not substitute caulk for a movement joint, or a paint line for a flashing interface. A sealant joint can weather or require renewal; a movement allowance can be a product requirement; an installation clearance may be hidden behind a casing. Each has a different inspection question and a different person responsible.

Treat finish as a separate purchased system
A material comparison becomes misleading when one row says “no paint” and another says “factory finish” without recording future finish responsibility. There are at least five finish states:
- unpainted product that is allowed to remain exposed;
- field-painted product with a named paint system;
- factory-finished product with a named color and finish warranty;
- factory-primed product awaiting field coating;
- an existing painted surface that will be cleaned, repaired, or removed.
For AZEK Premium Trim, the guide says paint is not required for protection, provides LRV guidance, and excludes the performance of painted finishes applied by the original purchaser or a third party from its cited Lifetime Limited Warranty. AZEK PaintPro has different instructions, including a requirement to paint within 180 days of outdoor UV exposure. Those are materially different procurement and handoff paths; the AZEK painting guidance must be matched to the exact line.
AZEK’s current Warranty & Care hub lists trim and moulding among the products backed by a Lifetime Limited Warranty and links the current Trim & Moulding Warranty documents. Use that hub to retrieve the document for the proposed purchase, then read the exclusions and claim conditions. The word “lifetime” is a product warranty label, not evidence that a field-applied coating, installation labor, sealant joint, or water-management error is covered.
VERSATEX similarly says its trim does not require painting for protection but gives coating, cleaning, LRV and warranty cautions. Its handbook says standard paints should have an LRV of at least 50 and warns that painting cellular PVC trim dark with a paint other than the named approved path can result in poor performance and void the warranty. It also says VERSATEX is not liable for paint used on its products or the results. See the VERSATEX painting instructions, then obtain the current coating manufacturer’s written compatibility and warranty conditions.
If the selected product is VERSATEX TrimLast rather than the Stealth material discussed elsewhere, use its separate TrimLast Installation Guide. That guide says TrimLast must be painted within 180 days of outdoor exposure and that failure to follow the instruction will void the warranty. This is exactly why “VERSATEX trim” is not a sufficient specification: product-line timing and warranty conditions can differ.
For James Hardie, the Hardie Trim Boards product page describes ColorPlus Technology as a factory-applied, baked-on finish, while the Trim-Over page lists a 15-year ColorPlus finish warranty alongside the applicable 30-year HZ5 or HZ10 siding and trim warranties. A homeowner should not compress those into “30-year paint.” The scope is separated: product substrate, product installation method, climate-zone warranty and finish have distinct conditions. Those pages are a reason to request the exact current warranty document, not a substitute for it.
Put LRV and color in the specification
Light Reflective Value (LRV) is not a decoration-only field when the product document ties paint or movement guidance to it. Record the manufacturer, product line, color name, color code if available, LRV, coating brand, coating product, sheen, primer, number of coats, application window, and who supplies touch-up material. If the color has not been chosen, record a range or decision deadline rather than allowing a “white or dark” allowance to pass into the contract.
Do not infer that an LRV threshold from one manufacturer applies to another. AZEK’s cited guidance uses 55 as the threshold in its Premium Trim recommendation; VERSATEX’s handbook uses 50 for standard paint guidance. Those values are evidence that the manufacturer rules differ, not a universal code threshold. If a designer selects a dark exterior color, ask each proposed product’s current document for the compatible coating path and whether the warranty covers the finish.
Finish decisions also affect later ownership. A homeowner may prefer a field-painted white trim because it matches a future repaint plan, or a factory-finished trim because it narrows the field-coating scope. Neither preference answers who will clean, touch up, inspect, or repaint it. Write those tasks into the maintenance record, with a trigger such as “visible coating failure,” “manufacturer inspection interval,” or “after impact or repair,” rather than inventing a nationwide repaint interval.
Do not confuse a drip edge with the entire water detail
AZEK’s Integrated Drip Edge page describes a two-piece product intended to assist moisture management around doors and windows, routed to accept a drip edge, with an integrated nailing flange. That can be a useful product option when the proposed opening detail is compatible. It does not, by itself, answer how the window, sill, jamb, head, WRB, flashing and siding are layered. The AZEK Integrated Drip Edge description should be paired with the opening drawing and the window and WRB instructions.
The careful wording matters: the product page says “designed to assist” with water management, not that it replaces the opening flashing system. VERSATEX’s window surround sequence explicitly says to prepare and flash the window area in accordance with AAMA method A1 or local building-code requirements and recommends drip flashing at the header. James Hardie’s Trim-Over page says to follow local building code and place flashing over WRB at inside and outside corners. These manufacturer pages point to a layered water-management handoff. They do not issue a national installation detail for every window, siding and trim combination.
The next decision is whether the selected profile can be drawn so the water-management professional, window installer, siding installer and trim installer can each identify their work. If a product-specific detail conflicts with the window manufacturer’s instructions, stop the selection and obtain a coordinated detail from the responsible professionals. Do not resolve the conflict by deleting a flashing layer from the quote.
Assign the window, WRB, siding, trim, and finish handoffs #
The trim material is ready for design freeze only when the project identifies who designs, installs, verifies, repairs, and documents each boundary around the opening. The homeowner may own the decision and the records, but does not automatically own technical installation. The general contractor, if one exists, should convert the matrix into scope language and schedule the inspection before concealment.
Draw the handoff as a sequence
Use this sequence for a new custom home or a major exterior replacement, then let the project professionals adapt it to the exact wall and opening:
- Design sets the intent. The architect or designer identifies opening type, visual trim width, sill and head appearance, returns, siding relationship, exposure and any style constraints. The drawings name the product or performance requirements rather than leaving “exterior trim” as a blank.
- The window or door professional confirms the unit. The product, flange or installation method, rough-opening relationship, manufacturer detail, threshold and required clearances are confirmed. The professional identifies the documents that the WRB and trim crews need.
- The wall-system professional confirms the layer order. The WRB, sill, jamb and head flashing, drainage path, siding and trim interfaces are shown. The AHJ and qualified designer resolve local requirements for the address; the article does not decide them.
- The estimator prices the same opening. The quote identifies product, profile, linear feet, waste, fasteners, adhesives, sealants, flashing or membrane, cuts, joints, finish, access equipment, removal and exclusions. A separate quote line for each opening group allows a change to be traced.
- The material supplier confirms current documents. The supplier or manufacturer confirms exact model, profile, color availability, climate-zone or product limits, installation guide, care guidance and warranty. A web page captured for research is not enough if the quote names another model.
- The general contractor assigns installation. The contract names the trade that installs the window or door, the trade that installs or verifies WRB/flashing, the siding trade, the trim trade, the painter, and the person who coordinates conflicts.
- The wall is inspected before concealment. The responsible professional verifies the opening, flashing and substrate at the agreed hold point. Photos are labeled by opening ID and layer. The trim crew does not cover an unresolved water path because the delivery date arrived.
- The finish and closeout are recorded. Color, coating, batch or product data when available, touch-up material, warranty documents, installer details, maintenance triggers and approved repairs are placed in the handover record.
The order can differ for a product-specific method. The James Hardie Trim-Over page describes a method in which pros install siding before trim, says it eliminates most caulking, and provides a window application overview. That is a method-specific sequence, not permission to let a generic siding subcontractor change the opening detail without the required documents. If the project chooses Trim-Over, name the method in the quote and attach the exact overview and installation requirements. Verify that the proposed climate-zone product and warranty apply.
Use a responsibility matrix instead of a verbal promise
The following matrix is a planning template. “Responsible” means the party who must produce or verify the deliverable; it does not mean every task is performed by one person. The general contractor may coordinate it, but the technical decision remains with the qualified party whose scope requires it.
| Deliverable | Homeowner | Designer/architect/engineer | Window/door installer | WRB or siding installer | Trim installer | Painter/finisher | GC or contract administrator |
|---|---|---|---|---|---|---|---|
| Address and jurisdiction record | Provide | Check project scope | Review applicable unit requirements | Review local detail | Review | Review finish limits | Keep contract record |
| Opening schedule | Initiate and approve visual intent | Complete dimensions/profile | Confirm unit and rough-opening needs | Confirm layer interfaces | Confirm cut-list inputs | Confirm finish area | Price and issue revisions |
| Exact product/model | Choose with advice | Check design fit | Check unit compatibility | Check siding compatibility | Check trim instructions | Check coating compatibility | Attach to contract |
| Substrate and backing | Ask to see it | Specify where needed | Identify installation plane | Identify wall plane | Verify fastener path | Not usually owner | Resolve missing scope |
| Sill/jamb/head water detail | Ask for drawing | Coordinate design | Follow unit method | Install/verify WRB and flashing | Protect and integrate without deleting layers | Avoid blocking drainage | Hold inspection |
| Joint and movement map | Approve visual locations | Coordinate appearance | Flag unit constraints | Flag siding sequence | Install per product guide | Avoid bridging or damaging joints | Schedule and document |
| Coating system | Select appearance | Check design intent | Protect installed unit | Protect wall layers | Prepare substrate as specified | Own application record | Confirm allowance and exclusions |
| Warranty set | Save current documents | Identify applicable design notes | Provide unit warranty | Provide siding/WRB instructions | Provide trim product record | Provide paint record if offered | Deliver closeout package |
| Final verification | Walk and record questions | Review visible design | Verify unit and sealant scope | Verify drainage and siding interface | Verify fasteners, joints and finish prep | Verify finish | Collect photos, sign-offs and punch list |
The matrix makes an important distinction between “does the work” and “proves the work.” A trim installer may attach casing, but the window installer may be the party who controls the unit’s flashing interface. A painter may apply a coating, but the trim manufacturer may exclude third-party finish performance. The contract should state how those responsibilities interact rather than forcing the homeowner to arbitrate after water or paint failure.
Verify the substrate before approving the fastener line
Fastener instructions are not decorative details. AZEK’s guide says fasteners must hit solid framing members, be installed into a flat solid substrate, and penetrate solid wood substrate at least 1 1/2 inches in the described application. It also says the material should be fastened along its length and uses two fasteners per framing member for trimboard applications, with additional limits for wider boards. See the AZEK fastening guidance for the exact profile and conditions.
For the VERSATEX Stealth window surround, the handbook calls for stainless steel 8d annular or spiral fasteners designed for wood trim and siding, with at least 1 1/4 inches into the substrate and a maximum spacing of 16 inches on center. That is a detail for the cited Stealth surround, not a universal rule for all VERSATEX products or other trim. The VERSATEX Stealth window installation section should be attached to the submittal.
The homeowner’s verification is simple: ask the installer to identify the substrate on the opening schedule and mark where fasteners land. Do not drill exploratory holes through a weather layer or remove existing trim yourself just to prove backing. If backing is uncertain, the qualified installer or designer decides how to expose, reinforce, or detail it. “The trim will hold” is not a substrate verification.
Make the verification hold points explicit
Use at least four hold points:
- Before window or door installation: confirm opening dimensions, unit, sill or threshold, and the manufacturer’s current installation documents.
- Before siding or trim covers the WRB/flashing: confirm the planned water path, layer laps, head treatment and any required inspection by the designer, GC or AHJ.
- Before finishing: confirm trim is clean, dry, undamaged, correctly fastened, jointed, and compatible with the specified coating. For a product with a paint timing rule, record the date of outdoor exposure and the paint date.
- At closeout: record the exact product and color, photos by opening ID, warranty documents, care instructions, repairs, touch-up material and the next maintenance trigger.
These are not substitute inspections or official code sign-offs. They are project-control points that help the responsible people see the work before the next layer hides it. If the local jurisdiction requires a different inspection sequence, that jurisdiction controls. If the window manufacturer requires a different order, the professional team must coordinate the detail before work continues.
The next decision after the handoff matrix is whether the proposed contract can be audited. A good contract lets the owner answer, for W-07: what was installed, who owned flashing, which fastener rule applied, what finish was used, what warranty covers the substrate, and who will respond if the joint or coating fails. If the owner cannot answer those questions, the design is not frozen even if the elevation rendering is complete.
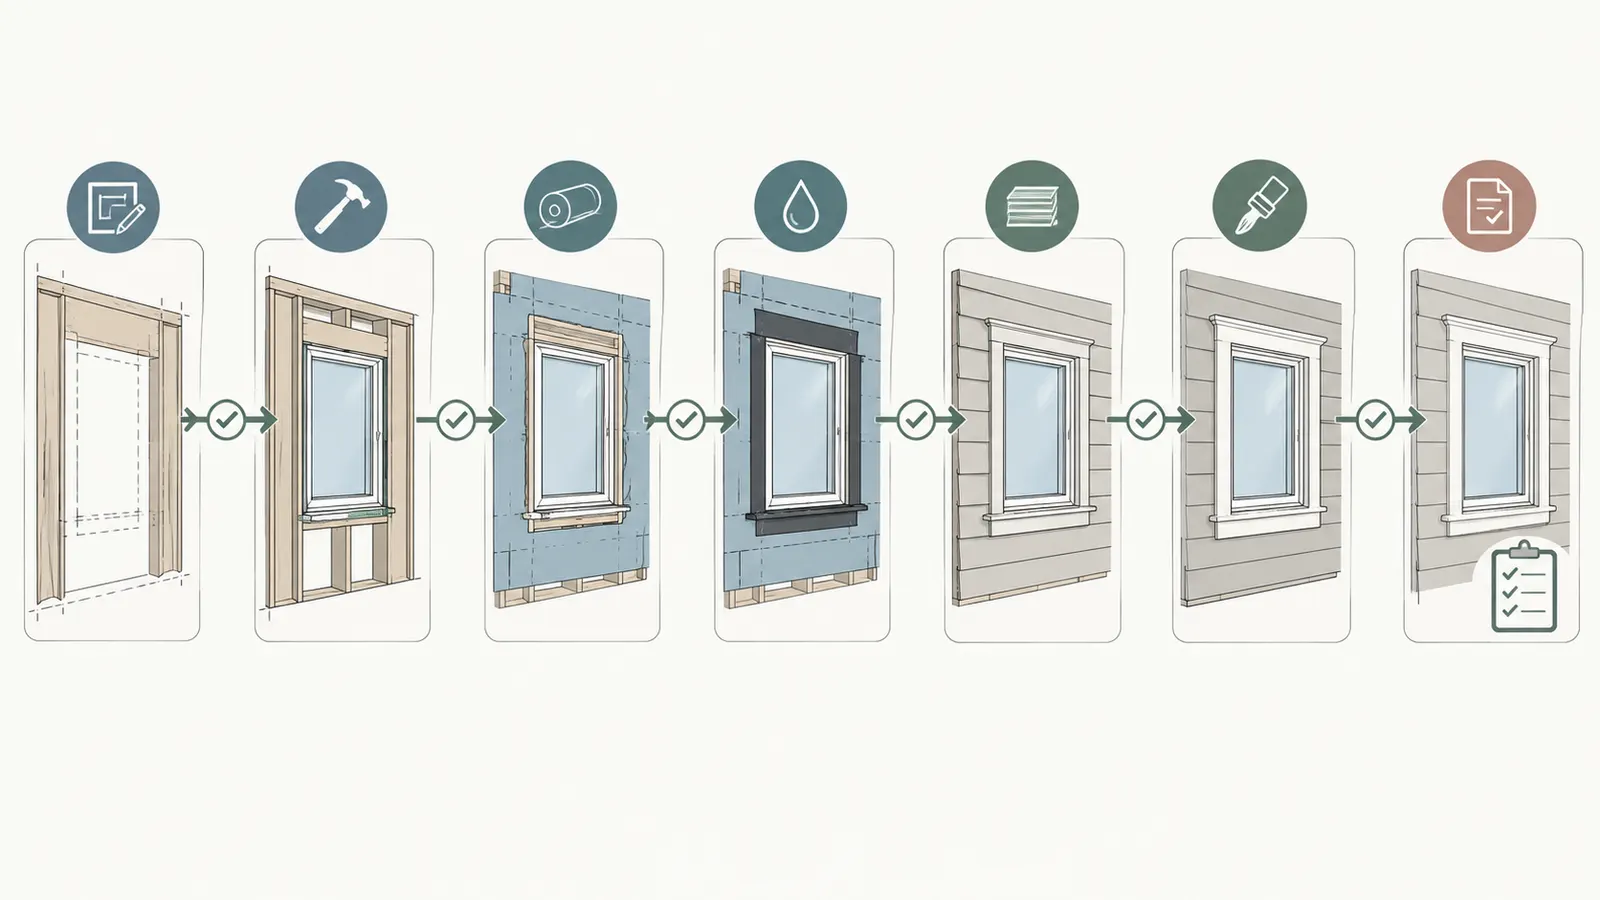
Normalize quotes and run the 30-year worksheet #
Compare quotes by opening-specific scope and reader-entered values, not by a generic material price or an invented national maintenance rate. The useful output is a transparent total that can be recalculated when the quote, repaint interval, event cost, exposure allowance, or replacement assumption changes. The worksheet should show unknowns rather than silently assigning them a zero.
Build the quantity sheet first
The opening schedule can generate a quantity sheet. Label every number as measured, drawn, quoted, or entered by the reader. Here is an illustrative geometry example—not a contractor quote and not a price assumption:
- Four identical windows:
3 ftwide by5 fthigh. - One exterior door:
6 ft 8 inhigh by3 ftwide. - Assumed visual treatment for this illustration: four-sided picture frame for every opening.
- Window perimeter:
2 × (3 + 5) × 4 = 64 linear ft. - Door height converted to feet:
6 ft 8 in = 6.667 ftto three decimals. - Door perimeter:
2 × (6.667 + 3) = 19.334 linear ft. - Combined illustrative perimeter:
83.334 linear ft, before waste, returns, sills, special profiles, joints, corners, or exclusions.
The example only demonstrates units and the perimeter formula. It does not assert that the door should receive the same four-sided trim or that 83.334 linear feet is an order quantity. The actual cut list may use board lengths, profile widths, joint allowances and waste. Ask the estimator to show how the quoted quantity is derived from the opening schedule.
Normalize each bidder’s inclusions
Use a table like this for each material and quote. Keep the cells blank until the bidder or supplier supplies a value. A blank is a decision item; it is not an invitation to make up a cost.
| Cost or scope input | Unit | Quote A | Quote B | Homeowner verification |
|---|---|---|---|---|
| Trim product and profile | named model | Does the model match the drawing and current guide? | ||
| Opening quantity | openings | Are all W- and D-IDs included? | ||
| Measured trim quantity | linear ft or board count | What dimensions, waste and returns are included? | ||
| Material supply | project currency | Does it include specialty sill/head pieces? | ||
| Fasteners and adhesive | project currency | Are compatible products named? | ||
| Flashing, membrane and drip components | project currency | Which layer and trade owns each item? | ||
| Trim installation labor | project currency | Does it include joints, cuts, backing and cleanup? | ||
| Window/door installation | project currency | Is this duplicated or omitted from trim scope? | ||
| Siding cut, sequence or repair | project currency | Does method change between options? | ||
| Field coating or factory finish | project currency | Is prep, primer, coats, cure and touch-up included? | ||
| Removal and disposal | project currency | Relevant to replacement only; state assumptions | ||
| Lift, scaffold or difficult access | project currency | Does exposure or height change this line? | ||
| Permit, inspection or testing allowance | project currency | Verify with the AHJ or qualified professional | ||
| Tax, delivery and handling | project currency | Same basis across quotes? | ||
| Explicit exclusions | text | Convert each exclusion into an owner decision | ||
| Warranty document | document ID | Does it cover product, finish, labor, or only some? |
Do not add a field called “maintenance savings” to make a preferred material look cheaper. Instead, record the maintenance event as a separate reader-entered scenario with an explicit trigger and cost basis. A manufacturer’s statement that a product does not require paint for protection does not supply a labor rate, repaint interval, access cost, or a service-life prediction.
Use an entered-cost formula
For each material option m, calculate an illustrative planning total over a 30-year horizon as:
T30(m) = Q0(m) + P(m) × Cpaint(m) + R(m) × Creplace(m) + A(m)
Where:
Q0(m)is the entered initial installed quote in the project’s currency, including only the normalized scope;P(m)is the number of entered maintenance or repaint events within 30 years;Cpaint(m)is the entered cost per event, including prep, coating, labor, access, protection and disposal if applicable;R(m)is the number of entered replacement or major-repair events;Creplace(m)is the entered cost per replacement or major repair, including associated opening work if the quote includes it;A(m)is the entered allowance for unresolved scope, such as an identified but not-yet-priced access or profile condition.
This is a decision worksheet, not a forecast. If a manufacturer’s current instructions do not state a repaint interval, leave P(m) as a scenario variable. If the owner does not expect replacement, set R(m)=0 only as an explicitly optimistic scenario, not as a claim that replacement will never occur. If the quote excludes flashing repair, do not hide it in Creplace; list it as an unresolved scope line and ask the responsible professional to price it.
The formula also exposes a key tradeoff: an apparently higher initial quote can be compared fairly only when the lower quote has the same opening detail, finish, access, flashing and warranty scope. A number without a scope boundary is not a low whole-life cost; it is an incomplete number.
Run sensitivity without inventing rates
Use your actual entered values in the cells. To test the decision, change one input at a time while holding the others constant:
| Sensitivity | Base entry | Test entries | What the change tells you |
|---|---|---|---|
| Repaint interval or event count | P events in 30 years | P-1, P, P+1, or a stated no-paint scenario | How much the decision depends on an unverified maintenance assumption |
| Initial quote | Q0 | quoted amount minus or plus the identified scope delta | Whether a quote gap is material or caused by omitted flashing, finish or access |
| Exposure | ordinary exposure allowance | direct-sun/south or difficult-access allowance entered by the estimator | Whether a long run or exposed elevation needs a different joint, finish or labor scope |
| Replacement event | R | 0, 1, or the professional’s stated scenario | Whether future access or opening repair changes the choice |
| Unresolved allowance | A | 0 only after the scope is closed; otherwise entered allowance | Whether the “winner” exists only because an unknown was omitted |
For a single-input quote sensitivity, the change is direct:
ΔT30 = ΔQ0
For one additional entered paint event:
ΔT30 = Cpaint
For one additional replacement event:
ΔT30 = Creplace
The worksheet should display the formulas and inputs so another person can reproduce the result. If the project uses dollars, enter dollars; if it uses another currency, label it. Do not compare an installed dollar quote with a material-only line, or a one-opening repair price with a whole-house linear-foot allowance.
Modeled example: a completed 30-year worksheet with hypothetical inputs
The following is an illustrative modeled example, not a market survey, contractor quote, repaint prediction, or service-life claim. It uses the earlier geometry illustration—four 3 ft × 5 ft windows and one 6 ft 8 in × 3 ft door, treated as four-sided picture frames—for 83.334 linear ft before waste, returns and special pieces. Assume three hypothetical bids have been normalized to the same opening schedule, profile, flashing scope, access and closeout record. The dollar inputs below are invented solely to show the worksheet arithmetic; replace every one with the project’s actual quote or an explicitly approved scenario.
| Option | Q0 initial installed quote (USD) | P repaint events in 30 years (count) | Cpaint per event (USD/event) | R replacement events (count) | Creplace per event (USD/event) | A unresolved allowance (USD) | T30 modeled total (USD) |
|---|---|---|---|---|---|---|---|
| Cellular PVC, field-painted scenario | $8,400 | 2 | $900 | 0 | $4,000 | $600 | $10,800 |
| Fiber-cement, factory-finish scenario | $9,100 | 1 | $1,000 | 0 | $3,500 | $400 | $10,500 |
| Painted wood, field-finish scenario | $7,600 | 4 | $1,100 | 1 | $3,200 | $800 | $16,000 |
The substitutions are: cellular PVC T30 = $8,400 + (2 × $900) + (0 × $4,000) + $600 = $10,800; fiber-cement T30 = $9,100 + (1 × $1,000) + (0 × $3,500) + $400 = $10,500; and painted wood T30 = $7,600 + (4 × $1,100) + (1 × $3,200) + $800 = $16,000. Here, P=2 might represent hypothetical repaint events in years 10 and 20, while P=4 represents hypothetical events in years 6, 12, 18 and 24. Those years are modeling choices, not manufacturer intervals. The zero replacement entries are optimistic scenarios, not a statement that replacement will never occur.
Test one entered variable at a time while leaving the others unchanged:
| Sensitivity test | Changed input | Recalculated result | Difference from base |
|---|---|---|---|
| Repaint-interval scenario for cellular PVC | P: 2 → 3; one additional $900 event | $11,700 | +$900 |
| Quote sensitivity for fiber-cement | Q0: $9,100 → $10,100; identified scope delta | $11,500 | +$1,000 |
| Direct-sun or difficult-access allowance for painted wood | A: $800 → $1,400; entered exposure/access delta | $16,600 | +$600 |
The arithmetic shows that the fiber-cement row is lowest under these hypothetical inputs, but it does not select a material for a real house. If the fiber-cement quote omits a flashing component, if the cellular-PVC finish is subject to a different product rule, or if the wood replacement event is not a defensible scenario, the inputs must change before the comparison is used. The next action is to replace the modeled entries with opening-specific quotes and document the source or responsible person for every non-cost field.
Make the worksheet opening-specific
A whole-house average can conceal the reason a material was selected. Run the worksheet by opening group:
- standard shaded windows;
- south or west windows with long exposed head trim;
- doors with thresholds, splash, or heavy use;
- garage-door jambs or low-to-grade conditions;
- masonry openings or replacement openings with uncertain backing;
- tall or difficult-access openings;
- openings requiring a special profile or a different siding method.
For each group, record LF, Q0, finish status, exposure, joint count, quote exclusions, and responsible handoff. The total whole-house result is the sum of the groups, but the decision may be different for each group. A homeowner might reasonably use one specified trim system at typical windows and a different approved detail at a masonry or low-to-grade condition if the design and contract can coordinate the visual and warranty consequences. That is a professional project decision, not a rule from this article.
Use source statements as worksheet fields
The source-traceable part of the artifact is the field beside the cost entries. Record the exact evidence or document for:
- movement value or joint rule;
- fastener type, penetration and spacing;
- substrate requirement;
- window flashing method or local-code reference;
- finish requirement and LRV;
- paint timing or cure condition;
- substrate warranty;
- finish warranty;
- installer or application exclusions;
- care and cleaning instruction;
- climate-zone or product availability condition.
For example, if the option is AZEK, the evidence row can point to the AZEK guide’s movement, fastening, joint and paint sections. If it is VERSATEX Stealth, point to the VERSATEX window surround, movement, finish and properties sections. If it is James Hardie Trim-Over, point to the method and warranty page and the exact technical document attached by the supplier. A link in the worksheet is not proof that the document applies; the model and date still need to match.
The next decision is a documented selection, not a spreadsheet ranking. Choose the option for an opening group only after the normalized scope, manufacturer document, warranty boundaries and qualified professional review all align. If the result changes when one unknown is filled, the right action is to close the unknown, not to advertise the preliminary result as a material winner.
Test failure cases before design freeze #
The strongest comparison is one that predicts where a choice can fail and assigns the next safe action. A failure case is not a claim that the failure will happen; it is a branch in the decision process. The matrix below tells the homeowner what to observe, what not to infer, who should respond, and what record to bring forward.
| Observation before or during work | What it may mean | What not to infer | Safest next step | Information to bring to a professional |
|---|---|---|---|---|
| Quote says “exterior trim” with no profile | Scope is not specified | That all bidders priced the same assembly | Pause award and request model, profile, sides, joints and layers | Elevation, opening schedule, sample and quote |
| Quote is per opening but window sizes differ | Hidden quantity or labor assumptions | That one opening price scales to all openings | Reprice by opening group and dimensions | Unit schedule, rough/finished dimensions, access notes |
| Trim fastener line has no named substrate | Backing may be assumed or absent | That siding or sheathing will hold the specified trim | Have installer identify solid framing/backing before covering | Wall section, photos before concealment, product guide |
| Head trim meets siding with no drip or membrane note | Water handoff is incomplete | That caulk alone creates a drainage path | Request coordinated window/WRB/siding/trim detail | Window instructions, WRB guide, elevation, local questions |
| A product accepts a drip edge | One product feature is available | That the whole opening is flashed | Verify each layer and responsible trade | Product page, window detail, WRB/flashing sequence |
| Long south or west run has no joint map | Movement scope is unresolved | That a continuous run will stay visually stable | Ask the trim installer for product-specific joint and fastening plan | Run length, exposure, color, profile and guide |
| Dark color is selected with generic paint | Coating or movement condition may be incompatible | That the LRV rule from another brand applies | Obtain current manufacturer and coating approvals in writing | Color code, LRV, exact product, warranty |
| Factory finish and field touch-up are combined | Different warranty boundaries may apply | That finish and substrate have the same coverage | Separate factory finish, field repair and labor records | Warranty PDFs, finish product, painter scope |
| Installer proposes a substitute sealant | Compatibility may differ | That every exterior sealant is interchangeable | Require named compatible sealant and manufacturer confirmation | Exact product, substrate, joint width, exposure |
| Boards arrive damaged, dirty or exposed | Storage or handling may affect finish | That damage can be hidden by paint | Photograph, quarantine affected pieces and ask supplier/installer | Delivery record, batch if available, photos |
| Paint date is unknown for a product with a timing rule | Warranty condition may be unprovable | That a later coat automatically restores coverage | Record outdoor exposure and obtain supplier direction before coating | Delivery date, installation date, guide and paint record |
| Existing trim has peeling or unknown paint | Surface preparation or hazardous-work scope may exist | That scraping and sanding are ordinary low-risk work | Stop disturbance until age and applicable lead-safe requirements are addressed | Home age, work scope, photos and contractor credentials |
| Joint opens after installation | Movement, joint treatment, fastening, substrate or finish issue may be involved | That adding surface caulk solves the cause | Notify the responsible installer and preserve the product record | Opening ID, run length, temperature/exposure, photos |
| Water stain appears at a head or sill | Multiple layers may be involved | That trim material alone caused or can fix it | Keep the area safe and have qualified professionals trace the water path | Weather date, photos, window/WRB/trim documents |
| Local inspector asks for a change | Jurisdiction-specific requirement may apply | That a web guide overrides the AHJ | Record the requirement and coordinate a revised detail | Address, permit comments, drawings and product documents |
The existing-home lead boundary is real but jurisdiction-specific
Major exterior replacement is not the same risk as new construction. For a pre-1978 home, EPA says lead-based paint is more likely, and says work such as replacing windows can create hazardous lead dust and chips. EPA recommends homeowners hire a certified and trained lead-safe contractor for covered renovation, repair and painting work. Read the EPA consumer RRP guidance and check the current federal, state, tribal and local program requirements for the actual project.
The careful scope is important. The EPA page does not mean every trim touch-up at every address is covered by one identical rule, and this guide cannot determine coverage from a photo. It means the homeowner should not authorize cutting, sanding, scraping, window replacement or paint disturbance at a pre-1978 home without resolving the applicable lead-safe requirements and contractor qualification. Ask the contractor to state whether the work falls under the applicable RRP requirements and what documentation they will provide. Do not assume a “new trim” scope avoids the hazard if existing painted materials will be disturbed.
For new construction, the pre-1978 lead-paint branch may not apply in the same way, but the project still has product-cutting, falls, sharp-edge, dust, ladder and weather exposure hazards. Fiber-cement installation can involve product-specific cutting and dust-control requirements; the homeowner should assign cutting and installation to the qualified crew and require them to follow the current James Hardie safety and technical documents. Do not create a homemade PPE or cutting method from this guide. The James Hardie technical documentation hub is the correct place to retrieve the current product documents.
Falls from ladders, scaffolds or elevated openings, structural changes to headers or backing, electrical or utility conflicts behind existing walls, and concealed water damage all require qualified professionals. The homeowner can observe from a safe location, photograph labeled conditions, ask for the detail and verify that the promised document is in the closeout package. The homeowner should not climb an unprotected opening, cut fiber-cement without the required controls, alter a header, remove a flashing layer, or disturb suspect paint to investigate a quote.
Read a failure as a handoff problem first
An opening problem can be blamed on the visible trim because trim is what the homeowner sees. The source evidence cautions against that shortcut. VERSATEX puts its window surround after the window area is prepared and flashed in its cited sequence. James Hardie says the Trim-Over method still requires local-code compliance and flashing over WRB at specified corners. AZEK’s drip-edge product is described as assisting moisture management, not as a complete wall drainage assembly. These details mean the investigation should trace the layers and documents, not begin with a material ranking.
When a joint opens, collect the exact product, run length, exposure, color, installation temperature if recorded, joint type, adhesive, fastener record, backing, photos and weather timing. When a coating peels, collect the coating brand, LRV, surface preparation, cure conditions, exposure date, paint date and warranty wording. When water appears, collect the window model, flashing sequence, WRB, siding method, trim profile, sealant and photographs before repair. The goal is to let the responsible professional distinguish design, installation, product, finish and maintenance issues.
Include a “stop” branch in the contract
The contract should identify conditions that stop concealment or finish work, such as:
- missing or conflicting window and trim installation documents;
- an unverified substrate where the specified fastener path cannot be demonstrated;
- a flashing or WRB layer that is not visible at the agreed hold point;
- a trim model substituted without written review;
- an unapproved dark-color or field-coating condition;
- a damaged board or unit that was installed without a documented disposition;
- an unresolved AHJ comment or professional design conflict;
- an existing-home hazardous-work question that has not been assigned.
This is not an instruction to the homeowner to direct a jobsite crew. It is a contract and project-control request to the GC or responsible professional. The party who can safely stop and restart the work should be named. The record should show the issue, opening IDs affected, proposed correction, revised document, approval, and verification photo.
The next decision after a failure branch is whether to repair, replace, accept with a documented limitation, or revise the entire opening detail. A surface patch may be reasonable for a cosmetic issue and inappropriate for a water-path issue. The professional who owns the relevant layer should explain the basis and warranty consequence before the homeowner approves the repair.
Record the decision and verify the installed opening #
The final decision record should state the selected material and exact opening detail, why it fits the project, what remains conditional, who owns each handoff, what the quote includes, and how future maintenance will be recognized. A design freeze is complete when the future installer can act from the record and the future homeowner can maintain the result without guessing which product was used.
Use a one-page decision record per opening group
Copy this structure into the project decision log. It is a practical planning record, not an official inspection, legal document, laboratory report, engineering calculation, or manufacturer warranty.
Opening group:
Opening IDs:
Project address and AHJ:
New construction or replacement:
Window/door model and installation method:
Wall assembly and WRB:
Trim manufacturer, product line, profile and dimensions:
Trim material selected: cellular PVC / fiber-cement / painted wood / other specified product
Exposure and color:
LRV and coating path, if applicable:
Sill, jamb, head and drip detail reference:
Movement allowance and joint map reference:
Substrate and fastener path:
Sealant, adhesive and compatibility record:
Initial normalized quote:
Included accessories and labor:
Explicit exclusions and unresolved allowances:
Substrate warranty document:
Finish warranty document:
Installation/workmanship warranty:
Responsible parties: designer; window/door installer; WRB/siding installer; trim installer; painter; GC; AHJ contact if applicable
Pre-concealment verification date and record:
Finish date and coating record:
Closeout photos and product records:
Maintenance trigger and next decision:
The last line should be a trigger, not an unsupported schedule. Examples are “inspect after the first season and after any impact,” “review when coating failure is visible,” “retain exact touch-up product,” or “ask the manufacturer or installer before changing the finish.” If the product’s current care guide gives a specific cleaning method or inspection instruction, copy that instruction with its source and product scope. Do not convert a marketing statement into a calendar promise.
Verify each layer in the right order
Use the opening ID on every photo, document and punch-list item. At the pre-concealment hold point, the responsible professional should verify:
- the opening matches the approved unit and dimension record;
- the sill, jamb and head water-management layers follow the coordinated detail;
- the WRB and flashing laps are in the specified relationship;
- the substrate or backing is present where the trim fasteners must land;
- the trim profile, projection, returns and joint locations match the drawing;
- the material is the approved model and has not been substituted;
- exposed cut edges, adhesives, sealants and fasteners follow the exact product instructions;
- the siding sequence and trim sequence match the named method;
- the finish path is compatible and its timing is recorded;
- the photographs and document records are stored before the next layer conceals the work.
This list does not replace an AHJ inspection or a professional inspection. It helps the owner ask a precise question: “Which document and person verify item 3 for W-04 before siding covers it?” That question is more valuable than asking whether the trim is “waterproof” or “maintenance free,” phrases that rarely identify the actual handoff.
Compare warranty scope with the event that might fail
Create a warranty map with separate columns:
| Possible event | Product substrate | Field finish | Installation/workmanship | Window/door unit | WRB/flashing | Maintenance or abuse |
|---|---|---|---|---|---|---|
| Board cracks or splits | Ask current product warranty | Usually separate | Ask installer/GC | Usually separate | Usually separate | Check cause and exclusions |
| Paint peels or fades | Check exclusion | Ask coating maker and painter | Ask prep/application scope | Separate | Separate | Record color, LRV and cleaning |
| Joint opens | Check product method | Check coating bridging | Ask trim installer | Maybe interface-related | Investigate water path | Record movement and exposure |
| Water enters at head | Usually not assumed from trim label | Not the primary layer | Investigate | Window detail | WRB/flashing scope | Maintenance only after cause resolved |
| Trim is damaged during later work | Check exclusions | Check touch-up path | Assign trade causing damage | Maybe | Maybe | Record repair and approved materials |
The point is not to predict whether a claim will be accepted. The point is to avoid a contract that promises “the trim is warranted” without identifying what that means. AZEK’s guide explicitly excludes performance of painted finishes applied by the original purchaser or a third party in the cited language. VERSATEX says it is not liable for paint used on its products or the results. James Hardie separates applicable substrate and ColorPlus finish warranties in its Trim-Over language. Those three records should change the questions in the contract.
Choose the next decision from the unresolved fields
At design freeze, every open item should have one of four statuses:
- Closed: exact product, detail, quote, responsibility and evidence are recorded.
- Conditionally closed: selected subject to a named professional or supplier confirmation with a due date.
- Priced allowance: unresolved, but the quantity, basis and owner of the final price are recorded.
- Stop: cannot proceed without a corrected drawing, document, safety decision, AHJ direction or qualified professional review.
Do not call an item “closed” because a sample was approved. A sample confirms appearance; it does not confirm substrate, joint, flashing, finish, warranty or labor scope. Do not call a quote “fixed” because the material name appears on the first page. The quote must identify the opening detail and exclusions.
The next decision can be sent to the correct Brictale journey topic. Questions about the exterior package belong in materials and systems; the visual opening brief and proportions belong in design and layout; quote allowances belong in planning and budget; responsibility and bid scope belong in choosing your team; pre-concealment verification belongs in managing the build; and the final product and maintenance record belongs in handover and ownership. Those are journey links, not a request to route the reader into a contractor advertisement.
Originality brief: what this guide adds and how to check it
Current answers: Short comparison pages usually label cellular PVC, fiber-cement, wood, composite or aluminum as low- or high-maintenance choices. Manufacturer documents contain the useful constraints, but the information is fragmented by product. An owner can easily read a movement rule, a paint rule, or a warranty headline without seeing the opening handoff.
Missing decision: The homeowner needs to choose and specify a trim material and opening detail that design, window, WRB/siding, trim, finish, warranty and maintenance responsibilities can share before contract award.
Original contribution: This guide’s “Opening-trim handoff matrix and illustrative 30-year worksheet” compares the decision at the opening level. It records linear feet, profile, substrate, exposure, finish, flashing interface, quote scope, warranty boundary, maintenance events and responsible handoffs. It uses manufacturer source claims for technical fields and reader-entered values for cost fields. The illustrative geometry example shows units and a perimeter calculation; the 30-year formula tests repaint, quote, exposure and replacement sensitivities without inventing rates or quotes.
Method: Record each opening's dimensions, linear feet, profile, substrate, exposure, finish, flashing interface, quote fields, warranty documents, and responsible handoff. Use manufacturer instructions for movement, joints, fastening, finish, and opening interfaces; calculate only entered costs and run repaint, quote, and exposure sensitivities. For each opening group, match technical cells to the exact current manufacturer instructions, enter only actual project quantities and quoted costs, then calculate T30 = Q0 + P × Cpaint + R × Creplace + A and change one reader-entered sensitivity at a time. This method is a comparison and recordkeeping procedure, not a product test.
How to check it: Take one actual opening group from the project. Verify the exact product model and current documents. Ask the designer and window/WRB/siding/trim professionals to complete the layer sequence, joint map, substrate and responsibility fields. Ask each bidder to price the same row. Enter only the actual quoted or owner-approved values. Change one sensitivity input at a time. If a result depends on a blank field, mark the choice conditionally closed or stop it. Recheck local requirements with the AHJ and qualified professionals.
Limitations: This is an illustrative planning tool, not a cost survey, code determination, engineering review, product test, contractor quote, or prediction of service life. Exact model instructions, local code, climate or fire-zone requirements, availability, labor, and warranty terms must be rechecked for the proposed project. The matrix is also not firsthand testing, an interview study, a code document, or a product endorsement. The source set does not establish a national ranking among cellular PVC, fiber-cement and painted wood. Manufacturer instructions and warranties can change and can differ by product, climate zone, profile, finish and installation method. The reader must recheck the exact current documents and the actual jurisdiction.
Final selection test
Select a material for an opening group only if you can answer yes to all of these questions:
- Is the exact product, profile, color and finish path named?
- Is the opening schedule based on the correct measurement plane and unit dimensions?
- Is the substrate and fastener path verified by the responsible professional?
- Is the sill, jamb, head, WRB, flashing, siding and trim relationship drawn?
- Are movement allowances, joint locations and sealant or adhesive rules recorded?
- Are manufacturer-specific LRV, paint timing, cure and finish conditions recorded?
- Is the product warranty separated from finish and workmanship responsibility?
- Does the quote include the same materials, labor, access, finish, removal and exclusions as its competitor?
- Is the local jurisdiction and any fire, structural, wind, permit or hazardous-work question assigned?
- Is there a pre-concealment hold point and a closeout record by opening ID?
- Can the homeowner state the next maintenance trigger and who to call?
If any answer is no, the most useful next move is to close that specific gap. Ask for a corrected drawing, an exact product document, a substrate verification, a coordinated flashing detail, an itemized quote, a warranty clarification, or a qualified professional decision. Do not make the material appear decided by deleting the unresolved line.
The final choice may be cellular PVC, fiber-cement, painted wood, or a specified combination. The evidence supports the process, not a national ranking: use the exact product instructions, preserve the water-management and safety handoffs, calculate only entered costs, and freeze the opening detail when another person can install, verify and maintain it from the record.
Cite this guide
Brictale. “How to Compare Exterior Window and Door Trim Materials Before Design Freeze.” Published 2026-10-07; updated 2026-10-07.
https://brictale.com/build/materials/compare-exterior-window-door-trim-materials-before-design-freeze · Read the Markdown version
Original contribution: Opening-trim handoff matrix and illustrative 30-year worksheet. A source-traceable way to compare cellular PVC, fiber-cement, and painted wood at each window and door opening without treating a substrate warranty as a finish or installation warranty.
Sources and scope
Evidence behind this page
- The AZEK Trim & Moulding Install Guide says the products should be installed using the same good building principles used for wood trim, in accordance with local building codes and the guide, and places application-specific suitability decisions with the installer; it recommends review by a licensed architect, engineer, or local building official.
AZEK Trim & Moulding Install Guide
Manufacturer installation guidance for AZEK Trim and Moulding; not a national code rule or a substitute for the authority having jurisdiction or a qualified design professional.
Accessed · Link to this claim - AZEK's guide recommends durable fasteners, says fasteners should penetrate solid wood substrate at least 1 1/2 inches, places fasteners within 2 inches of board ends, requires two fasteners on each side of a board joint, and says fasteners must hit solid framing members and a flat solid substrate.
AZEK Trim & Moulding Install Guide
General AZEK Trim and Moulding fastening guidance; exact profile, substrate, fastener and local requirements must be checked for the proposed assembly.
Accessed · Link to this claim - AZEK recommends gluing AZEK-to-AZEK joints, including window surrounds, with AZEK Cellular PVC Cement and recommends a scarf joint with two fasteners on each side rather than a butt joint for best results.
AZEK Trim & Moulding Install Guide
Manufacturer best-practice guidance for AZEK-to-AZEK trim joints; it does not establish that every opening or adhesive is interchangeable with another product.
Accessed · Link to this claim - AZEK says Trim and Moulding expand and contract with temperature changes; when properly fastened it instructs the installer to allow 1/8 inch per 18 feet for expansion and contraction, and warns that dark colors may increase movement.
AZEK Trim & Moulding Install Guide
Manufacturer's stated allowance for AZEK Trim and Moulding under its described installation conditions; not a universal movement value for all cellular PVC products or profiles.
Accessed · Link to this claim - AZEK says Premium Trim does not require paint for protection, gives LRV-based paint guidance, and states its Trim and Moulding Lifetime Limited Warranty does not cover painted finishes or coatings applied by the original purchaser or a third party.
AZEK Trim & Moulding Install Guide
AZEK Premium Trim and PaintPro guidance in the cited guide; exact product and warranty document control for a specified model and finish.
Accessed · Link to this claim - The AZEK Trim & Moulding Install Guide says AZEK PaintPro Trim must be painted within 180 days of outdoor UV exposure and gives separate coating guidance for PaintPro; the same guide says the Lifetime Limited Warranty does not cover painted finishes or coatings applied by the original purchaser or a third party.
AZEK Trim & Moulding Install Guide
AZEK PaintPro Trim timing and warranty language in the cited guide only; do not generalize the 180-day condition to AZEK Premium Trim or another product line.
Accessed · Link to this claim - AZEK describes its Integrated Drip Edge as a two-piece trim product designed to assist moisture management around doors and windows, routed to accept a drip edge, with an integrated nailing flange; the product page says it does not require paint for protection and identifies a Lifetime Limited Warranty.
Integrated Drip Edge Trim | AZEK Exteriors
Product-page description of one AZEK Integrated Drip Edge product; it does not replace the window, WRB, flashing, siding, or local code instructions for an opening.
Accessed · Link to this claim - The VERSATEX Contractor Handbook says a window area should be prepared and flashed in accordance with AAMA method A1 or local building-code requirements; its Stealth window surround sequence recommends a sill, jamb and header arrangement with drip flashing at the header.
VERSATEX Contractor Handbook, version 2.8.24
VERSATEX Stealth window surround installation guidance; AAMA method and local requirements are not replaced by this article.
Accessed · Link to this claim - For the cited VERSATEX Stealth window surround, the handbook calls for stainless steel 8d annular or spiral fasteners designed for wood trim and siding, at least 1 1/4 inches into the substrate, with fasteners no more than 16 inches on center.
VERSATEX Contractor Handbook, version 2.8.24
The handbook's Stealth window surround detail; not a universal requirement for every VERSATEX profile, other trim material, or opening condition.
Accessed · Link to this claim - VERSATEX says southern exposures or areas in direct sunlight are more prone to movement, recommends more fasteners in combination with expansion joints, and recommends placing expansion/contraction joints in inconspicuous locations along long runs; it describes shiplap joints as a superior option for long runs.
VERSATEX Contractor Handbook, version 2.8.24
VERSATEX trim guidance for its products and long runs; it is not a climate-independent rule for other cellular PVC systems.
Accessed · Link to this claim - VERSATEX says its trim does not require painting for protection, recommends 100% acrylic latex or acrylic latex with urethane additive, states standard paints should have an LRV of 50 or greater, warns that some dark-color choices can void the warranty, and says it is not liable for paint or its results.
VERSATEX Contractor Handbook, version 2.8.24
VERSATEX Trimboard painting guidance and warranty boundary; exact board, coating, color and current warranty must be verified before specification.
Accessed · Link to this claim - The VERSATEX handbook says VERSATEX can be installed at or below grade because it does not wick moisture, lists moisture-prone applications including garage-door jambs and ground contact, and provides cleaning guidance while advising a test on an inconspicuous area.
VERSATEX Contractor Handbook, version 2.8.24
Manufacturer claims for VERSATEX products in the cited handbook; not a blanket approval for a specific project, coating, sealant or code condition.
Accessed · Link to this claim - The VERSATEX handbook publishes product-specific tested properties for its Stealth material, including a coefficient of linear expansion of 3.24 x 10^-5 in/in/°F and water absorption below 0.50 percent, alongside the cited test methods.
VERSATEX Contractor Handbook, version 2.8.24
Published Stealth product-property table and its test methods; do not generalize the values to every VERSATEX profile or other cellular PVC product.
Accessed · Link to this claim - The VERSATEX TrimLast Installation Guide says TrimLast must be painted within 180 days of outdoor exposure and that failure to follow that instruction will void the warranty; it also gives LRV and coating guidance for the named product.
TrimLast Installation Guide | VERSATEX
VERSATEX TrimLast product and warranty instruction only; do not generalize the 180-day requirement to other VERSATEX products or cellular PVC trim.
Accessed · Link to this claim - James Hardie's current Hardie Trim page describes region-specific formulation through its Engineered for Climate positioning and states a 30-year non-prorated, transferrable substrate warranty for Hardie Trim Boards; exact availability can vary by local dealer.
Hardie Trim Boards | James Hardie
Current U.S. Hardie Trim Boards product page; it is not a promise that every texture, color, climate-zone product, or finish is available in every jurisdiction.
Accessed · Link to this claim - James Hardie's current Hardie Trim Boards product page describes ColorPlus Technology as a factory-applied, baked-on color that is cured between coats.
Hardie Trim Boards | James Hardie
James Hardie's current U.S. Hardie Trim Boards product-page description of ColorPlus Technology; it does not establish the finish scope, availability or warranty for every product, color, climate zone or field-applied coating.
Accessed · Link to this claim - James Hardie says its Trim-Over Method installs siding before trim and that this sequence eliminates most caulking; the page also says the method must follow James Hardie installation instructions and local building code.
Hardie Trim-Over Method for Faster Siding Installation | James Hardie
James Hardie's named Trim-Over installation method and stated sequence; this is not a claim that all caulking is eliminated or that the method applies to other siding systems, products, openings or jurisdictions without the exact current documents.
Accessed · Link to this claim - James Hardie's Trim-Over page says the method installs siding before trim, is approved under the applicable HZ5 and HZ10 siding and trim warranties with a 15-year ColorPlus finish warranty, requires following local building code and placing flashing over WRB at inside and outside corners, and has a window application overview.
Hardie Trim-Over Method for Faster Siding Installation | James Hardie
James Hardie's named Trim-Over installation method and applicable warranty language; use the exact current installation documents for the proposed siding, trim, window and climate zone.
Accessed · Link to this claim - EPA says pre-1978 homes are more likely to contain lead-based paint, that activities such as replacing windows can create hazardous lead dust and chips, and recommends a certified and trained lead-safe contractor for covered renovation, repair and painting work.
Renovation, Repair and Painting (RRP) Program: Consumers | US EPA
U.S. EPA consumer guidance for pre-1978 renovation, repair and painting work; state, tribal and local program requirements may add requirements, and this is not a determination that a particular project is covered.
Accessed · Link to this claim - AZEK's current Warranty & Care page identifies its siding, trim and moulding products as backed by a Lifetime Limited Warranty and links the current Trim & Moulding Warranty documents and claim resources.
Warranty & Care | AZEK Exteriors
Current AZEK Exteriors warranty hub; the linked warranty document and exact product terms control, and a warranty headline does not cover excluded finishes or workmanship automatically.
Accessed · Link to this claim