How Much Window Area Should I Plan for Each Room in a New Home?
Compare low, middle, and high window-area schemes by room, facade, daylight, glare, heat gain, shading, and local review before design freeze.
The short answer
Do not choose one window percentage for the whole house. For each room, record floor area, gross exterior wall area, facade azimuth, privacy and view needs, then compare low, middle, and high glazing schemes using WWR = glazing area ÷ gross exterior wall area. Use VT for daylight, SHGC for solar heat, U-factor for heat flow, and shading as a design dependency. Have the architect, energy modeler, and project jurisdiction review the selected scheme before design freeze.How Much Window Area Should I Plan for Each Room in a New Home?
Do not choose one window percentage for the whole house. For each room, record floor area, gross exterior wall area, facade azimuth, privacy and view needs, then compare low, middle, and high glazing schemes using WWR = glazing area ÷ gross exterior wall area. Use VT for daylight, SHGC for solar heat, U-factor for heat flow, and shading as a design dependency. Have the architect, energy modeler, and project jurisdiction review the selected scheme before design freeze.
The practical answer is a room-by-room glazing budget, not a whole-house percentage #
The useful decision is not “What percentage of my house should be windows?” It is “For this room, on this facade, with these occupants and this view, is the next increment of glass worth the added glare, heat gain, heat loss, privacy, structural, cleaning, and cost consequences?” A window budget makes that question visible while the plan can still change.
For a new home in the United States, start with a middle scheme for the rooms that need dependable daylight and a restrained scheme for rooms where privacy, glare, or solar exposure dominates. Treat those labels as comparison cases, not national design standards. A high-glazing living room may be sensible on a shaded north facade and uncomfortable on an unshaded west facade. A modest bedroom window may be adequate when it is tall, unobstructed, and paired with a second exposure, but disappointing when a neighboring building blocks the lower half.
DOE describes daylighting as a combination of window type, placement, and interior conditions, not merely window count. Its Building Science Education guidance says strategic placement can provide light while managing solar gain, glare, and overheating, and specifically identifies north and south windows as easier to control than east and west windows. Natural Light and Daylighting is useful for the design principle, but it does not provide a room-by-room percentage to copy.
The worksheet in this guide produces five decisions for every important room:
- the low, middle, and high glazing areas you are willing to compare;
- the facade or facades where that area should be placed;
- the glass performance and shade assumptions that make each option credible;
- the question that must be tested by the architect, energy modeler, or local reviewer; and
- the next handoff before the design is frozen.
The homeowner owns the priorities and approves the tradeoff. The architect or residential designer turns those priorities into a plan, checks how openings affect the envelope and structure, and coordinates the elevations. An energy modeler or architect using a suitable model tests loads, comfort, and, where relevant, daylight outcomes. The window supplier provides product-specific ratings and installation information. The builder coordinates rough openings and installation sequencing. The authority having jurisdiction (AHJ)—the actual city, county, state, tribal, or other permitting authority for the project—decides what its adopted rules require. An HOA, historic district, or private design-review body may add separate constraints; none should be assumed from a generic US rule.
This distinction matters because DOE says the United States has no single national energy code. Energy codes are adopted at the state and sometimes municipal level, become law in the adopting jurisdiction, and are implemented locally. DOE’s Building Energy Codes Program explanation supports the process, not a conclusion about your property. Until you identify the project address and AHJ, this article cannot tell you whether a particular window area is permitted, whether a historic review applies, or which compliance path your plans must use.
Before choosing area, collect the inputs that make the comparison meaningful #
You can compare window-area schemes only after recording the room, wall, sun, view, and approval inputs that determine what the glass has to do. A floor-area percentage by itself omits the wall available for windows, the direction of the wall, the height of the glass, nearby obstructions, and whether the room is occupied during the glare-prone part of the day.
Start with a room list and a freeze date
List every room that has a meaningful daylight, view, privacy, or ventilation decision. Include living and family rooms, kitchen and dining areas, bedrooms, offices, studios, bathrooms, stair halls, laundry rooms, and any room with a glass door or skylight. Mark rooms that share an exterior wall with another room; otherwise, the same wall can be counted twice when you roll the numbers up to a facade.
Add two timing fields:
- Current design stage: schematic design, design development, or a later stage.
- Decision deadline: the date after which orientation, wall lengths, openings, shade supports, and HVAC assumptions become expensive to change.
The approved opportunity is aimed at schematic design or design development. A window-area worksheet is less useful after framing, structural engineering, energy compliance documentation, window ordering, or mechanical sizing has already locked the assumptions. If the design is already permit-ready, treat this as a change-management exercise and ask the architect what can still move without rework.
Record the room’s purpose in observable terms
“More daylight” is not a sufficient input. Write what the room must support and when it will be used. A living room used at 4 p.m. in July has a different problem from a bedroom used mainly at night. An office with a monitor needs a glare strategy, not merely a larger opening. A bathroom needs privacy at the glass line. A kitchen may benefit from a bright work surface but can suffer from direct sun reflected by counters or appliances.
For each room, record:
| Input | What to write down | Why it changes the decision |
|---|---|---|
| Floor area | Square feet (ft²), measured to the convention your designer uses | Helps describe the room, but does not determine WWR by itself |
| Occupancy | Who uses it, at what times, and for what tasks | Identifies glare, privacy, heat, and daylight priorities |
| View priority | None, useful view, or destination view; note the eye height and direction | May justify a larger or lower opening, but can increase glare and privacy exposure |
| Privacy priority | Low, medium, high; note neighbors, street, bath, bedroom, or lot line | May favor higher sills, clerestories, translucent glass, screens, or less area |
| Daylight priority | Low, medium, high; note whether diffuse light is acceptable | Helps distinguish daylight from a view window or solar aperture |
| Ventilation/egress need | Which openings are intended to operate and which must remain fixed | Affects sash type, clear opening, furniture layout, and local review |
| Exterior wall segments | Width and height of each exterior wall that bounds the room | Supplies the denominator for a room-level comparison |
| Facade azimuth | True or project north reference and approximate wall bearing | Connects area to sun path and shade design |
| Obstructions | Trees, hills, adjacent buildings, porches, roof overhangs, fences | Changes actual sky exposure and direct-beam sun |
| Interior constraints | Furniture, screens, counters, artwork, HVAC registers, wall storage | Determines whether light and view are usable rather than blocked |
| Climate and site | DOE climate zone, local weather assumptions, wind, wildfire or hurricane exposure where relevant | Changes the value and risk of solar gain, shade, glass, and operability |
| Approval constraints | AHJ, adopted energy code, zoning, historic district, HOA, design review | Determines which assumptions require formal confirmation |
Do not fill an unknown input with optimism. Write “unknown—verify” for a tree canopy, future neighboring building, solar exposure, or historic-district rule. An explicit unknown is a handoff; a guessed value can become an untraceable design assumption.
Measure the wall area consistently
For this planning worksheet, use the gross exterior wall area of the wall segment serving the room before subtracting openings:
Gross wall area = exterior wall width × wall height
If a room has two exterior walls, calculate each segment separately and add them. If only part of a wall belongs to the room, use that part. Keep doors and windows in the numerator if you are budgeting all fenestration, or keep the categories separate and state the choice. The DOE Building Energy Codes Program defines WWR as fenestration area divided by gross wall area and notes that the ratio can be limited by the applicable code and compliance path. DOE’s WWR data-collection definition is a useful formula reference; it does not turn this room worksheet into a permit calculation.
Use one area convention throughout. “Window area” might mean rough-opening area, frame-to-frame unit area, visible glass area, or the area of the complete fenestration assembly. Those numbers are not interchangeable. For the comparison stage, choose one convention—preferably the convention your architect and energy modeler use—and label it on every sheet. Later, the window schedule and energy model need the specified product and actual rated size.
Determine orientation from the wall, not from the room name
A south-facing living room and a south-facing bathroom share a sun direction but not a useful glazing target. Conversely, a room called “front bedroom” may have a different solar exposure on every lot. Record the bearing of each exterior wall as an azimuth, such as 0° north, 90° east, 180° south, or 270° west, plus diagonal exposures such as southeast. Use the project’s survey or site plan when possible. A phone compass can be a preliminary observation, not the final basis for a shade angle or energy model.
DOE’s daylighting guidance describes south windows as useful for winter sun in the United States, north windows as a source of more diffuse daylight with less glare and summer heat, and east and west windows as more difficult because of excess heat and glare. Energy 101: Daylighting gives the broad principle. Latitude, season, local horizon, overhangs, tree leaves, neighboring buildings, and room schedule can reverse the practical preference, so use the orientation label to ask a better question rather than to assign an automatic percentage.
Identify who must sign off on each input
Make the responsibility visible before the design meeting. The homeowner is usually best positioned to answer furniture, privacy, view, maintenance, and daily-use questions. The architect or designer should own the geometric wall and opening schedule. The energy modeler should own the model inputs and report what was actually tested. The window supplier should own the product data for the candidate unit, including the NFRC-rated values at the specified size where available. The builder should confirm constructability, sequencing, flashing, and the opening details in the contract documents. A structural engineer may need to review large openings, concentrated openings, headers, shear-wall effects, and connections. The AHJ and any private reviewer decide their own approval requirements.
Create a short input register with columns for input, value, source, owner, date, and status. “South wall” can have source “survey plan, sheet C1.1.” “SHGC 0.27” can have source “NFRC label for product and size.” “No exterior shade” can have owner “architect” and status “unresolved.” This register is more valuable than a polished elevation that hides its assumptions.

Calculate WWR transparently, then compare low, middle, and high schemes #
WWR is a comparison ratio, not a design verdict. Calculate it as glazing area divided by gross exterior wall area, show the units, and keep the room and facade denominators separate. Then compare at least three illustrative schemes so the homeowner can see what is gained, what becomes harder, and which assumption must be verified next.
The formula and a worked example
Use:
WWR (%) = glazing area (ft²) ÷ gross exterior wall area (ft²) × 100
Suppose an illustrative living room has 40 linear feet of exterior wall and a 9-foot wall height. Its gross exterior wall area is:
40 ft × 9 ft = 360 ft²
If the proposed glazing area is 54 ft²:
54 ft² ÷ 360 ft² × 100 = 15% WWR
That 15% is not a recommended national target. It is simply a transparent middle case for discussion. The actual area may include one picture window, several smaller units, a glazed door, or a combination. Shape, sill height, head height, and visible glass can change the room experience even when the area remains 54 ft².
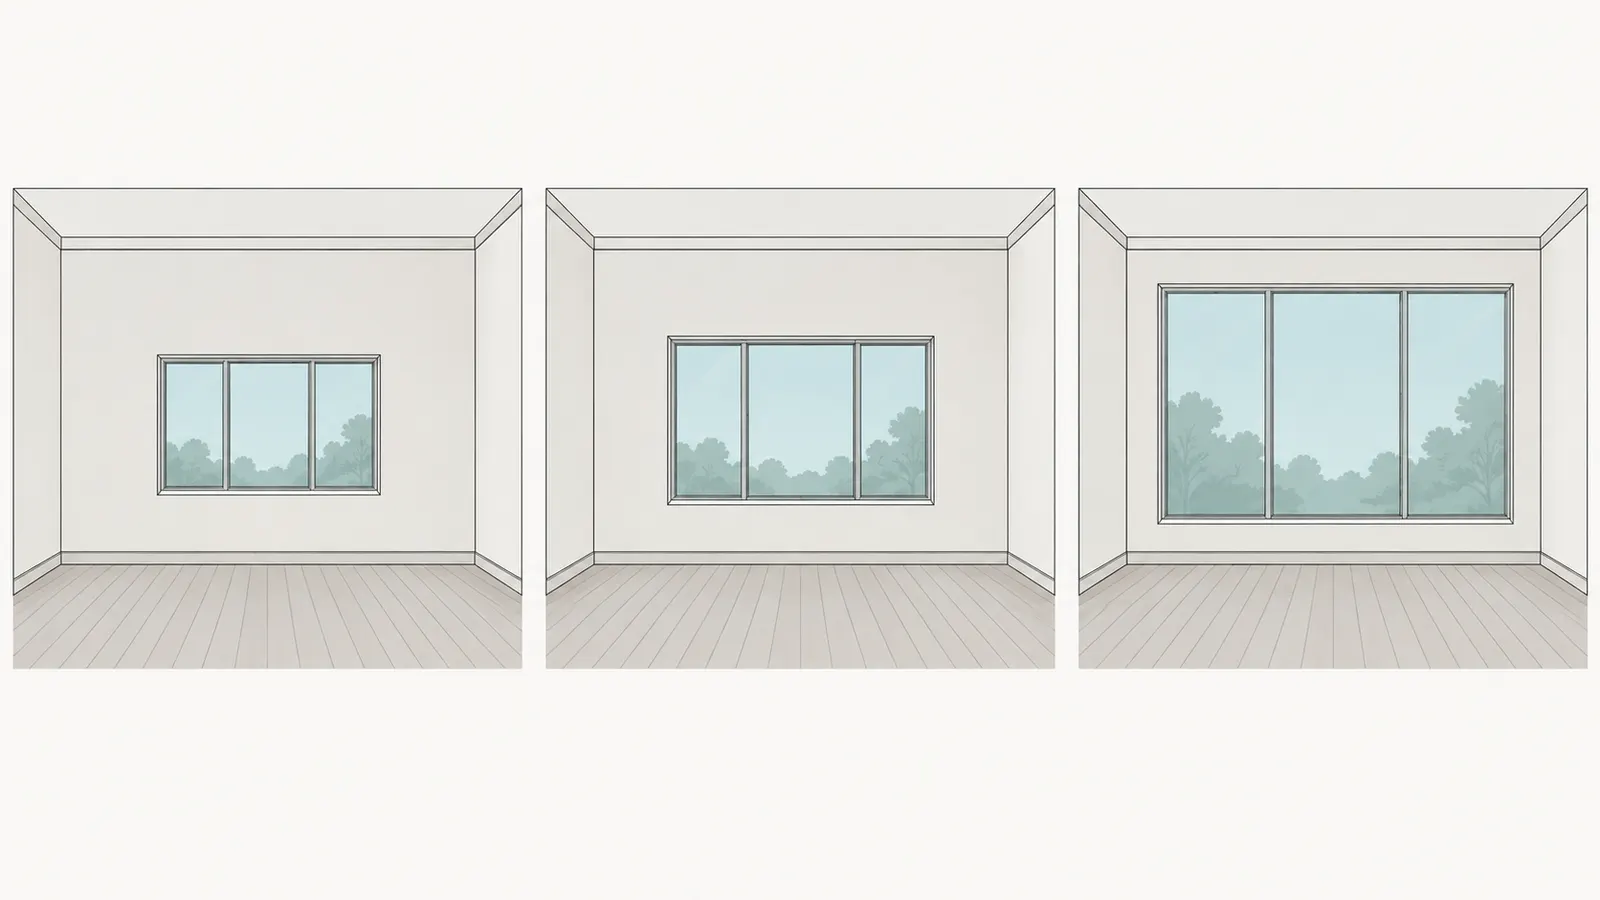
Illustrative low, middle, and high room schemes
The table below is a modeled comparison example created for this worksheet. The areas are not measured homes, code thresholds, or performance results. They use a 9-foot gross wall height, one exposed wall segment per room, and the worksheet’s consistent fenestration-area convention. The point is to expose the calculation and the handoff, not to prescribe a percentage.
| Illustrative room | Floor area | Gross wall basis | Low area / WWR | Middle area / WWR | High area / WWR | First question to resolve |
|---|---|---|---|---|---|---|
| Living room | 320 ft² | 40 ft × 9 ft = 360 ft² | 36 ft² / 10% | 54 ft² / 15% | 72 ft² / 20% | Can the chosen facade be shaded during the occupied afternoon? |
| Kitchen/dining | 180 ft² | 30 ft × 9 ft = 270 ft² | 27 ft² / 10% | 40.5 ft² / 15% | 54 ft² / 20% | Will counters, cabinets, and direct sun make the work area uncomfortable? |
| Primary bedroom | 180 ft² | 18 ft × 9 ft = 162 ft² | 16.2 ft² / 10% | 24.3 ft² / 15% | 32.4 ft² / 20% | What privacy and blackout strategy works at the actual neighbor-facing wall? |
| Home office | 120 ft² | 18 ft × 9 ft = 162 ft² | 16.2 ft² / 10% | 24.3 ft² / 15% | 32.4 ft² / 20% | Can the screen face away from direct sun, or is exterior control required? |
| Bathroom | 80 ft² | 9 ft × 9 ft = 81 ft² | 8.1 ft² / 10% | 12.2 ft² / 15% | 16.2 ft² / 20% | Can privacy be maintained without relying on blinds that stay closed? |
The table deliberately gives each room the same low/middle/high WWR values to make the arithmetic easy to audit. In a real design, the scheme may not use the same ratio. A bathroom may choose a small high window or clerestory for privacy while a living room uses more area for a view. A west-facing office may remain in the low case even if a north-facing bedroom uses the middle or high case. The comparison becomes useful when the ratio is treated as a starting variable that can change by facade and room.
Keep the numerator honest
If a room has a 36 ft² window but 8 ft² is a frame and 28 ft² is visible glass, you have two possible numerators. The worksheet may use 36 ft² to coordinate with a rough opening or product schedule, while a daylight discussion may be more interested in 28 ft² of visible glass. Do not substitute one silently. Write:
- Fenestration area: 36 ft², used for this planning WWR;
- Visible glass area: 28 ft², used as a daylight discussion input;
- Frame/sash area: 8 ft², retained as the difference;
- Measurement status: illustrative until the specified unit and size are selected.
Include glass doors and skylights in a whole-house fenestration total if that is how the energy or code documentation defines the project. For the room decision, show them as separate line items when their function or orientation differs. A sliding glass door is also an access and egress element; a skylight is a roof aperture with a different solar exposure; neither should disappear inside a generic “window count.”
Use a facade ledger to prevent double counting
Make a second table by facade. For each north, northeast, east, southeast, south, southwest, west, and northwest wall, list the total fenestration area, the rooms served, the shade type, and whether the area is fixed or still adjustable. Compare the sum of the facade ledger with the sum of room sheets. If the numbers disagree, stop the design review and reconcile the wall assignment before anyone models HVAC or orders windows.
This is especially important for open-plan rooms. A living/dining/kitchen plan may be one daylight zone but three uses. Allocate each exterior wall segment once, then assign the glazing to the room or zone that receives the opening. If an opening sits at a boundary, record the allocation rule. The goal is not mathematical precision beyond what the schematic plan supports; the goal is to prevent a plausible-looking number from carrying an invisible double count.
Sensitivity: wall height and area can change WWR without changing the window
WWR is sensitive to the denominator. In the living-room example, 54 ft² of glazing against 40 ft of wall gives these outcomes:
| Assumption | Gross wall area | WWR for the same 54 ft² glazing |
|---|---|---|
| 8 ft wall | 40 ft × 8 ft = 320 ft² | 16.9% |
| 9 ft wall | 40 ft × 9 ft = 360 ft² | 15.0% |
| 10 ft wall | 40 ft × 10 ft = 400 ft² | 13.5% |
The window did not change. The ratio changed because the gross wall area changed. This is why a website answer that gives one WWR number without naming the wall convention is not enough for design. Record wall height, roof or floor intersections, and whether the window is being measured as an assembly or visible glass.
Sensitivity: area and VT are different levers
VT, or visible transmittance, describes how much visible light passes through the glazing. DOE says a higher VT generally admits more daylight, while SHGC describes solar heat and U-factor describes heat flow. DOE’s window guidance provides those distinctions. NFRC’s Certified Products Directory lets a homeowner verify product-label U-factor, SHGC, and VT values for a specified product. NFRC’s Certified Products Directory is a place to check the rating record; it is not evidence that a particular room will meet a daylight or comfort target.
For a simple screening illustration, define a non-predictive “visible-area proxy”:
Visible-area proxy = glazing area × VT
Compare two hypothetical living-room products:
- Middle scheme: 54 ft² × VT 0.60 = 32.4 ft² proxy;
- High scheme: 72 ft² × VT 0.45 = 32.4 ft² proxy.
The equal proxy does not mean equal daylight. Window height, sky view, frame layout, interior reflectance, shading, neighboring obstructions, and occupant position all matter. It does show why more glass is not automatically more useful daylight. A higher area with lower VT may also change glare and solar gain differently from a smaller area with higher VT. Use the proxy only to ask the modeler or product team for a more appropriate test.
Do not use glazing area × SHGC as an annual heat-load calculation. It ignores solar angle, time, shade position, orientation, climate, window geometry, and opaque-envelope effects. At most, it can be a flagged comparison input in a design meeting: “The high-west scheme has more aperture and relies on low SHGC plus exterior control.” The actual consequence belongs in project-specific energy and comfort modeling.
Let room function and facade orientation change the scheme #
A room should receive more glass only when the view, daylight, ventilation, or solar goal is worth the added dependency on glazing, shading, privacy, and mechanical design. Orientation changes that tradeoff: north tends to favor diffuse light, south can pair with horizontal shading, and east/west usually demand more direct-beam control.
Living and family rooms: protect the occupied view
For a living room, start by drawing the seated eye line, the preferred view, the television or display wall, and the furniture that will remain in front of the glazing. A high window may deliver sky light while preserving privacy; a low picture window may deliver a destination view but create a strong bright rectangle in the field of vision. If the room is used in the evening, the interior becomes visible from outside unless privacy is addressed.
A middle scheme is often a useful comparison case where the facade has a good view and a credible shade strategy. Move to high only after answering four questions:
- Which hours is the room occupied during direct sun?
- Can exterior or architectural shading block the beam without destroying the view?
- Where will the heat go when the shades are closed—into the room, into the shade cavity, or outside the envelope?
- Does the HVAC and comfort model test the same glass and shade behavior?
PNNL notes that windows perform multiple functions—access, daylight, connection to outdoors, solar heat gain, and ventilation—while also causing potentially large heat loss or heat gain. PNNL’s shading guide supports treating the living-room window as a coordinated system rather than an isolated opening.
On north exposure, a larger area may be attractive for diffuse daylight and view with less direct solar concern, but an obstruction can remove much of that advantage. On south exposure, a high or middle scheme may work with a properly designed overhang, although winter sun and summer shade must be modeled for the actual latitude. On west exposure, make the low scheme the default comparison until the architect demonstrates a credible exterior or combined control strategy. This is not a ban on west glass; it is a prompt to price and verify the control that makes it livable.
Kitchen and dining: separate daylight from work-surface glare
Kitchen windows interact with counters, backsplashes, cabinet runs, appliances, and the person standing at the work surface. A window behind a sink may be valuable for a view, but a low afternoon sun can reflect off a glossy counter or appliance. A high clerestory can admit diffuse light while preserving upper cabinets and privacy. A dining area may benefit from a larger opening because occupants look outward, but the table may also become a glare surface.
Map the task surfaces before increasing area. Mark where the cook faces, where food preparation occurs, and where the dining table will sit. Ask whether the chosen opening has an operable shade that can be cleaned and reached. If the shade is motorized, record the control method and power route during design rather than assuming it can be added later.
The DOE guidance distinguishes VT from SHGC: VT is about visible light, while SHGC is about transmitted solar heat. The DOE FEMP window guide means a kitchen can need enough VT for useful light without accepting the highest SHGC available on a hot, exposed facade. The product choice is climate-specific, and different facades may legitimately use different glass.
Bedrooms: solve sleep, privacy, and ventilation together
Bedrooms often need daylight in the morning, privacy from neighbors, quiet, blackout control, and sometimes an operable opening. The largest area is rarely the only path to a pleasant room. A correctly placed window with a higher sill, a pair of narrower windows, a north-facing opening, or a shaded south-facing opening can serve the room better than a broad unprotected west window.
Record the wake and sleep schedule. A bedroom used by a shift worker has a different shade priority from a child’s room that needs morning daylight. Record whether the bed faces the window, whether a screen or mirror will reflect it, and whether furniture will block the lower opening. Put the privacy method in the budget: exterior landscape, screen, interior roller shade, cellular shade, translucent glazing, high sill, or a combination. “We will add blinds later” is an unresolved dependency, not a completed design.
For any room where an opening is intended to serve a code-related emergency escape or rescue function, do not size it from this article. The architect and the actual AHJ must review the applicable requirement for the project. The same is true for tempered safety glazing, fall protection, opening height, and bedroom ventilation rules; they are jurisdiction- and condition-specific. The homeowner can mark the need on the worksheet, but a qualified designer must confirm the actual dimensions and details.
Home offices and studios: treat glare as a task failure
The best office window is the one that lets the person work, not necessarily the one with the largest view. Mark the monitor position, camera position, desk orientation, and the hours of direct sun. A large west window behind a monitor can create a bright background for video calls, while a bright window in front of the monitor can create reflections. If the desk position is not fixed, test more than one layout.
Start with low and middle schemes and require an explicit shading strategy before considering high. Exterior solar screens, vertical fins, shutters, or landscape may perform differently from interior blinds. Interior control can reduce visual discomfort but may leave heat inside the room. High-performance glazing can reduce solar heat while preserving more visible transmission than a dark tint, but the actual product ratings still need to be checked.
Rutgers’ New Jersey Green Building Manual explains that glare and heat-gain reduction involves orientation, glazing, shading, lighting, mechanical systems, and interior design, and that project-specific solutions may require advanced simulation. The Rutgers glare and heat-gain guidance is a general integrated-design reference; its New Jersey example values are not national rules and are not used here as targets.
Bathrooms, laundry rooms, and private rooms: raise, filter, or relocate the aperture
High privacy does not mean no daylight. Compare a smaller conventional window, a high window, a clerestory, translucent or obscured glazing, a shaded side window, and borrowed light only where the architect confirms the wall and moisture details. Avoid choosing a large clear low window and assuming a blind will always be closed; that can produce a technically glazed room that is functionally dark.
Wet rooms also have cleaning, condensation, and maintenance consequences. Put operability, hardware reach, insect screens, exhaust location, and the ability to clean both sides on the room sheet. Do not infer that a higher condensation-resistance rating solves a ventilation or humidity problem. DOE describes condensation resistance as a product rating and separately lists ventilation, thermal comfort, maintenance, and installation considerations, so room moisture control still depends on the complete design and installation. DOE’s window-performance guidance supports that boundary.
Halls, stairs, and interior zones: consider daylight path before adding glass
A hallway that needs occasional orientation may not need the same glazing area as a room where people sit for hours. Interior zones can sometimes receive borrowed light through transoms, clerestories, or open-plan sight lines, but every such move changes privacy, acoustics, fire separation, and wall use. PNNL advises minimizing or avoiding skylights where possible because they can admit substantial summer solar heat and lose heat in winter, and it identifies north- or south-facing clerestories as an alternative in some designs. PNNL’s skylight guidance is a design option, not an approval for a particular roof.
If a skylight remains in the high scheme, make its area, shaft, orientation, shade, product ratings, cleaning access, roof integration, and model status explicit. A skylight is not simply a vertical window moved onto the roof. It receives a different solar exposure and may have a different roof, flashing, fall, and maintenance risk.
Select glass and shading as part of the area decision #
Glazing area, orientation, glass metrics, and shades are one package. If a high-area option works only when the shade is closed, record that as a comfort and daylight tradeoff. If a low-area option requires a darker glass to control solar gain, compare whether a smaller, clearer aperture or a different facade would achieve the room goal more reliably.
Read the three core ratings without mixing their jobs
Use the ratings as distinct inputs:
| Rating | What it tells you | What it does not tell you |
|---|---|---|
| U-factor | Rate of heat flow through the fenestration; lower generally means less heat flow | It does not predict a room’s heating load, surface temperature, or condensation by itself |
| SHGC | Fractional solar heat-gain behavior of the rated fenestration; lower admits less solar heat | It does not give the annual heat gain without orientation, time, shade, climate, and model context |
| VT | Fractional visible-light transmission of the rated product; higher generally admits more visible light | It does not equal daylight autonomy, useful illuminance, or glare-free daylight |
DOE says fenestration energy performance varies by climate and recommends identifying the climate zone before selecting appropriate U-factor and SHGC values. DOE’s FEMP acquisition guidance is not a shortcut to a single residential specification. It also notes that cost, structural capability, water resistance, durability, maintenance, sound, ventilation, thermal comfort, fading, and glare are important criteria beyond energy efficiency.
NFRC ratings improve product comparison when they correspond to the unit you are actually specifying. NFRC’s Certified Products Directory lets you verify the U-factor, SHGC, and VT values shown for a specified product label. Ask the supplier for the full rating record, product series, configuration, rated size, frame, spacer, glass, and any limits on combining the unit with a shade or attachment. A brochure value from one size should not be silently assigned to a different custom unit.
Match SHGC to exposure and climate, not to a slogan
Lower SHGC can be valuable on an exposed east or west window in a cooling-dominated situation, while a heating-dominated project may examine the winter value of solar gain on a well-shaded south facade. PNNL advises choosing the lowest practical SHGC for the climate in its general solar-control guide and notes that higher SHGC can be considered for south-facing windows in climates with significant winter heating loads. PNNL’s orientation and climate guidance supports a facade-specific discussion.
Do not turn that into “high SHGC is good in cold states” or “low SHGC is good everywhere.” The home may have cooling loads, winter comfort goals, adjacent obstructions, heat pumps, internal gains, or a local energy-code requirement that changes the result. Give the modeler the actual window-area scheme, product ratings, shade geometry, operating assumptions, and climate location. If you change area after the model runs, ask for the affected rooms and facades to be rerun.
Use shading to make area usable, not to hide a bad orientation
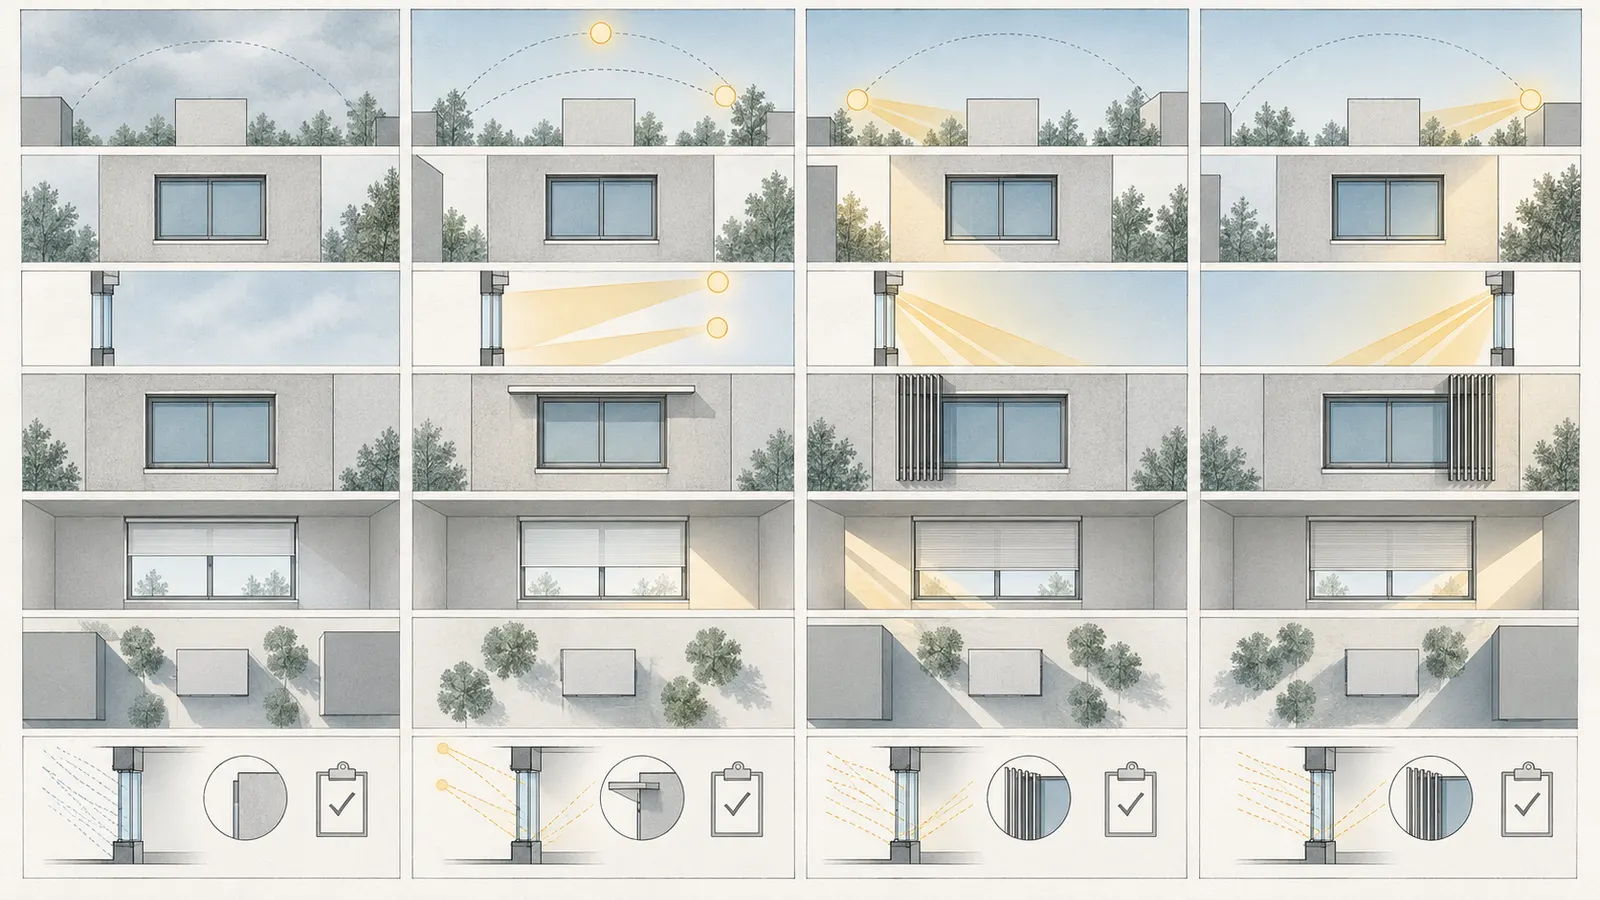
Exterior shading blocks solar energy before it enters the room. Overhangs, porches, fins, screens, shutters, trellises, and landscape can each preserve some combination of view, breeze, privacy, diffuse light, and access. Interior shades can control brightness and privacy but are often dependent on occupant action and may not prevent the same amount of heat from entering the room.
PNNL’s guide recommends focusing summertime shading first on skylights, then east- and west-facing windows, then south-facing windows, with north-facing windows generally last. It also describes horizontal overhangs as effective for properly designed south-facing windows and vertical or combined strategies as useful for lower-angle east and west sun. The PNNL orientation table and shading strategies support this sequence, but the actual shade dimensions require the project latitude, window geometry, sun angles, obstructions, and architectural coordination.
For every high or middle scheme, write the shading dependency in plain language:
- None: no direct-beam control has been selected; high exposure is a red flag.
- Architectural fixed: overhang, porch, fin, or screen is drawn and dimensioned; winter and shoulder-season behavior remains to be tested.
- Exterior operable: screen or shutter is selected in concept; wind, maintenance, view, and control need confirmation.
- Interior operable: shade is reachable or automated; heat-control performance and occupant behavior need modeling or a bounded assumption.
- Landscape: tree or shrub is proposed; maturity, ownership, irrigation, wildfire, storm, and future removal need an explicit owner and plan.
- Automated: motor, sensor, control logic, wiring, override, failure mode, and maintenance are defined; do not treat “smart shades” as a complete specification.
PNNL recommends at least one operable technology per window when appropriate and says fixed shading rarely optimizes shading, diffuse light, heat gain, privacy, ventilation, and view for all times of day and year. PNNL’s shading-system selection guidance provides the coordination principle. LBNL also describes residential modeling of window attachments and shade operation; its work used EnergyPlus and WINDOW/BSDF methods and explicitly notes that some modeled product qualities were theoretical rather than actual products. LBNL’s Residential Windows & Attachments methodology is evidence for modeling discipline, not a product guarantee.
Pre-wire only when the control responsibility is real
Motorized shading can be useful when windows are high, numerous, difficult to reach, or exposed to recurring glare. It adds power, controls, commissioning, access, replacement, and user-interface decisions. If you include it in the high scheme, record the wiring route, power source, control zone, manual override, shade position on power loss, service access, and whether the owner or a home-automation contractor maintains it. PNNL specifically advises pre-wiring above windows in new construction for potential motorized and automated shading systems. PNNL’s new-construction shading guidance supports reserving the infrastructure, not buying a particular control platform.
Electrical safety boundary for motorized shades
Homeowners must not run, connect, modify, or troubleshoot electrical wiring for motorized shades, controls, receptacles, or power sources. The U.S. Consumer Product Safety Commission says its home-wiring guide is not a repair manual and that identifying and repairing electrical defects are jobs for qualified electrical professionals. CPSC’s Guide to Home Wiring Hazards supports this safety boundary. The homeowner can state the desired shade locations and control behavior, and can ask the design team to show a route, but should not pull cable, terminate conductors, alter a circuit, open energized equipment, or diagnose a wiring fault.
Before construction, have a qualified electrical professional—qualified or licensed as required by the project jurisdiction—review the power source, circuit or low-voltage/control wiring, device locations, separation, access, and installation scope. Have the applicable authority having jurisdiction (AHJ), such as the actual city, county, state, or tribal permitting authority for the address, confirm its electrical permit, inspection, and adopted-rule requirements before work begins. The architect and builder still coordinate the shade route with wall, window, insulation, fire-separation, and finish details; that coordination does not replace the electrical professional’s review or the AHJ’s authority. If the electrical review is not complete, mark the shade dependency as unresolved and do not treat “pre-wired” or “smart-home ready” as a construction-ready specification.
An LBNL study of dynamic-window control algorithms modeled four US locations—Atlanta, Phoenix, Minneapolis, and Washington, DC—and found that climate and control approach affected modeled energy and daylight outcomes. LBNL’s dynamic-window study summary is useful because it shows why behavior and climate belong in the comparison. Its modeled results cannot predict the savings, comfort, or user acceptance of your home.
Hand the selected assumptions to the right people before design freeze #
The selected glazing scheme is ready for design freeze only when its geometry, orientation, product assumptions, shade dependencies, and approval questions have named owners and a review record. A homeowner’s “middle option” is not yet a coordinated design package.
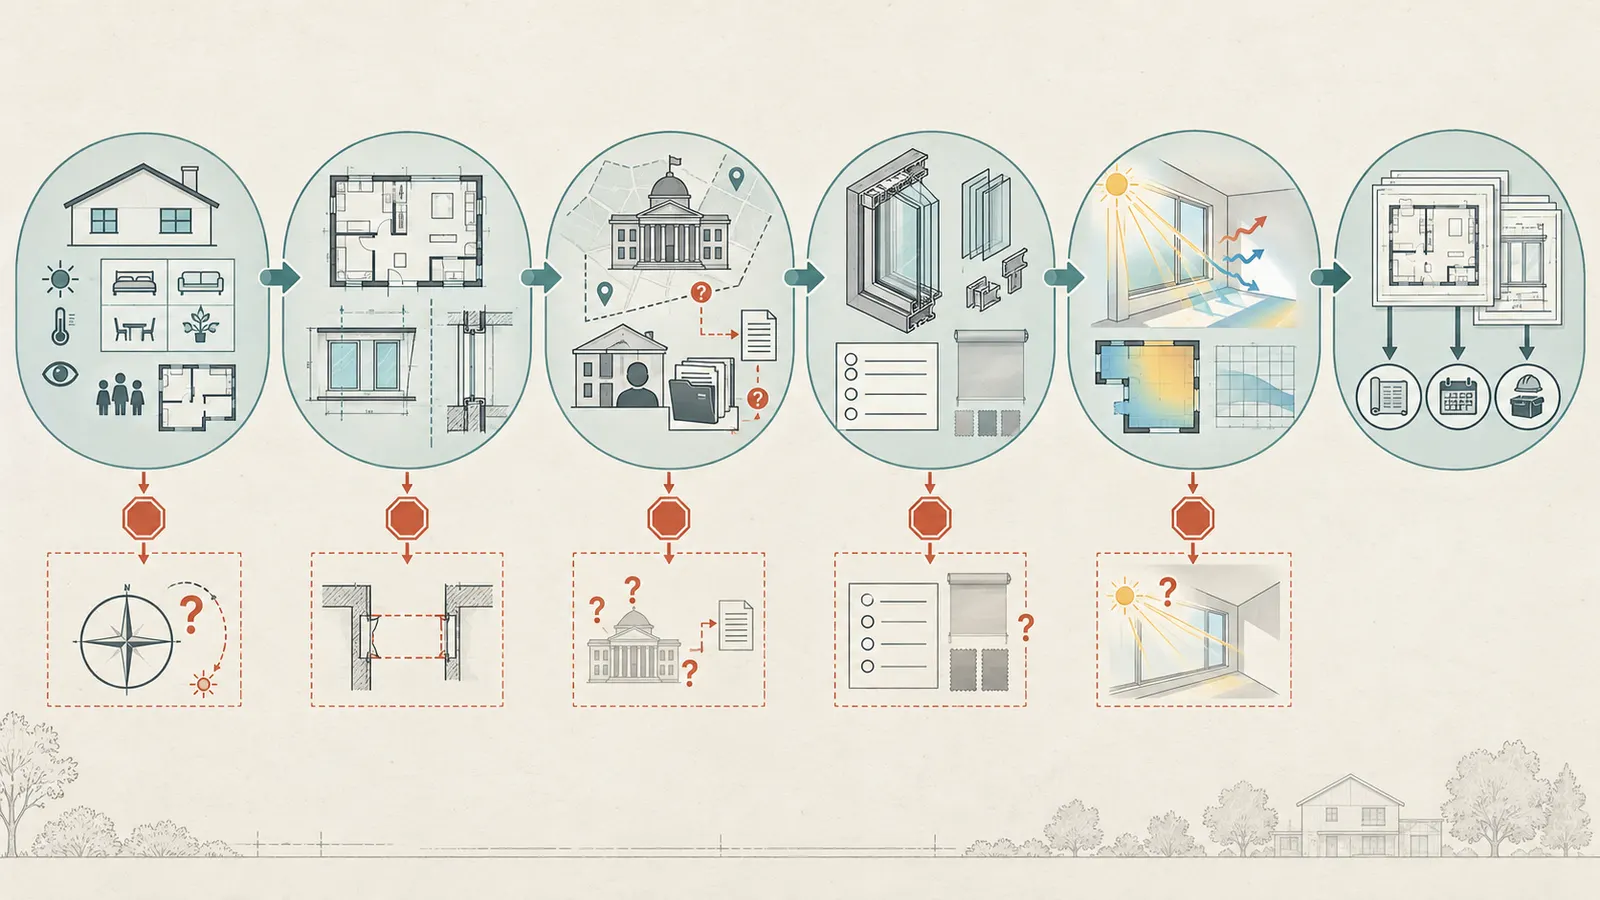
Sequence the work in six gates
Gate 1: homeowner brief. The homeowner marks each room’s use, schedule, view, privacy, glare tolerance, ventilation preference, furniture, maintenance tolerance, and preferred low/middle/high scheme. Include the reasons for any high area: view, daylight, connection to outdoors, passive solar goal, or another defined function. Do not write “modern look” as the only justification; translate it into a window form and a comfort or maintenance expectation.
Gate 2: architectural geometry. The architect or designer confirms room boundaries, exterior wall segments, wall heights, facade azimuths, sill and head heights, furniture, doors, roof overhangs, porches, and known obstructions. They should reconcile the room worksheet with elevations and the preliminary window schedule. If the design changes from one exterior wall to two, recalculate the denominator and revisit the room’s solar exposure.
Gate 3: jurisdiction and private review. Identify the actual AHJ by project address: for example, the City of X building department, Y County, State of Z, or the relevant tribal authority. Ask that jurisdiction which energy code and amendments apply, which compliance paths are available, and whether the permit set must document fenestration area, ratings, shading, or other envelope inputs. Separately identify zoning setbacks, lot-line restrictions, historic-district review, HOA covenants, and design-review requirements. Record each answer with a date and source. DOE’s code program explains why the adopted rule cannot be assumed from a national model code page. Review DOE’s code adoption guidance and use the state or local portal it points to, then confirm with the actual AHJ.
Gate 4: product and shade assumptions. The window supplier or architect supplies candidate product data for the actual size and configuration: U-factor, SHGC, VT, air leakage, condensation resistance when relevant, frame, glass, spacer, operation, and any certification record. The architect documents shade geometry and attachment assumptions. The builder reviews whether the opening, flashing, exterior control, and maintenance access can be built as drawn, while a qualified electrical professional reviews any power, circuit, low-voltage/control wiring, or connection scope. The applicable AHJ confirms the electrical permit and inspection requirements before construction. Homeowners must not run, connect, modify, or troubleshoot that wiring. If no product has been selected, label the model input as an assumption rather than implying that every window in a category performs the same.
Gate 5: project-specific analysis. The architect or energy modeler tests at least the low, middle, and high cases that are genuinely under consideration, or documents why a branch was eliminated before modeling. The model should preserve the room/facade allocation, orientation, overhangs, shade operation, product ratings, internal gains, schedule, ventilation, and HVAC assumptions. Ask for outputs relevant to the decision: heating and cooling loads, room temperature or comfort flags, peak solar exposure, glare risk, daylight metrics if required by the brief, and sensitivity to shade failure or occupant behavior. Do not accept a whole-house annual energy number as proof that a west-facing office will be comfortable.
Gate 6: freeze record and handoff. The homeowner records the chosen case, rejected cases, reasons, open risks, and next decision. The architect updates plans, elevations, window schedule, and shade details. The modeler archives the model input set and results. The supplier quotes the specified configuration, not a generic unit. The builder carries the details into the scope and confirms procurement and installation dependencies. The AHJ review proceeds through the actual jurisdiction’s permit process; the homeowner should not treat this guide as approval.
DOE describes building energy modeling as a way to quantify project-specific tradeoffs and notes that orientation, floor plans, and major facade elements are often settled early. DOE’s Building Energy Modeling 101 guidance supports running the comparison while those decisions are still movable. The article is an overview with some commercial examples, so it supports the timing principle rather than a residential performance claim.
Use a compact handoff record
For each room, deliver one row like this to the design team:
| Field | Example entry | Owner or verifier |
|---|---|---|
| Room / use | Living room; occupied 4–10 p.m. | Homeowner |
| Exterior wall / azimuth | West wall; 268°; open horizon | Architect; survey/site review |
| Gross wall basis | 40 ft × 9 ft = 360 ft² | Architect |
| Scheme selected | Middle; 54 ft² fenestration; 15% worksheet WWR | Homeowner + architect |
| Daylight/view reason | Destination view; diffuse light preferred | Homeowner |
| Product input | U-factor, SHGC, VT and rated size pending | Supplier / architect |
| Shade dependency | Exterior solar screen plus operable interior shade | Architect / builder |
| Model status | Middle run complete; high run rejected pending shade | Energy modeler |
| Local review | AHJ and HOA questions open | Homeowner / architect |
| Next decision | Approve facade and shade detail before elevations freeze | Project team |
This record is deliberately short enough to use in a design meeting. Attach the detailed calculations and product sheets rather than replacing the record with a narrative email. If a value changes, update the date and owner. The change log should say whether the change affects area, wall denominator, orientation, product metric, shade, structural opening, HVAC, or approval.
Verify the model’s boundary before trusting the result
Ask the modeler five questions:
- Did the model use the selected window area by facade, or only a whole-house total?
- Did it use actual or assumed U-factor, SHGC, VT, frame, and size values?
- Did it represent overhangs, fins, landscape, interior shades, exterior screens, and control schedules?
- Did it test the rooms at their real occupancy and equipment schedules?
- Which outputs are modeled results, which are assumptions, and which are outside the model’s scope?
LBNL’s residential attachment methodology shows why this matters: optical and attachment behavior may be represented through specialized modeling, and theoretical parameters may not map directly to products sold for a project. The LBNL methods page supports asking for the exact model inputs. Rutgers similarly recommends project-specific simulation for complex glare and heat-gain interactions. Rutgers’ integrated-design guidance supports the handoff to a qualified analyst when the decision has real comfort consequences.
Verify the built result without doing hazardous work yourself
Before construction, verify the specified units, sizes, ratings, shade hardware, wiring, and opening details against the contract documents. During construction, the builder and qualified trades should verify rough openings, flashing, sill support, anchorage, air and water-control layers, and the installation instructions. The homeowner can compare labels, room locations, and visible dimensions from a safe accessible position, but should not climb roofs, scaffolds, or unfinished framing to inspect a skylight or high window. Do not enlarge an opening, cut framing, alter a shear wall, or add a heavy shade attachment without the responsible designer and qualified builder reviewing it.
After installation, record deviations: a changed product series, a missing exterior screen, a reduced overhang, a different sill height, or a blocked view. Ask the architect or modeler whether the deviation changes the approved scheme. A product label confirms a rating for the product; it does not prove correct installation, correct shade control, structural adequacy, flashing, or local code compliance.
Use the failure cases to decide what to change next #
Most window-area mistakes are not arithmetic mistakes. They are failures to notice that the chosen area depends on a facade, a shade, a schedule, a privacy condition, or a later trade. Use the failure branch to choose whether the next move is less glass, different glass, better shading, a changed orientation, a different room layout, or professional review.
Failure: the plan uses one whole-house WWR
What to observe: Every room is assigned the same percentage, or a salesperson, article, or early sketch supplies one target without a wall convention.
How to interpret it: The number may be useful as a first budget check, but it cannot distinguish a shaded north room from an unshaded west room or a private bath from a destination-view living room.
What not to infer: Do not infer code compliance, daylight quality, or comfort from the whole-house average. A whole-house total can hide a concentrated facade problem.
Safest next step: Rebuild the room and facade ledgers. Assign every opening once, record each wall’s azimuth, and compare low/middle/high options by room.
Next decision: Which room or facade needs a project-specific model first? Usually choose the largest exposed area, the west-facing occupied room, the room with the strongest view demand, or the room with the most consequential privacy constraint.
Failure: more glass was added to solve a dark room
What to observe: The room still feels dark in the model or mock-up even after area increases, or the extra glass is low and blocked by a porch, furniture, wall, or adjacent building.
How to interpret it: Usable daylight depends on sky view, visible transmittance, window height, room depth, surface reflectance, obstructions, and shade position. The new area may be in a low-value location.
What not to infer: Do not infer that doubling area doubles useful daylight. Do not use the visible-area proxy as a daylight prediction.
Safest next step: Ask the designer to test head height, clerestory placement, a second exposure, lighter interior surfaces, or an unobstructed window position. Ask the modeler for the metric and view points that support the change.
Next decision: Is the problem aperture area, aperture location, product VT, interior layout, or an obstruction? Change one lever at a time so the result is interpretable.
Failure: a west window creates afternoon glare
What to observe: Occupants close blinds during the room’s main use, a monitor or television reflects a bright window, floor surfaces become hot, or the model shows a late-day solar peak.
How to interpret it: Low-angle west sun is difficult to block with a simple horizontal overhang. PNNL and DOE both identify east/west exposures as more difficult to shade and more prone to heat and glare. DOE’s daylighting overview and PNNL’s orientation guidance support the diagnosis.
What not to infer: Do not assume darker glass alone will preserve comfort, or that interior blinds eliminate heat entering through the glass. Do not assume the problem is solved because the room’s annual cooling energy looks acceptable.
Safest next step: Compare less west area, a different facade, exterior vertical control, an architectural screen, lower-SHGC product, a changed furniture layout, and an operable shade. Have the energy and comfort assumptions reviewed together.
Next decision: Choose whether the view or the unshaded afternoon condition has priority. If the view wins, fund and detail the shade dependency; if comfort wins, reduce or relocate the area.
Failure: the south-facing “passive solar” window overheats
What to observe: Winter sun is welcome but spring, summer, or shoulder-season direct sun causes hot surfaces, closed shades, or room-temperature complaints.
How to interpret it: South glass can be favorable for winter gain, but only when area, glass, thermal mass, ventilation, and shade geometry are coordinated. DOE Building America says passive-solar strategies vary by location and climate, and advises selecting, orienting, and sizing glass for the specific climate while pairing south-facing overhangs with seasonal goals. DOE’s Passive Solar Design fact sheet supports that bounded principle.
What not to infer: Do not infer that “south-facing” automatically means no overheating. Do not copy an overhang dimension from a different latitude or wall height.
Safest next step: Ask the architect to document the sun-control geometry and the modeler to test the shoulder seasons, not only a design winter and summer day. Include shade failure and occupant operation assumptions.
Next decision: Keep the area with better shading, change the glass, add thermal mass or ventilation where appropriate, or reduce the aperture. The responsible designer must decide which interventions are compatible with the plan.
Failure: shades were promised but not specified
What to observe: Elevations say “shades by owner,” the high-area case is modeled as always shaded, or there is no power, attachment, cleaning access, wind rating, or control description.
How to interpret it: The design has transferred a performance dependency to an unknown future purchase or behavior. The model may be optimistic or incomplete.
What not to infer: Do not infer that a future shade is free, compatible, operable, or effective at the required angle. Do not accept “smart home ready” without a wiring and control scope.
Safest next step: Add shade type, location, control, maintenance, cost allowance, attachment, and failure assumption to the window schedule. Re-run the comparison if the selected shade changes the model.
Next decision: Is the shade included in the construction scope, pre-wired for a later owner purchase, or replaced by a lower-area or different-orientation scheme?
Failure: the window metric was copied from a different product
What to observe: The energy model uses a generic U-factor, SHGC, or VT; the bid uses a different frame or glass; or the label belongs to a standard size while the plan uses a custom unit.
How to interpret it: Ratings are product-specific inputs. DOE and NFRC distinguish U-factor, SHGC, and VT, and LBNL’s modeling work demonstrates that attachments and optical behavior can require detailed representation. DOE’s rating definitions, NFRC’s Certified Products Directory, and LBNL’s attachment methodology support this check.
What not to infer: Do not infer equal performance from equal pane count, a low-e marketing phrase, or an ENERGY STAR label without checking the climate and product record. Do not infer that changing VT has no effect on glare or daylight.
Safest next step: Reconcile the exact product series, configuration, rated size, ratings, and shade attachment with the energy model and window schedule.
Next decision: Accept the substituted product, reselect the product, or rerun the affected rooms and facades before freeze.
Failure: local approval arrives after the design is frozen
What to observe: The homeowner learns late that the actual AHJ, historic district, HOA, or design-review body limits facade changes, requires a particular review, or uses an amended energy code.
How to interpret it: The project treated a generic US explanation as a local rule. DOE’s code program expressly describes a patchwork of state and local adoption and local implementation.
What not to infer: Do not infer that the model IECC edition, a neighboring city’s rule, a contractor’s prior project, or an HOA’s informal comment applies to this address.
Safest next step: Name the actual jurisdiction and private reviewers, obtain their current written guidance or application requirements, and ask the architect to map each constraint to the elevations and window schedule.
Next decision: Does the selected glazing scheme remain feasible, need a facade redesign, or need an alternate compliance or review path? That decision belongs to the project team and the relevant authority.
Complete the room-by-room worksheet and record the next decision #
The worksheet is complete when another person can reproduce the ratio, understand why the area was selected, identify the facade risk, and see who must verify the open items. It is not complete merely because every room has a number.
Reusable worksheet
Copy one row per exterior wall segment, then summarize by room and facade.
| Room / wall segment | Floor area (ft²) | Wall width × height (ft) | Gross wall area (ft²) | Azimuth | Low glazing (ft² / WWR) | Middle glazing (ft² / WWR) | High glazing (ft² / WWR) | Selected case | VT | SHGC | U-factor | Shade type / dependency | Model status | Owner / next handoff |
|---|---|---|---|---|---|---|---|---|---|---|---|---|---|---|
Use the following formulas in every row:
- Gross wall area (ft²) = width (ft) × height (ft).
- WWR (%) = selected glazing area (ft²) ÷ gross wall area (ft²) × 100.
- Visible-area proxy (ft²) = glazing area (ft²) × VT. Use only as a screening prompt, not a daylight prediction.
- Orientation note = azimuth + obstruction + shade condition. Do not reduce this to “north” or “south” when the wall is diagonal or shaded.
Add a facade summary:
| Facade / azimuth | Rooms served | Total fenestration area (ft²) | Exterior shade | Interior/operable shade | Product assumption | Highest risk | Verification owner |
|---|---|---|---|---|---|---|---|
Checklist for the design-freeze meeting
- Every important room has a stated use, schedule, view priority, privacy priority, and daylight priority.
- Every exterior wall segment has a width, height, gross wall area, and azimuth source.
- The area convention is written: rough opening, unit area, frame-to-frame, or visible glass.
- Room-level WWR calculations show units and the formula.
- Low, middle, and high schemes are labeled illustrative and compared by room and facade.
- Glass doors and skylights are shown separately where their function or solar exposure differs.
- Each selected product has a product-specific U-factor, SHGC, and VT assumption or is explicitly marked pending.
- East and west rooms have a direct-beam glare and heat-gain strategy, not just an interior-blind note.
- South windows have a shade geometry and a winter/summer tradeoff to verify.
- North windows have obstruction and view assumptions checked rather than being assumed automatically bright.
- Shade ownership, wiring, operation, maintenance, wind exposure, and failure assumptions are recorded.
- A qualified electrical professional has reviewed any motorized-shade power or control wiring, and the applicable AHJ's permit and inspection requirements are confirmed before construction; the homeowner will not run, connect, modify, or troubleshoot the wiring.
- The architect has reconciled the worksheet with plans, elevations, the window schedule, and structural coordination.
- The energy modeler has stated which cases, products, schedules, and shades were modeled.
- The project address has an identified AHJ, adopted energy code, amendments, and review path to confirm.
- Zoning, historic-district, HOA, and design-review constraints are separately named and sourced.
- The homeowner has recorded the selected case, rejected cases, open risks, and next decision.
Original contribution: Room-by-room glazing-budget worksheet
Summary. This worksheet is a source-derived decision surface for comparing window area before design freeze. It connects room function to gross exterior wall area, facade azimuth, VT, SHGC, U-factor, shading, modeling, and approval status. Its purpose is to make the tradeoff inspectable by the homeowner and handoff-ready for the architect, modeler, supplier, builder, and local reviewer.
Declared method. Record floor area, gross exterior wall area, facade azimuth, room priorities, glazing area, VT, SHGC, U-factor, and shade assumptions; calculate WWR as glazing area divided by gross exterior wall area; compare illustrative schemes and hand the selected assumptions to the architect and energy modeler.
Method. The method begins with a room and facade inventory. For each exterior wall segment, record width, wall height, and gross wall area in square feet. Record the wall azimuth, obstructions, use schedule, view and privacy priorities, and the low/middle/high glazing areas. Calculate WWR = glazing area ÷ gross exterior wall area × 100. Add the selected or assumed VT, SHGC, and U-factor, then describe the shade type and whether it is fixed, operable, exterior, interior, landscape, or automated. Compare the schemes by room and facade; identify the highest-risk room; send the selected case to the architect and energy modeler; and record local-review status before the freeze date.
The source inputs are deliberately visible. DOE provides the WWR definition and the warning that applicable code and compliance path matter. DOE’s WWR reference supplies the denominator concept. DOE and NFRC define the separate jobs of U-factor, SHGC, and VT. DOE’s window-performance guidance and NFRC’s Certified Products Directory supply the rating vocabulary. DOE, PNNL, Rutgers, and LBNL support orientation, shading, integrated design, and project-specific modeling. DOE’s modeling overview, PNNL’s shading guide, Rutgers’ glare guidance, and LBNL’s attachment methodology make the handoff and limitations explicit.
Worked illustrative example. A living room with 40 ft of exterior wall and a 9 ft wall height has 360 ft² of gross wall area. A 36 ft² low case is 10% WWR, a 54 ft² middle case is 15% WWR, and a 72 ft² high case is 20% WWR. If the middle case uses VT 0.60, its visible-area proxy is 32.4 ft². If a high case uses VT 0.45, its proxy is also 32.4 ft². The equal proxy illustrates a comparison question; it is not a prediction of equal daylight. Changing the assumed wall height to 8 ft or 10 ft changes the 54 ft² result to 16.9% or 13.5% WWR, demonstrating denominator sensitivity.
Declared limitations. The worksheet is a planning and communication aid, not a code-compliance calculation or a prediction of daylight autonomy, glare, thermal comfort, heating or cooling loads, structural adequacy, egress, or local design approval without project-specific modeling and jurisdiction review.
Limitations. The worksheet cannot predict code compliance, daylight autonomy, useful illuminance, glare, annual energy use, peak loads, thermal comfort, condensation, acoustic performance, structural adequacy, egress, water management, product availability, or approval. It does not replace the adopted rule of the actual project jurisdiction, a site survey, an architect’s drawings, structural review, a window supplier’s product data, a builder’s installation details, or project-specific energy, daylight, and comfort modeling. It cannot see future trees, buildings, landscape maintenance, occupant shade behavior, or changes made after the model run. All numerical schemes in this article are illustrative, not measurements or recommendations.
Originality brief. Current US-oriented answers explain orientation, shading, and window ratings, but generally stop short of a room-by-room pre-freeze decision process. The missing decision is whether a particular room needs more glass, different glass, better shading, or a different facade. This contribution supplies the room/facade worksheet, the low/middle/high comparison, and the WWR and visible-area calculations. It can be checked by reproducing each area and ratio from the recorded dimensions, tracing every cited input to the evidence records, and asking the architect, energy modeler, supplier, builder, and actual project jurisdiction to verify their assigned fields.
The answer to record on the project brief
Write one sentence per important room. The following is a fully filled illustrative record, not a recommendation for an actual project:
“For the living room, we selected the middle illustrative glazing case of 54 ft² on the south facade, using product-specific U-factor, SHGC, and VT values pending supplier confirmation and an exterior overhang plus operable interior shade, because the priority is a destination view with controllable daylight. The architect will verify geometry, structure, and privacy; the energy modeler will test seasonal loads, comfort, and shade behavior; and the authority having jurisdiction identified by the project address plus the named HOA will confirm local energy-code and facade-review constraints before the schematic-design freeze date.”
If a real project cannot complete those fields, the design is not ready to freeze. The next decision is not whether to add another window. It is which missing input, owner, model case, product record, or jurisdictional answer must be resolved first. Brictale’s blog keeps this work in the broader home-planning journey; the project-specific decision remains with the homeowner and qualified design team.
Cite this guide
Brictale. “How Much Window Area Should I Plan for Each Room in a New Home?.” Published 2026-10-04; updated 2026-10-04.
https://brictale.com/build/design/compare-new-home-window-area-by-room-orientation-before-design-freeze · Read the Markdown version
Original contribution: Room-by-room glazing-budget worksheet. A source-derived worksheet for comparing low, middle, and high glazing-area schemes by room, facade, orientation, window metrics, shading dependency, and review status.
Sources and scope
Evidence behind this page
- Window placement can provide natural light while also affecting solar gain, glare, and overheating; DOE Building Science Education identifies north and south exposures as easier to control than east and west exposures.
DOE Building Science Education overview; general residential daylighting and solar-control guidance, not a room-specific sizing rule or code requirement.
Accessed · Link to this claim - DOE describes south-facing windows as useful for winter sun in the United States, north-facing windows as useful for diffuse daylight with less glare and summer heat, and east- and west-facing windows as more prone to excess heat and glare.
US Department of Energy public guidance; broad orientation principle with climate and site exceptions, not a universal prescription for every latitude or room.
Accessed · Link to this claim - DOE Building Energy Codes Program defines window-to-wall ratio as fenestration area divided by gross wall area and notes that the ratio is limited by the applicable code and selected compliance path.
Appendix A: Data Collection Measures
DOE data-collection definition and historical code-documentation context; this package adapts the formula for schematic room-by-room comparison and does not claim the worksheet is a permit calculation.
Accessed · Link to this claim - The United States has no single national energy code; energy codes are adopted at state and sometimes municipal level, become law in the adopting jurisdiction, and are implemented locally.
Building Energy Codes - Development, Adoption, Implementation, and Compliance
DOE Building Energy Codes Program explanation of code development, adoption, and enforcement; the actual project jurisdiction must be checked for its adopted code and amendments.
Accessed · Link to this claim - DOE identifies U-factor as a heat-flow measure where lower values reduce heat flow, SHGC as a measure of solar heat transmitted where lower values admit less heat, and VT as a measure of visible daylight transmission where higher values admit more daylight.
Purchasing Energy-Efficient Residential Windows, Doors, and Skylights
DOE FEMP residential fenestration purchasing guidance; ratings are product and climate dependent and do not by themselves determine room daylight or whole-building performance.
Accessed · Link to this claim - NFRC's Certified Products Directory lets users verify product-label rating data, including U-factor, SHGC, and VT, for the specified product.
NFRC Certified Products Directory; use the rating for the specified product and size and do not infer installed performance or code compliance from a generic marketing label.
Accessed · Link to this claim - PNNL Building America recommends minimizing east- and west-facing window area when possible, prioritizing shading for skylights and east/west windows, and using properly designed horizontal overhangs to shade south-facing windows in summer while allowing winter sun.
Shading and Solar Control for Windows and Skylights
PNNL Building America residential resource guide; orientation priorities are general design guidance and depend on latitude, climate, obstructions, season, and the actual shading geometry.
Accessed · Link to this claim - PNNL describes high-performance glazing, landscape shading, architectural shading, exterior attachments, and interior attachments as solar-control options, and advises combining technologies with at least one operable technology per window when appropriate.
Shading and Solar Control for Windows and Skylights
PNNL Building America residential design guidance; the advice is not a guarantee that a shade will meet a particular glare, load, wind, or comfort target.
Accessed · Link to this claim - DOE says building energy modeling can quantify project-specific tradeoffs, and that orientation, floor plans, and major facade elements are often settled early enough that early modeling can avoid undermining efficiency later.
Building Energy Modeling 101: Architectural Design Use Case
DOE architectural building-energy-modeling overview; examples include commercial design, so this package uses it for the general timing and tradeoff principle, not as a residential simulation result.
Accessed · Link to this claim - LBNL describes residential window-attachment analysis using EnergyPlus and WINDOW/BSDF modeling, and notes that its modeled attachment parameters include theoretical qualities that do not necessarily represent real products.
Residential Windows & Attachments
Lawrence Berkeley National Laboratory research methodology page; the source supports the need for modeled, product-specific review and expressly limits generalizing theoretical parameters to actual products.
Accessed · Link to this claim - Rutgers' New Jersey Green Building Manual says glare and heat-gain reduction involves interactions among orientation, glazing, shading, lighting, mechanical systems, and interior design, and that project-specific solutions may require advanced simulation.
NR Glare and Heat Gain Reduction
Rutgers New Jersey Green Building Manual; general integrated-design guidance with some New Jersey-specific example values that are not generalized here as US rules.
Accessed · Link to this claim - DOE Building America passive-solar guidance says glazing should be selected, oriented, and sized for the specific climate, recommends considering different glazings by exposure, and pairs south-facing overhangs with winter solar-gain goals.
DOE Building America technology fact sheet for passive-solar design; older general guidance whose principles require current project modeling and local review.
Accessed · Link to this claim - An LBNL residential simulation study compared manual and automated shade-control algorithms across Atlanta, Phoenix, Minneapolis, and Washington, DC, and found that climate and control strategy affected modeled energy and daylight outcomes; its results are not a promise for a particular home.
Control algorithms for dynamic windows for residential buildings
2015 LBNL journal-study summary; four US modeled locations and specified modeled configurations, not a universal savings estimate or a substitute for project-specific analysis.
Accessed · Link to this claim - The U.S. Consumer Product Safety Commission says its home-wiring guide is not an instruction manual for repairing defective electrical systems and that identifying specific defects and repairing them are jobs for qualified electrical professionals; it also advises having electrical inspections performed by a qualified electrician or licensed electrical inspector.
CPSC Guide to Home Wiring Hazards
U.S. Consumer Product Safety Commission home-wiring safety guide; supports the homeowner boundary and qualified-professional handoff for electrical work, not a project-specific licensing, permit, or code determination.
Accessed · Link to this claim