How to Verify Fireblocking and Firestopping Before Drywall in a New Home
A homeowner release process for checking concealed fireblocking, firestopping, trade handoffs, local inspections and evidence before insulation or drywall.
The short answer
Release an area for insulation or drywall only after the builder has mapped concealed fireblocking and firestopping, matched each condition to the approved plans or a listed system, completed required rough inspections, and supplied correction and photo records. A homeowner can request and document a hold and ask the contractually authorized builder or permit holder to enforce it; formal release remains with the builder or permit holder and the AHJ or other qualified authority for required inspection or acceptance.Release an area for insulation or drywall only after the builder has mapped concealed fireblocking and firestopping, matched each condition to the approved plans or a listed system, completed required rough inspections, and supplied correction and photo records. A homeowner can document a hold and ask the authorized builder or permit holder to enforce it; formal release remains with that builder or permit holder, and any required inspection or acceptance remains with the AHJ or other qualified authority.
Originality brief. Current answers split the decision between local inspection checklists and technical firestop resources. The missing decision is whether one specific framed area has enough classification, field-condition, responsibility, inspection and record evidence to be covered. The original contribution here is the Concealed Fire-Protection Release Matrix, which can be checked row by row against the permit set, the exact listing or approved material, trade records and the local authority having jurisdiction. It is a source-derived coordination aid, not a new code test or an inspection substitute.
What must be true before you release a framed area for insulation or drywall? #
The area should remain on hold until the approved construction documents, concealed fire-protection work, rough-trade work, required AHJ checkpoint and evidence record agree. “The opening is sealed” is not enough. The release question is whether the responsible people can show what the location is, which protection path applies, whether the installed condition matches that path, who accepted it, and what work may safely follow.
This is a phase-gate decision, not a visual scavenger hunt. The homeowner’s role is to request and document a coherent hold when a material uncertainty remains, then ask the contractually authorized builder or permit holder to enforce it. The homeowner is not being asked to determine the fire rating, select a sealant, crawl through an unsafe cavity, remove a cover, or overrule an inspector. Formal release belongs to the builder or permit holder under the permit and contract, and to the AHJ or other qualified authority for any required inspection or acceptance; qualified trades and design professionals supply the work and technical records.
The release question has five separate parts
Treat each part as a separate yes-or-hold test:
- Classification: Is this ordinary combustible-space fireblocking, a penetration through a fire-resistance-rated assembly, a membrane penetration, a joint, a perimeter condition, or another condition defined by the approved documents and adopted code?
- Inputs: Do the record and the person doing the review identify the room, assembly, substrate, penetrant, opening, insulation, joint or edge condition, and any required rating?
- Match: Does the installed material and configuration match the approved detail, the code path, the listed system, the manufacturer’s instructions, or a written project-specific approval?
- Acceptance: Are required rough-trade approvals, framing or firestop inspections, special-inspection reports, corrections and reinspections complete for this jurisdiction and permit?
- Handoff: Has one named person released the location to the insulation or drywall crew, with a dated record and a clear list of exceptions that remain on hold?
An area fails the release gate if any one of those questions is unanswered. A photograph can support the record but cannot cure an unclassified opening. A city inspection can support the record but cannot silently convert a nonmatching product into a listed system. A manufacturer’s product page can identify a product family but cannot prove that the installed opening, penetrant, substrate and depth fit one of that family’s tested systems.
What “before covering” means in practice
Covering includes more than drywall. It can include insulation, a ceiling membrane, a soffit, a chase enclosure, framing infill, spray-applied material, pipe or duct wrap that hides the condition, or any other work that removes the inspector’s or qualified reviewer’s view. The exact trigger comes from the permit, approved plans, local checklist and the project’s inspection plan.
Philadelphia, Pennsylvania illustrates why the sequence must be read locally. The City’s residential building inspection guidance describes an in-wall framing inspection after interior wall framing and applicable rough-ins; its checks include fire blocking and draft stopping, and it says not to install drywall or finishes until that inspection passes. The same page then describes an insulation inspection and says drywall or finishes should wait until that inspection passes. Those are Philadelphia examples, not a national schedule. Philadelphia’s inspection-by-permit-type guidance also tells the permit holder to use the permit documents and consult the inspector about the relevant inspections.
Hillsborough Township, New Jersey provides a different local example. Its required-inspections checklist places fireblocking and firestopping in the frame inspection before finish or infill materials cover the work, and says rough plumbing, mechanical, electrical and fire inspections must be approved before the frame inspection is called. That checklist is not a rule for a home elsewhere in New Jersey or the United States. It is a prompt to find the actual Hillsborough permit checklist, or the actual checklist for the home’s jurisdiction, before scheduling and before covering. Hillsborough Township’s required-inspections checklist is the local example.
The practical release condition is therefore: the work is physically complete enough to inspect, the relevant inspection or qualified review has occurred, all observations and corrections are closed or explicitly accepted, and the next trade has a current packet. If the local official says a different sequence applies, follow the local direction and record the name, date, permit and instruction.
What the homeowner can safely observe
From a safe, accessible location, the homeowner can observe whether an area is still open, whether a location code or photo map exists, whether visible fireblocking is continuous, whether a penetration has changed since the rough-in, whether a product label or system reference was recorded, and whether the builder has a written hold list. The homeowner can compare room names, drawings and photographs for obvious mismatches.
Do not enter a crawlspace, attic edge, shaft, scaffold, ladder position, excavation, energized area or confined cavity to obtain a better view. Do not pull out insulation, scrape sealant, move a pipe, drill a stud, cut a fireblock, disconnect a fixture, or ask a trade to “make it work” for the sake of a photograph. If a condition cannot be safely viewed, mark it as unverified and ask the builder or qualified inspector to provide the appropriate record or access plan.
The next decision after this gate is simple: if every material row is accepted, release the named area to its next covering step; if any row is unresolved, hold only the affected area where the builder can safely isolate it, or hold the dependent package if the unresolved work could affect a larger assembly. Get that boundary in writing.
How do fireblocking and firestopping differ? #
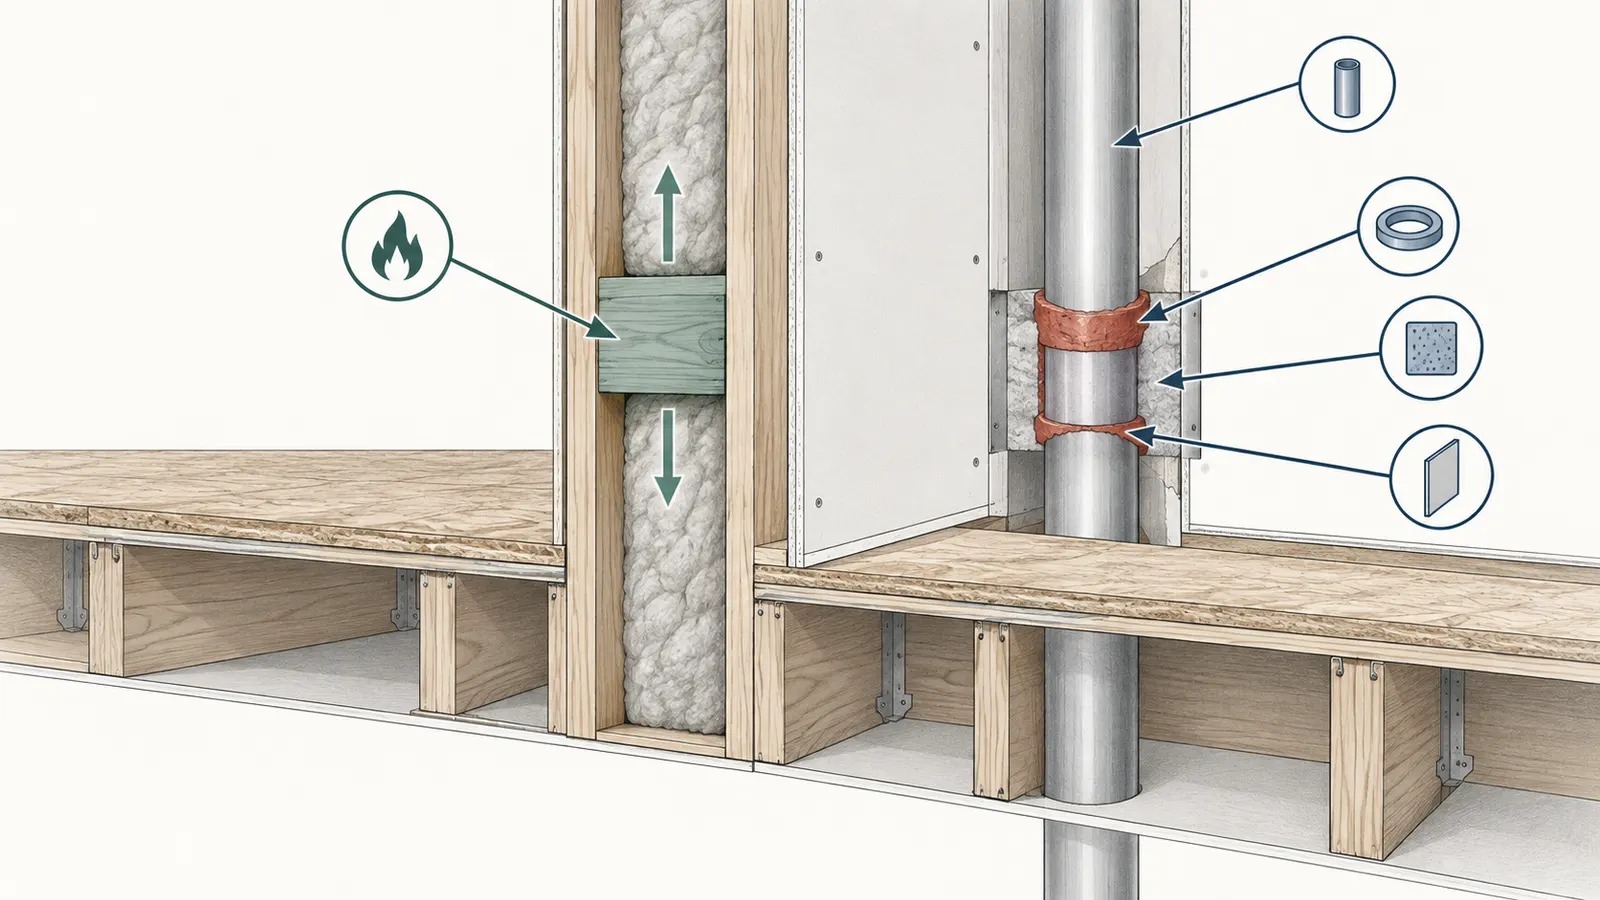
Fireblocking and firestopping both limit fire and hot-gas movement, but they are not interchangeable labels. Fireblocking is generally a prescriptive way to interrupt concealed combustible spaces. Firestopping generally protects a penetration, joint or other opening in a fire-resistance-rated assembly with an approved and tested system. The project’s adopted code, rated assembly, approved plans and AHJ determine the applicable path.
Fireblocking is about concealed combustible-space continuity
UL Solutions describes fireblocking as a building material, or a material approved by the code official or code authority, required by code to protect against fire spread in concealed combustible spaces. Its explanation identifies wall and floor or ceiling intersections, interconnections between concealed vertical and horizontal spaces such as soffits and dropped ceilings, concealed spaces at the top and bottom of stair stringers, and openings around vents, pipes, ducts, cables and wires at ceiling and floor level. UL’s fireblocking explanation is useful for classification, but the adopted local code controls the real project.
The DOE Building America report reproduces IRC R302.11 provisions that describe fireblocking in concealed stud-wall and partition spaces at floor and ceiling levels, horizontally at intervals not exceeding 10 feet in the stated wall conditions, at interconnections between concealed vertical and horizontal spaces, at certain stair locations and at openings around services at floor and ceiling level. It also reproduces listed material paths and the requirement that the integrity of all fireblocks be maintained. The DOE Building America report on the IRC fire-separation provisions is a technical reference, not proof that a specific state or municipality adopted the same edition without amendments.
The verification question for fireblocking is therefore not “Is there some wood or insulation in the bay?” It is “Does the approved code path require a fireblock here, is the selected material permitted for this location, does it fully interrupt the intended concealed path, is it securely retained where required, and is its integrity maintained around services and joints?” A piece of material that stops short, shifts, leaves an unaddressed bypass or is cut by a later trade may not satisfy that question.
Do not infer from a product’s color, a label saying “fire rated,” or a material’s common use that it is the right fireblock for every location. Some provisions are location-specific. For example, the DOE report reproduces a stated condition for unfaced fiberglass used as fireblocking that includes filling the entire cavity cross-section to a minimum height of 16 inches and packing tightly around encountered obstructions. That is not permission to substitute a loose piece of insulation in an unrelated opening. The project’s adopted code and the qualified installer’s interpretation control.
Firestopping is about an approved protection system
Firestopping is most consequential where a pipe, conduit, cable, duct, electrical box, joint or other item passes through or interrupts a fire-resistance-rated wall, floor, ceiling or other assembly. The verification problem becomes a system-matching problem. The protection must be approved for the assembly and installed as tested, or the project must have another accepted design path.
The DOE Building America report reproduces IRC provisions stating that through-penetrations in rated assemblies must be installed as tested in the approved fire-resistance-rated assembly or protected by an approved penetration firestop system tested under ASTM E814 or UL 1479. It also states that the required F rating must be at least the rating of the penetrated wall or floor/ceiling assembly. The DOE report’s rated-penetration provisions explain why a generic “fire caulk” rule is unsafe: the system is defined by the assembly and the penetrant configuration, not just by the color or name of a product.
UL Solutions describes improper system specification, installation, inspection and maintenance as causes of project delays, cost overruns and reduced fire safety. It gives a specific example of a site using red fire caulk for every penetration without certification that the material had been tested for the required hourly rating. The point for a homeowner is not that red sealant is always wrong; it is that color does not establish a tested system. UL’s firestop systems guidance supports asking for the exact system reference and the exact installed conditions.
A compact comparison for the release meeting
| Question | Fireblocking | Firestopping | Evidence to request before covering |
|---|---|---|---|
| Main purpose | Interrupt concealed combustible-space paths | Protect a penetration, joint or opening in a rated assembly | Classification and applicable plan or code detail |
| Typical evidence | Approved material and location detail; retained and continuous installation | Listed or otherwise approved system, design number or project-specific approval; installation record | Exact reference, field-condition inputs, photos and inspection status |
| Common error | A gap, bypass or loose material leaves concealed continuity | Product is installed without matching penetrant, opening, substrate, rating or depth | Hold row, correction owner and reinspection or acceptance record |
| Who decides | Builder and qualified framing trade under the adopted code and AHJ | Qualified installer, designer or firestop reviewer under the approved system and AHJ | Named responsible party, not an anonymous crew or homeowner guess |
| Next handoff | Rough inspection and approved covering sequence | Required inspection or qualified review, then insulation, drywall or enclosure | Dated release with exceptions isolated |
The comparison is a coordination aid. It does not create a new classification. When a location could fit both descriptions, record both possibilities and ask the builder’s qualified reviewer or AHJ to resolve the classification before work is covered.
Why the distinction changes the handoff
A framing crew may install a wood or board fireblock while a plumber, electrician, HVAC installer or firestop trade creates a later penetration. The later trade can change the condition that the framing inspector saw. Conversely, a firestop installer may seal a penetration while a later crew adds a cable, sleeve or support through the protected area. The release record must therefore identify the trade sequence, not only the final appearance.
If the location is part of a rated wall or floor, ask for the assembly designation from the plan set and the penetration or joint system reference. If it is a concealed wood-framing location outside a rated assembly, ask what code provision or approved detail governs the fireblock and how its integrity was maintained. If no one can state the classification, the safest next step is a hold and a qualified determination, not a product substitution.
Which inputs should be assembled before anyone approves the release? #
The release cannot be verified from a single close-up photograph. Assemble a small, current evidence packet for each area: the approved drawing reference, location code, assembly description, trade work status, fire-protection classification, system or material reference, photos, inspection result, correction status and release owner.
Start with the current approved documents
Request the permit number, approved plan set, relevant architectural wall or ceiling details, fire-resistance-rated assembly details, mechanical, plumbing and electrical rough-in drawings, reflected ceiling or soffit details, and any approved revisions or deferred submittals that affect the area. The page or detail number matters because “bathroom wall” is too broad to identify a rated partition, shaft, chase or ceiling transition.
Record the document issue or revision date. If the field condition differs from the current plan, create an exception rather than silently using an older sketch. A change in duct route, pipe material, cable bundle, electrical box, access panel or shaft opening can change the system match. The homeowner should not determine whether the change is minor. Ask the permit holder and qualified design or firestop reviewer to classify it and tell you what record closes it.
For a local inspection sequence, record the authority’s name, jurisdiction, permit type, inspection name or code, scheduling prerequisite and result. Philadelphia’s page says contractors are responsible for scheduling L&I inspections at key points and directs users to permit documents and inspectors for the relevant inspection types. Hillsborough’s checklist says the permit number must be given when requesting inspections and ties the frame inspection to prior rough approvals. Those examples show why the permit and jurisdiction belong in the packet. Philadelphia’s inspection page and Hillsborough Township’s checklist should be read as local examples, not blended into one national rule.
Record the assembly and field condition in measurable terms
For each row, record what a qualified reviewer would need to compare:
- Room, level, grid or elevation, and a stable location code.
- Wall, floor, ceiling, shaft, chase, soffit, stair or roof assembly.
- Whether the assembly is ordinary combustible construction, a rated assembly, a dwelling-unit separation, a shaft, a smoke barrier or another controlled condition in the approved documents.
- Substrate and thickness where relevant: wood framing, gypsum, concrete, masonry, metal framing or another stated substrate.
- Opening shape and dimensions, using the project’s chosen units. Record width, height, diameter or joint length, not only “small” or “large.”
- Penetrant type, outside diameter, bundle size, insulation or jacket, support and angle. Record pipe material, conduit material, cable type or duct construction rather than only “pipe” or “wire.”
- Annular space, meaning the gap between the penetrant and the opening, when the system requires it.
- Backing, mineral wool, sleeve, wrap, collar, putty, sealant, board, lumber or other component, with exact product or system identity.
- Required fire-resistance rating, F rating, T rating or other rating shown in the approved system, if applicable.
- Installation depth, number of layers, fastener pattern, retained position or other system-specific variable when the listing requires it.
Use a blank or “not measured” honestly. Do not invent a dimension from a perspective photo. If the condition is inaccessible, ask the qualified installer or inspector for the method used to verify it and record that limitation.
3M’s CP 25WB+ installation guide demonstrates why this level of detail matters. It says sealant depth and complete filling of the annular space follow the system specifications and instructs the installer to confirm opening size, pipe size and material, insulation type and thickness, and annular space. It also says the guide is a general highlight and excludes CPVC. 3M’s CP 25WB+ installation guide is evidence for that product’s bounded instructions, not a universal recipe for every sealant or penetrant.
Separate observation from acceptance
Use two fields rather than one:
Observed: what the photo, drawing, label, test record or site conversation shows.
Accepted: who determined that the observed condition satisfies the applicable requirement, when, under which document or inspection, and with what exceptions.
For example, “white mineral wool visible around a pipe” is an observation. “Plumber installed the mineral wool to system X, firestop installer verified opening and depth against system X, inspector accepted the frame inspection on August 22” is an acceptance record. The second statement may still need the actual system sheet and inspection record, but it identifies a path to verify it.
Do not use “looks good,” “builder approved,” or “inspector was here” as acceptance records. Ask for the report, approval number, label, sign-off, or written direction that the project normally uses. If an inspector gives verbal direction, the permit holder should record the date, name, permit, location and instruction and confirm whether a written correction, reinspection or revised drawing is required.
Identify all responsible people before the release meeting
The person who created the opening may not own the correction. A framing contractor may own a missing fireblock. A plumber may own a pipe route that changes the opening. An electrician may own a box or cable penetration. An HVAC contractor may own a duct or chase. A firestop trade may own the system installation. The general contractor or builder coordinates the package. The permit holder schedules the municipal inspection where the local process assigns that duty. A designer, engineer or qualified firestop professional may need to resolve a nonstandard or rated condition.
Put one responsible person and one backup in the matrix for each row. Avoid “GC/trade” as the only owner. If the owner is disputed, the row is held until the builder assigns the correction path. Responsibility for coordination is distinct from responsibility for technical acceptance.
The next decision after inputs are assembled is classification. Do not ask the insulation or drywall crew to decide whether an opening is fireblocking or firestopping as they cover it. Give the crew a released area and a current drawing or matrix excerpt.
In what sequence should trades, inspections and covering hand off? #
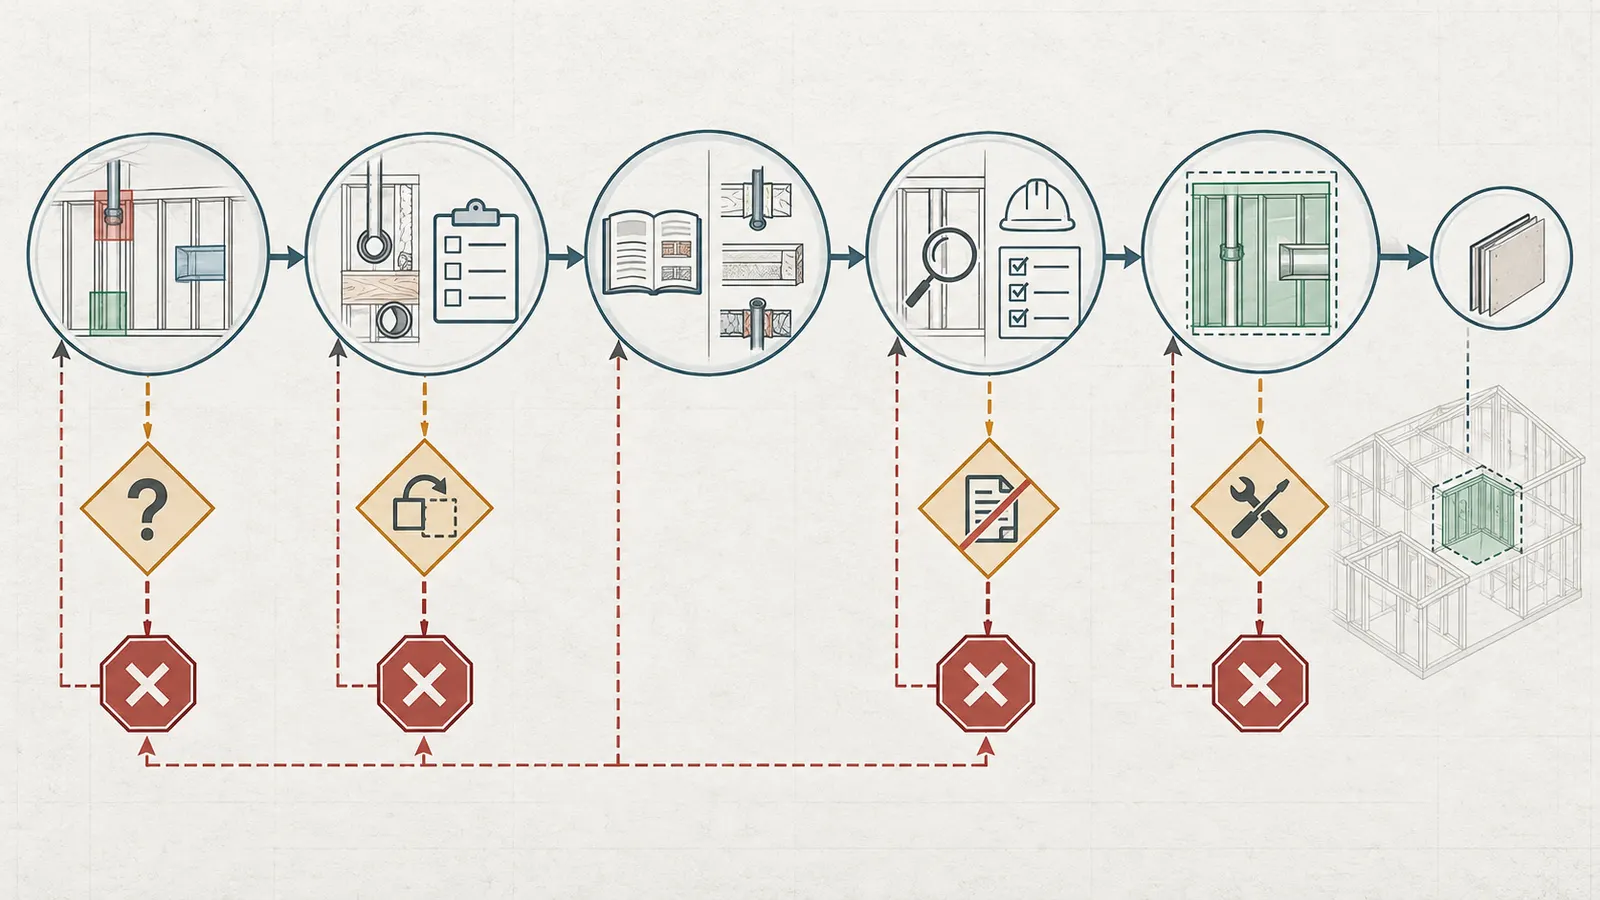
The safest sequence is to finish the framing and rough trades, document every concealed protection location, obtain the inspections or qualified reviews required by the actual jurisdiction and permit, correct exceptions, verify the corrections, and only then release the defined area to insulation or drywall. The exact inspection names and order vary, so the project schedule must be checked against the AHJ rather than copied from another city.
1. Freeze the release boundary
Divide the home into areas that can be named and isolated: a floor, room group, wall elevation, shaft, ceiling zone or other boundary that the builder can actually hold. Do not call the whole house “ready” because one room is complete. Record the area code, the planned insulation date and the planned drywall date. Add the trades expected to enter before covering.
The boundary prevents a common failure: the builder releases an entire level while one chase, stair, rated wall or ceiling transition remains unresolved. If the unresolved location can affect a continuous assembly, extend the hold to every dependent area until the qualified reviewer defines the limit.
2. Finish rough work that can change the opening
Framing, plumbing, mechanical, electrical, fire suppression and low-voltage work may create or alter openings. Coordinate the sequence so that the inspection sees the final pre-covering condition. A photo taken before a late cable pull or duct adjustment is historical evidence, not release evidence.
Philadelphia’s residential inspection guidance lists interior wall framing after rough-ins and says the inspector checks fire blocking and draft stopping before drywall or finishes. Hillsborough Township’s checklist likewise requires rough plumbing, mechanical, electrical and fire inspection approvals before the frame inspection is called in its local process. Philadelphia’s sequence example and Hillsborough’s sequence example support the dependency principle: a framing release made before final rough work can be stale.
3. Install according to the applicable path
The qualified trade installs the fireblock or firestop using the approved detail, adopted code path, listed system or project-specific written approval. The homeowner should receive the reference used, not direct the installation.
For an ordinary fireblocking row, the reference may be a plan detail and the adopted code provision. For a rated penetration, it may be a listed system design number with a product, assembly and installation page. For a nonstandard condition, it may be a project-specific engineering judgment or other AHJ-accepted design. Hilti’s U.S. Firestop Resource Center describes a selector that finds tested systems and generates submittals, and identifies engineering judgments for non-standard conditions through its platform. That is a manufacturer-specific route, not a universal approval, but it illustrates the difference between a tested system and an unexplained field improvisation. Hilti’s Firestop Resource Center is the source for that bounded example.
4. Capture the record before the inspector arrives
Photograph the open condition with a wide image that shows the room or grid, a middle image showing the assembly and surrounding trades, and a close image showing the product, opening and installation detail. Use a ruler or reference marker only when it can be placed safely and without touching the work. Do not stage or alter the condition for the photograph.
Name the files with the location code and sequence, such as L2-STAIR-NE-01-wide, L2-STAIR-NE-02-assembly, and L2-STAIR-NE-03-detail. Keep the original files. The matrix should point to the record, but the record itself should remain available to the builder and inspector.
Record product labels, lot or batch information when the project’s quality process requires it, the system or design number, installer or trade, date, and any inaccessible components. A photograph of a cartridge alone does not show the installation. A photograph of the installation alone may not show the product identity. The packet should connect both.
5. Complete the AHJ and any separate qualified inspection
The city or township inspection, a special inspection, a firestop inspection, and the builder’s quality-control check are different records unless the actual project documents explicitly combine them. Do not say “the inspector signed off” without identifying which inspector, which inspection and which scope.
UL Solutions references ASTM E2174 for on-site inspection of installed firestops and ASTM E2393 for installed fire-resistive joint systems and perimeter fire barriers. It also explains that the code authority establishes the policy used to verify compliance, and that a qualified third-party label can be useful evidence where such an inspection is part of the project. UL’s inspection guidance does not mean every single-family project needs a third-party firestop label. It means the project must identify the required inspection route instead of assuming a generic visual check is equivalent.
If the AHJ rejects a condition, preserve the rejection and hold the dependent work. If the AHJ accepts it with a note, record the note and whether it closes the matrix row. If the AHJ does not inspect a particular detail, that absence is not automatic approval; ask the builder what qualified review and record covers it.
6. Correct, re-record and re-present
Corrections must be traceable. The row should show the original condition, correction instruction, responsible trade, date corrected, new photographs or record, and who verified the correction. If the correction changes the opening, penetrant or assembly, re-run the system match instead of merely photographing the new seal.
Do not accept a patched photo that hides the original condition or a statement that “it was fixed behind the wall.” If the condition is already covered, the builder and qualified reviewer must determine whether an access opening, destructive verification, alternate record or AHJ direction is needed. The homeowner cannot convert a concealed unknown into a pass by trusting the sequence.
7. Release the next trade in writing
The release should identify the area, date, scope released, records reviewed, unresolved exceptions and next trade. Use language such as: “Area L2-East-bedroom-wall released for insulation after framing inspection record F-214, rows 03-08 accepted; row 09 remains held at shaft corner. Drywall release is not included.” That prevents a partial insulation release from being interpreted as a whole-area drywall release.
Philadelphia’s guidance treats the insulation inspection as a separate checkpoint and says drywall or finishes should wait until that inspection passes. That is a useful example of why “fireblocking complete” does not always mean “drywall now.” Philadelphia’s insulation and wallboard sequence should be reconciled with the actual permit and AHJ direction.
The next decision is whether the next step is insulation, a separate insulation inspection, drywall, a rated wall enclosure, another trade, or a hold. Release only the next defined step, not every later step.
How do you match a penetration to an approved firestop system? #
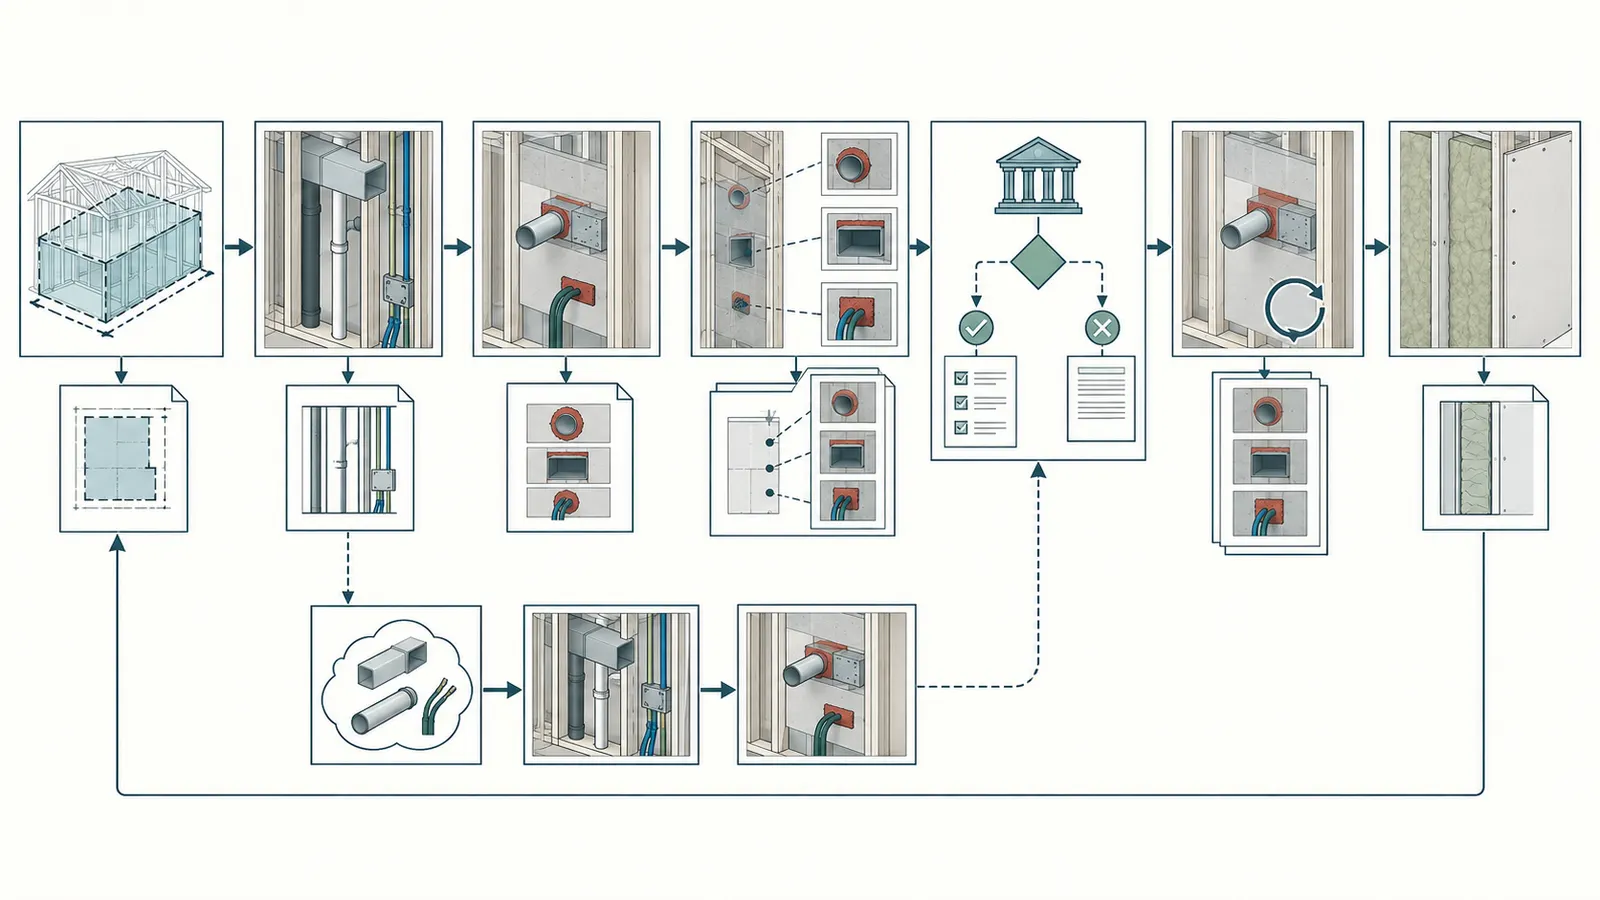
Match the complete field condition, not just the product name. A credible match identifies the penetrated assembly, rating, penetrant, opening, substrate, annular space, backing or wrap, product, installation depth and any other variable required by the listed system or approved design. If one of those inputs differs, stop treating the match as proven until the qualified reviewer resolves the difference.
Build the system-match record
Use this sequence for every rated penetration or joint:
- Identify the assembly. Record the wall, floor, ceiling, shaft, joint or barrier designation and its required rating from the current approved documents.
- Identify the opening. Record whether it is a through-penetration, membrane penetration, joint, perimeter condition, sleeve, box, collar or another detail. Record dimensions and geometry.
- Identify the penetrant. Record material, size, number, bundle, insulation or jacket, support and orientation. “Pipe” or “cable” is not enough if the system distinguishes materials or sizes.
- Identify the substrate and backing. Record concrete, masonry, gypsum, wood or metal framing, board layers, mineral wool, sleeve and any backing condition specified by the system.
- Find the exact system or approved detail. Use the design number, listing, evaluation, tested assembly, approved submittal or project-specific determination. Record revision and page.
- Compare every variable. Mark exact match, permitted range, not applicable or unresolved. Do not turn “close” into “match.”
- Record installation evidence. Photograph the open work, label, depth and relevant edge; record installer, date and inspection status.
- Resolve deviations before covering. Ask the responsible qualified reviewer whether the system remains applicable, whether a different listed system fits, or whether a project-specific approval is required.
UL Product iQ guidance says the database can be searched by file number, product type, category control number, fire-resistive design or assembly number and model number, and provides searches for firestop systems and rated assemblies. UL’s Product iQ guidance is a practical starting point for finding a certification record. The search result is not the release itself. Open the system, read its scope and installation parameters, and compare those parameters to the field row.
Use the product sheet and the system sheet for different jobs
The product sheet answers questions about the product: storage, health precautions, application tools, cure or handling information, and product identity. The listed system or tested assembly answers questions about the combination: the assembly, penetrant, opening, thickness, backing, depth, rating and permitted installation.
A product can be appropriate for one system and inappropriate for another. A product manufacturer’s general installation guide may show a typical method but expressly say the complete system specifications control. 3M’s CP 25WB+ guide says it highlights general steps and methods and is not intended to describe all details and requirements; it also tells the installer to confirm field conditions against system specifications. The 3M guide therefore supports a verification request, not a shortcut around the system.
Treat common substitutions as decisions, not favors
Common pressure points include a different pipe material, a larger opening, an added cable, a changed insulation type, a shallower seal, a different backing material, a product from another manufacturer, a sleeve installed after the original detail, or a penetration in a different rated assembly. Each can change the system.
When a substitution appears, ask four questions:
- What exact approved system or detail does the substitute use?
- Which field-condition variable changed from the original system?
- Who with project authority accepted the substitution, and in what record?
- Does the AHJ require a revised submittal, site review, engineering judgment, correction or reinspection?
Hilti’s resource center identifies engineering judgments as a path for non-standard conditions. That does not make an engineering judgment automatic, universal or homeowner-authorized. It means a nonstandard condition needs a defined professional path. Hilti’s bounded guidance supports holding the row while that path is obtained.
Do not use a remote review as sign-off
A homeowner can send a location-coded photograph and the system reference to the builder, architect, engineer, firestop reviewer or AHJ for coordination. A remote reply may help identify missing information or a next action. It does not prove concealed depth, continuity, substrate condition, product identity or code compliance unless the authorized professional and local process expressly accept that method.
The article’s scope excludes remote sign-off because the release depends on physical conditions that a photograph may not show. If a remote or video inspection is available in the jurisdiction, ask the AHJ for its current procedure, eligibility and record requirements. Do not assume a video call is equivalent to a physical inspection or qualified field inspection.
The next decision after a system comparison is either “matched and ready for the required acceptance step” or “not matched.” “Not matched” is a useful result. It routes the row to correction, a different listed system, a qualified design judgment or an AHJ decision before the covering trade proceeds.
How does the Concealed Fire-Protection Release Matrix make the decision? #
The Concealed Fire-Protection Release Matrix is a decision matrix that records one concealed location per row and makes the release criteria inspectable. Its purpose is to prevent a broad statement such as “framing passed” from hiding a missing system reference, a changed penetrant, an unassigned correction or a local inspection dependency.
Method
The method is: Classify each location, match the field conditions to the approved code path or listed system, assign the trade and authority handoff, and release insulation or drywall only when the required inspection and record evidence are present. The worked rows are illustrative coordination examples, not installation instructions.
The matrix uses evidence from local inspection examples, the DOE reproduction of relevant IRC provisions, UL certification and inspection guidance, and manufacturer resources. It does not assume that one source controls every project. Local code adoption and the approved permit documents control local rules. Manufacturer instructions control their own products. A listing controls only within its stated scope. A matrix row is complete only when those scopes agree for the project condition.
Inputs and statuses
Use a stable row ID for every location. You can start with rooms and elevations, then add a penetration sequence. The minimum fields are:
| Field | What to enter | Why it matters |
|---|---|---|
| Location ID | Example: L1-KITCHEN-E-04 | Keeps drawings, photos, corrections and inspection records connected |
| Room and assembly | Level, room, wall/floor/ceiling/shaft, drawing detail | Identifies the physical and rated context |
| Classification | Fireblocking, through-penetration, membrane penetration, joint, perimeter or unresolved | Determines which evidence path applies |
| Penetrant or opening | Pipe, conduit, cable, duct, box, joint or no penetrant; dimensions and materials | Allows exact system comparison |
| Substrate and rating | Wood, gypsum, concrete, masonry or metal; required rating if shown | A system is not portable across every assembly |
| Protection reference | Code/detail, listing/design number, approved submittal or project-specific decision | Provides the acceptance basis |
| Installing trade | Framer, plumber, electrician, HVAC, firestop trade or builder | Assigns work and correction ownership |
| Photo or record | Wide, assembly, close, label, report or inspection ID | Shows what was observed and accepted |
| AHJ or qualified review | Inspection name, date, inspector/reviewer and result | Distinguishes a visual observation from acceptance |
| Exception and owner | Exact gap, changed condition, responsible person and due date | Creates a hold that can be closed |
| Release | Area, next step, release date, releasing person and limits | Prevents partial approval from becoming blanket approval |
Use status values that describe risk and action:
- Not started: location identified but work has not been installed or documented.
- Installed, evidence missing: visible work exists, but the reference or record is absent.
- System match pending: a rated or nonstandard condition is awaiting comparison or approval.
- Inspection pending: the project record is ready, but the required AHJ or qualified review has not happened.
- Correction required: an exception exists and the next covering step is held.
- Accepted for next step: the row has the required evidence and a bounded release.
- Closed with limitation: the authorized reviewer accepted the row but recorded an explicit limitation or later checkpoint. Do not convert this to a general release.
Illustrative matrix rows
The following rows are illustrative. They show inputs, units, formulas and sensitivity where useful for coordination; they are not measurements from a real site, product tests, or recommendations for a particular home.
| ID and location | Classification and inputs | Match and evidence required | Owner and next decision |
|---|---|---|---|
L1-STAIR-W-01 stair-wall cavity | Fireblocking candidate; concealed wall space; wall intersection at floor; nominal opening condition to be confirmed on site | Approved plan or adopted-code detail; continuity photo; framing inspection record; later penetrations logged | Framing trade installs; builder coordinates; hold drywall until the local framing checkpoint and exceptions are closed |
L1-LAUNDRY-N-03 pipe through rated wall | Through-penetration; rated wall designation from plan; pipe material and outside diameter in millimeters; opening width and height in millimeters; annular space measured in millimeters | Exact listed system or approved detail showing wall assembly, pipe, opening, backing, depth and rating; installation photo; inspection or qualified review | Plumber creates route; firestop installer or qualified trade installs; builder holds insulation and drywall until match and acceptance |
L2-MECH-S-07 insulated duct at shaft | Rated shaft or chase; duct material and insulation type; opening geometry; support and clearance | Listed system or approved assembly matching duct and shaft; any required collar, wrap or seal; photo before enclosure; AHJ or qualified review | HVAC trade and firestop trade coordinate; hold shaft enclosure if any variable is unresolved |
L2-BEDROOM-E-02 electrical boxes on opposite sides | Membrane penetration; box listing, wall membrane, separation distance and protection method | Box listing or approved detail; actual separation in millimeters; putty pad or other listed method if used; photo and rough electrical acceptance | Electrician owns installation; builder confirms no later cable change; release only after required inspection |
L2-ATTIC-C-04 concealed ceiling transition | Fireblocking or rated continuity condition; ceiling, soffit and vertical cavity geometry; service openings | Detail showing the transition; continuity and retained-material evidence; inspection record; later penetrations added to matrix | Framer and mechanical trade coordinate; release insulation only for the defined zone |
For the illustrative rated-wall row, the decision is not based on the sealant volume alone. If an approved system specifies a required annular depth, the installer records the measured opening and penetrant. The matrix can include a simple area calculation when it helps identify an obvious mismatch, but it cannot determine compliance from area alone.
For example, suppose an illustrative circular pipe has an outside diameter of 50 mm and an illustrative circular opening diameter of 70 mm. The radial annular gap is:
(70 mm - 50 mm) / 2 = 10 mm
The illustrative annular ring area is:
π × [(35 mm)² - (25 mm)²] = π × (1,225 - 625) mm² ≈ 1,885 mm²
Those values only describe the geometry. They do not establish a permitted gap, required sealant volume, depth, rating or acceptable system. A rectangular opening, multiple penetrants, insulation, backing or a manufacturer-specific measurement method may make that calculation irrelevant. The sensitivity is clear: if the opening were 80 mm instead of 70 mm, the radial gap would be 15 mm, a 50% increase from 10 mm, while the ring area would be π × [(40 mm)² - (25 mm)²] = π × (1,600 - 625) mm² ≈ 3,063 mm², about 62.5% larger than the corrected 70 mm example. The change may move the condition outside the system’s permitted range even though both openings look “small.” Use the system’s own parameters and a qualified installer’s measurements for the release decision.
How to score a row without pretending it is a code calculation
This matrix uses a categorical release rule, not a numeric safety score. A row is Accepted for next step only when all required gates are true:
Release = classification confirmed AND field-condition match confirmed AND responsible trade record present AND required inspection/review accepted AND correction status closed
If any input is unknown, the result is Hold, not a partial pass. This is intentionally conservative because a missing input can hide a change in the tested system. It is not a claim that every unanswered field is a code violation.
An owner may add a separate schedule flag, such as on path, at risk or late, but schedule status must not change the release rule. A drywall date that is approaching is not evidence. If the builder needs to maintain progress, isolate released zones and document the held zones rather than covering the uncertainty.
How to check the matrix against source scope
At review, inspect the row and ask:
- Is the local rule labeled with the actual jurisdiction, permit and inspection name?
- Is the code or technical claim linked to a source that actually says it?
- Is the manufacturer source limited to its own product or tool?
- Does the system reference show the exact assembly and field variables?
- Does the photograph show the relevant condition without claiming to prove hidden depth?
- Does the inspection record identify the scope and result?
- Is the correction owner a person or trade with authority to act?
- Does the release name only the next covering step and area?
If the row cannot answer those questions, keep it open. The matrix is successful when it makes uncertainty visible and routes it to the person who can resolve it. It is not successful when every row is forced to “pass.”
Limitations
The Concealed Fire-Protection Release Matrix is limited as follows: This is a coordination worksheet, not an engineering determination, code opinion, inspection guarantee, remote sign-off, product approval, or substitute for the authority having jurisdiction, approved plans, qualified installer or qualified inspector. It cannot see behind a finished wall, validate an installation from a single image, select a system for an unusual condition, determine a fire-resistance rating, or change a permit requirement. Its rows are illustrative and must be populated with the actual project’s units, drawings, product and inspection records.
The matrix also does not assign contract responsibility. A builder may choose to use a firestop subcontractor, a qualified special inspector or an internal quality-control process. The contract, permit documents, approved plans and local authority determine who has formal responsibility. The matrix only makes the handoff explicit for the homeowner.
The next decision is whether the matrix is complete enough to take to the builder’s release meeting. If it lacks drawings, system references, inspection records or trade owners, it is not ready. If it is complete, use it to ask for a bounded release, not an informal assurance.
Which failure cases should trigger a hold, correction and recheck? #
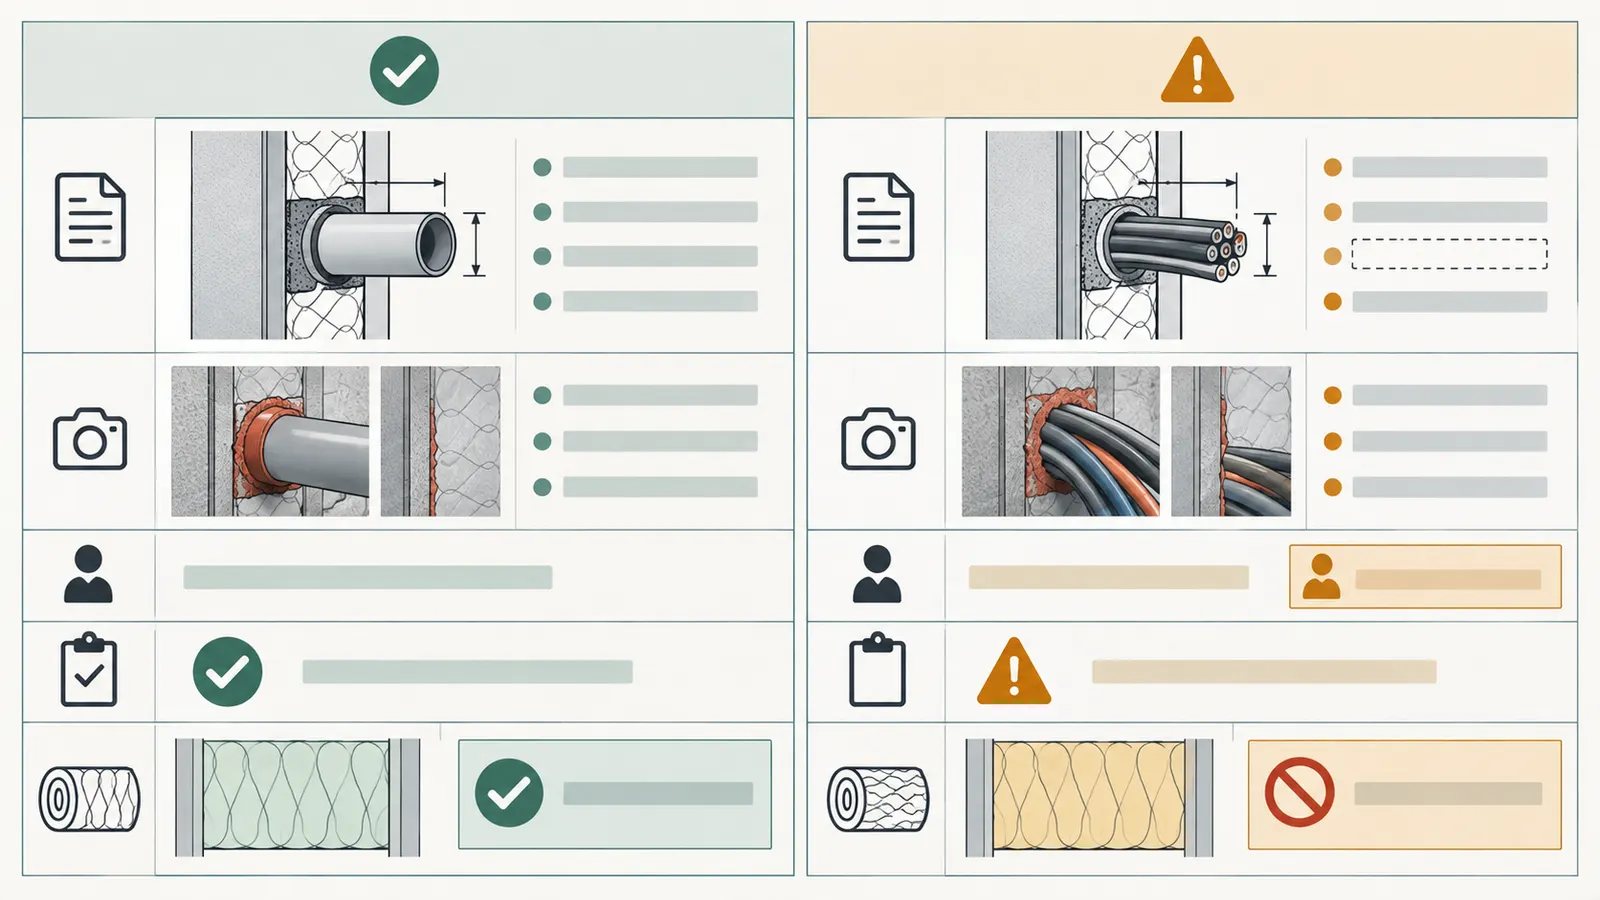
Any failure that changes the classification, field-condition match, acceptance record or handoff should hold the dependent covering work until the responsible qualified person defines and closes the correction. The following branches are common because they arise from sequencing and evidence gaps, not only from visibly missing material.
“There is red caulk everywhere”
Observe: Red sealant appears around multiple pipes, cables and ducts, but the packet lists no design numbers or system references.
Interpretation: Color is product identification at best. It does not establish the required assembly, rating, penetrant, opening, backing or depth. UL’s guidance specifically warns against using red fire caulk for every penetration without certification that the material was tested for the required rating. UL’s firestop systems article supports holding the rows until the exact system or accepted detail is identified.
Do not infer: Do not infer that every red seal is wrong, and do not infer that any red seal is right.
Safest next step: Ask the builder to produce the system reference for each repeated condition, group identical conditions only after a qualified reviewer confirms that they are identical, and recheck the field variables.
Next handoff: The firestop trade or qualified reviewer returns the system-match record; the builder then schedules the required inspection or review. Drywall remains held for affected rows.
“The photo shows a seal, but not the opening”
Observe: A close-up shows a finished bead or patch with no room, assembly, penetrant, opening edge or product label.
Interpretation: The image may show that a surface was covered. It does not show the system inputs or whether the seal is continuous and at the required depth.
Do not infer: Do not infer hidden depth, backing or continuity from a smooth surface.
Safest next step: Request the pre-covering wide and detail photos, the system reference and the inspector or installer record. If those do not exist, ask the builder and qualified reviewer whether the area needs access or another verification method.
Next handoff: Release only after the professional record closes the missing evidence or the AHJ gives direction.
“A late trade changed the opening”
Observe: A cable bundle, pipe size, duct route, sleeve or electrical box changed after the photograph or inspection.
Interpretation: The earlier inspection and photo may no longer describe the release condition. The change may affect the classification or system match.
Do not infer: Do not infer that a small change is harmless because the new item fits physically.
Safest next step: Update the row with the new field inputs, ask the qualified installer or reviewer to compare the change against the approved system, and tell the builder whether reinspection or a revised record is required.
Next handoff: The trade that made the change supplies the new record; the responsible firestop or design reviewer resolves the match; the builder reopens the covering gate.
“Framing passed, so drywall is scheduled”
Observe: The builder has a framing inspection result but no insulation inspection status, no firestop system record for rated penetrations, or no final rough-trade correction list.
Interpretation: A framing pass may close one local checkpoint without closing later insulation, wallboard, fire suppression, special-inspection or system-documentation requirements. Philadelphia’s published sequence separates interior framing, insulation and wallboard inspections. Philadelphia’s inspection guidance illustrates the point.
Do not infer: Do not infer that one inspection record releases every later covering step or every room.
Safest next step: Ask for the permit’s complete pre-covering sequence and list each remaining prerequisite by area.
Next handoff: Release insulation, inspection, drywall or another step separately, with the local authority and permit holder controlling the schedule.
“The product is listed, so the field installation is compliant”
Observe: The packet includes a product name or a database screenshot, but not the exact system and field-condition comparison.
Interpretation: A listed product or a searchable certification record does not prove that the installed configuration is within scope. UL Product iQ helps locate products, designs and systems, but the field condition must still match the system. UL’s Product iQ guidance supports using the database as a verification input, not as a blanket approval.
Do not infer: Do not infer that a product family, model suffix, color or nearby design number applies to the installed condition.
Safest next step: Record the exact system number, open the installation requirements, compare each variable and route any deviation to a qualified reviewer.
Next handoff: System match, then inspection or qualified acceptance, then bounded release.
“The general installation guide says to fill the gap”
Observe: An installer presents a product guide but no project-specific system sheet, and the guide includes general language.
Interpretation: The guide may give handling steps while the listed system supplies the configuration and rating requirements. 3M’s guide says it highlights general steps and that system specifications control, and it directs the installer to confirm opening size, pipe size and material, insulation type and thickness and annular space. 3M’s installation guide is a bounded product example.
Do not infer: Do not infer that filling the visible gap to the surface establishes the required depth or rating.
Safest next step: Request the system-specific installation page and have the qualified installer compare the actual row.
Next handoff: Correct or document the match, then obtain the project-required acceptance.
“The nonstandard condition has no decision owner”
Observe: A pipe, sleeve, opening, joint or assembly is outside the listed system, but the row says “field verify” with no named reviewer.
Interpretation: “Field verify” is a task description, not an approval path. A nonstandard condition requires a qualified determination, accepted alternate system or project-specific record.
Do not infer: Do not infer that a material supplier, homeowner or drywall crew can approve a deviation.
Safest next step: Ask the builder to assign the qualified reviewer and tell you whether the path is a different listed system, design-professional direction, engineering judgment, AHJ decision or another project-approved route. Hilti’s resource center identifies engineering judgments as one manufacturer-specific route for nonstandard conditions, but the actual project authority controls. Hilti’s resource center is not a universal approval.
Next handoff: The assigned reviewer issues a record; the builder updates the matrix; the AHJ or required inspector confirms the resulting path.
“The area is inaccessible or unsafe to inspect”
Observe: The only route to the location is an unsafe ladder, crawlspace, shaft, scaffold, roof edge, energized zone or confined cavity.
Interpretation: The evidence is incomplete, and accessing it may create a fall, electrical, respiratory, struck-by or confined-space hazard.
Do not infer: Do not infer that an unsafe inspection is a homeowner responsibility or that a remote photograph proves the hidden condition.
Safest next step: Stop personal access. Ask the builder to provide a qualified access plan, qualified inspection record or AHJ-approved alternative. Keep the area held if the condition cannot be verified.
Next handoff: A qualified person completes the inspection or documents the permitted alternative; the builder releases only the area and step covered by that record.
“A correction was made after the inspection, but no recheck exists”
Observe: The inspection report lists a correction, and a later photo shows a seal or board, but no reinspection, qualified review or correction closeout is attached.
Interpretation: The correction may be real but not accepted. The matrix needs both correction evidence and acceptance evidence when the project requires them.
Do not infer: Do not infer that the correction itself closes the inspector’s objection.
Safest next step: Ask the permit holder or builder what closes that type of objection in the actual jurisdiction and have the responsible trade provide the requested record.
Next handoff: Reinspection or documented acceptance, then next-step release.
The pattern across all failure branches is consistent: preserve the condition, name the missing input, assign the person who can resolve it, obtain the appropriate record and release only the dependent next step. A hold is not a construction failure. An undocumented release is a coordination failure that becomes expensive once the wall is closed.
What should the homeowner release next, and what should remain unresolved? #
Release only the next named covering step for the area whose rows are accepted; keep any row with a missing classification, system match, correction closeout, inspection result or responsible owner on hold. The final homeowner decision is not “Does the fire protection look finished?” It is “Which exact area and next action does the evidence support, and what remains outside that release?”
Use this pre-release checklist
Before agreeing that an area may proceed, ask the builder to confirm each item:
- The jurisdiction, permit number, approved plan issue and current inspection sequence are recorded.
- The release boundary has a stable location code and does not silently include an unresolved shaft, stair, chase or rated transition.
- All framing and rough-trade work that can change the condition is complete for the release boundary.
- Every concealed fire-protection location is classified as fireblocking, firestopping, another approved condition or unresolved.
- Fireblocking rows identify the governing plan or code path, material, continuity and retained integrity.
- Firestopping rows identify the assembly, rating, penetrant, opening, substrate, backing, depth and exact approved system or detail.
- The system reference is not just a product name, color, label or general installation guide.
- Location-coded wide, assembly and detail records exist, with labels and original files retained where required.
- The installing trade and correction owner are named for every row.
- Required city, township, AHJ, special-inspection or qualified-review records are attached and scoped to the area.
- Every correction has a correction record and the required reinspection or acceptance record.
- The release states whether it covers insulation, an insulation inspection, drywall, ceiling enclosure, shaft enclosure or another single next step.
- Held locations are listed and physically communicated to the next trade.
- The builder, not the homeowner, confirms that the release is consistent with the contract, permit and approved documents.
If a box is not applicable, write why and identify who made that determination. Do not leave it blank. If a box is unknown, mark the row held.
A sample release note
Use a short note that can travel with the schedule:
Area: L1 east bedroom and hall wall, studs to ceiling line. Release: insulation only. Reviewed: current architectural detail A5.12, framing inspection record 309-24, rough plumbing and electrical records, matrix rows L1-E-01 through L1-E-12. Accepted: rows 01-10. Held: row 11, changed cable bundle at rated wall; row 12, photo does not show opening edge. Owners: electrician for row 11, firestop reviewer for system match, builder for reinspection coordination. Drywall is not released. Next review: before insulation inspection.
This is a coordination example, not an official inspection record. It is useful because it distinguishes area, scope, evidence, accepted rows, held rows, owners and next review. A note that says “pre-drywall approved” without those limits is too broad.
What to bring to the builder or professional
Bring the matrix row, drawing excerpt, location-coded photos, system reference, inspection report, correction record and your exact question. Do not bring only a phone photo and ask whether it “looks right.” A professional can give a more useful answer when the question is bounded:
- “Does this listed system cover this wall assembly, 50 mm copper pipe, 70 mm opening, mineral-wool backing and the recorded depth?”
- “Does this changed cable bundle require a different system or an updated acceptance record?”
- “Which inspection or qualified review closes this held row in this permit and jurisdiction?”
- “Is insulation released for this room while the shaft corner remains held?”
- “What record should the drywall crew receive before covering?”
If the professional says the answer depends on an input you do not have, add that input to the matrix. If the answer depends on the AHJ, ask the permit holder to obtain the jurisdiction’s direction. If the answer depends on a design professional, ask for the written project record rather than relying on a hallway conversation.
The jurisdiction boundary is part of the answer
This guide uses the United States as the default market but does not supply one national inspection schedule. Philadelphia, Pennsylvania and Hillsborough Township, New Jersey are examples with different published inspection language. A home in another city, county, township, state or tribal jurisdiction may use a different adopted code edition, amendment, inspection name, permit holder, third-party agency or pre-covering sequence.
Name the actual authority having jurisdiction in the matrix. Confirm whether it is a city building department, county building department, township construction office, state agency, fire marshal or another authority. Record the permit type and current published checklist, then confirm the project-specific requirement with the permit holder or inspector. A source that says what Philadelphia checks cannot prove what a home in Denver, Dallas or a rural county must do.
The safety boundary is part of the answer
This decision involves life-safety construction and may occur around falls, ladders, scaffolds, electrical rough-ins, sharp framing, dust, sealants, elevated work, shafts and confined or poorly ventilated spaces. Homeowners should stay in safe, authorized areas and should not install, remove, cut, test or repair fireblocking, firestopping, rated assemblies, electrical work, ductwork, plumbing or structural framing. Do not handle uncured products or enter an unsafe cavity to improve the record.
Photos or video cannot establish pressure integrity or contamination/uncured-material safety. Do not pressure-test or alter fire-protection or plumbing systems, infer pressure integrity remotely, or handle potentially contaminated dust or debris or uncured firestop products. Route those questions and any needed inspection to the qualified trade and the AHJ.
Ask the builder to arrange access and qualified review. If there is an immediate fall, electrical, fire or confined-space hazard, leave the area and notify the site supervisor. The release matrix cannot make hazardous work safe and cannot substitute for a site safety plan.
The final decision path
Use the following path at the release meeting:
- All inputs present and classification clear? If no, hold and assign the missing input or qualified determination.
- Field condition matches the approved code path or exact listed system? If no or uncertain, hold and route the deviation to the qualified reviewer, design professional, AHJ or accepted manufacturer pathway.
- Required trade, AHJ and qualified-review records complete? If no, hold the dependent covering step and schedule the correct checkpoint.
- Corrections closed and evidence attached? If no, hold the affected row and recheck.
- Release scope bounded to one area and next step? If no, rewrite the release.
- Released area communicated to the next trade? If yes, release only that area and step, retain the held list, and set the next inspection or handoff.
The answer to the original question is therefore evidence-based and deliberately narrow: verify the condition, verify the match, verify the responsible acceptance, then release the next covering step. When the evidence is incomplete, the correct homeowner action is to document the missing handoff and hold the next step. For more homeowner decision surfaces across planning and construction, use the Brictale homeowner blog, while keeping the permit set and actual AHJ as the controlling project sources.
Cite this guide
Brictale. “How to Verify Fireblocking and Firestopping Before Drywall in a New Home.” Published 2026-09-27; updated 2026-09-27.
https://brictale.com/build/construction/verify-new-home-fireblocking-firestopping-before-drywall · Read the Markdown version
Original contribution: Concealed Fire-Protection Release Matrix. A homeowner-facing matrix that connects each concealed fireblocking or firestopping location to its assembly, field conditions, responsible trade, inspection status, evidence record, correction owner and covering release.
Sources and scope
Evidence behind this page
- For Philadelphia, Pennsylvania residential building permits, the City describes an interior framing inspection after interior wall framing and applicable mechanical, electrical, plumbing and fire-suppression rough-ins; it says the inspector checks placement of fire blocking and draft stopping and that drywall or finishes should not be installed until the inspection passes.
Inspections by permit type | Department of Licenses and Inspections | City of Philadelphia
Philadelphia, Pennsylvania city inspection guidance; use only as a local example and confirm the project permit and current inspector instructions.
Accessed · Link to this claim - The City of Philadelphia describes an insulation inspection after insulation and fenestrations are installed, says voids, gaps, penetrations and rim joists are checked, and says drywall or finishes should not be installed until the insulation inspection passes; its wallboard inspection follows installation of wallboard.
Inspections by permit type | Department of Licenses and Inspections | City of Philadelphia
Philadelphia, Pennsylvania residential inspection sequence; not a national inspection schedule.
Accessed · Link to this claim - Hillsborough Township, New Jersey's required-inspections checklist places fireblocking and firestopping within the frame inspection before covering with finish or infill materials and states that rough plumbing, mechanical, electrical and fire inspections must be approved before that frame inspection is called.
Permit number must be given when requesting inspections | Hillsborough Township, New Jersey
Hillsborough Township, New Jersey checklist example; requirements and sequencing are jurisdiction- and permit-specific.
Accessed · Link to this claim - UL Solutions describes fireblocking as code-required material or code-official-approved material that protects concealed combustible spaces, and identifies locations including wall and floor or ceiling intersections, concealed-space interconnections, stair-stringer spaces, and openings around vents, pipes, ducts, cables and wires at ceiling and floor level.
The Code Authority Q&A: Fireblocking | UL Solutions
UL Solutions explanation referencing the 2021 IBC and IRC; the adopted code, amendments and AHJ control a real project.
Accessed · Link to this claim - The U.S. Department of Energy Building America report reproduces IRC R302.11 material and location provisions, including vertical and horizontal concealed-space fireblocking, a ten-foot maximum interval in specified stud-wall spaces, approved materials, a sixteen-inch minimum height for a stated unfaced-fiberglass condition, and the requirement to maintain fireblock integrity.
A Building America technical report reproducing cited IRC provisions; not a determination that a particular jurisdiction has adopted that edition unchanged.
Accessed · Link to this claim - The DOE Building America report reproduces IRC provisions stating that penetrations of fire-resistance-rated assemblies must be installed as tested in the approved assembly or protected by an approved penetration firestop system tested under ASTM E814 or UL 1479, with the required F rating at least equal to the penetrated assembly's rating.
Technical report's reproduction of IRC R302.4 provisions; project code adoption, rated assembly design and AHJ interpretation still govern.
Accessed · Link to this claim - UL Solutions identifies ASTM E2174 and ASTM E2393 as guidance for on-site inspection of installed firestops and says a qualified third-party inspection label can provide evidence to code authorities that a UL Certified firestop system was properly installed; it also notes that local code authorities establish the policy used to verify compliance.
Firestop Systems: An Important Line of Defense for Fire Safety | UL Solutions
UL Solutions industry guidance and standards references; it does not require a third-party inspector on every single-family project.
Accessed · Link to this claim - UL Solutions says Product iQ can be searched by file number, product type, category control number, fire-resistive design or assembly number and model number, and provides access to firestop and fire-resistance-rated assembly searches.
Finding UL Listed and Certified Fire-Rated Products with UL Product iQ | UL Solutions
UL Product iQ search guidance; a database search does not by itself prove that the installed field condition matches a system.
Accessed · Link to this claim - 3M's CP 25WB+ installation guide says sealant depth and complete filling of the annular space follow system specifications, and instructs the installer to confirm that opening size, pipe size and material, insulation type and thickness, and annular space comply with the system specifications; the guide is general and excludes CPVC.
3M Fire Barrier Sealant CP 25WB+ Installation Guide
3M CP 25WB+ guide for general through-penetration and construction-joint applications; do not generalize to other products or conditions.
Accessed · Link to this claim - Hilti's U.S. Firestop Resource Center describes its selector as a way to find tested firestop systems and generate submittals, and identifies engineering judgments as a route for non-standard conditions through its construction platform.
Firestop Resource Center | Hilti USA
Hilti's manufacturer-specific resource pathway; it is not a universal approval route and does not replace the AHJ or design professional.
Accessed · Link to this claim