How to Compare Custom-Home Finish Allowances With Installed Costs
Normalize every finish allowance for product, labor, tax, freight, rough-ins and timing before you lock a custom-home contract or loan budget.
The short answer
Compare an allowance with installed cost only after matching quantity, quality, product scope, labor, tax, freight, storage, rough-ins, builder fees, exclusions and payment timing. Record each item in one worksheet, calculate low, base and scope-complete scenarios, then have the builder confirm contract responsibility and the lender confirm budget and draw treatment. Treat every price as project-specific, not a national quote.How to Compare Custom-Home Finish Allowances With Installed Costs
Compare a finish allowance with installed cost only after matching quantity, quality, product scope, labor, tax, freight, storage, rough-ins, builder fees, exclusions, and payment timing. Record each item in one worksheet, calculate low, base, and scope-complete scenarios, then have the builder confirm contract responsibility and the lender confirm budget and draw treatment. Every price below is project-specific, not a national quote.
Originality brief. Current answers define allowances, show builder allowance sheets, or list product prices. The missing decision is whether a particular allowance is usable as written before contract and construction-loan budget lock. The original contribution is an Allowance-normalization worksheet that converts each line into a scope-matched, installed-cost comparison with responsibility, timing, and sensitivity fields. Its method is: For each finish, add the allowance basis to tax, freight, storage, installation, builder fee, rough-in work, and owner-supplied costs, then calculate low, base, and scope-complete totals with sensitivity. Its limitations are: Modeled dollars are illustrative, not quotes; local tax, freight, labor, permits, lender rules, and contract language must be verified for the project jurisdiction. You can check it by tracing every input to the contract, a dated product source, a written trade or builder scope, or a lender confirmation; anything else stays an assumption.
This finish comparison belongs in the budgeting stage of Brictale’s Build journey, before design decisions become rough-in instructions and before a lender locks the construction budget.
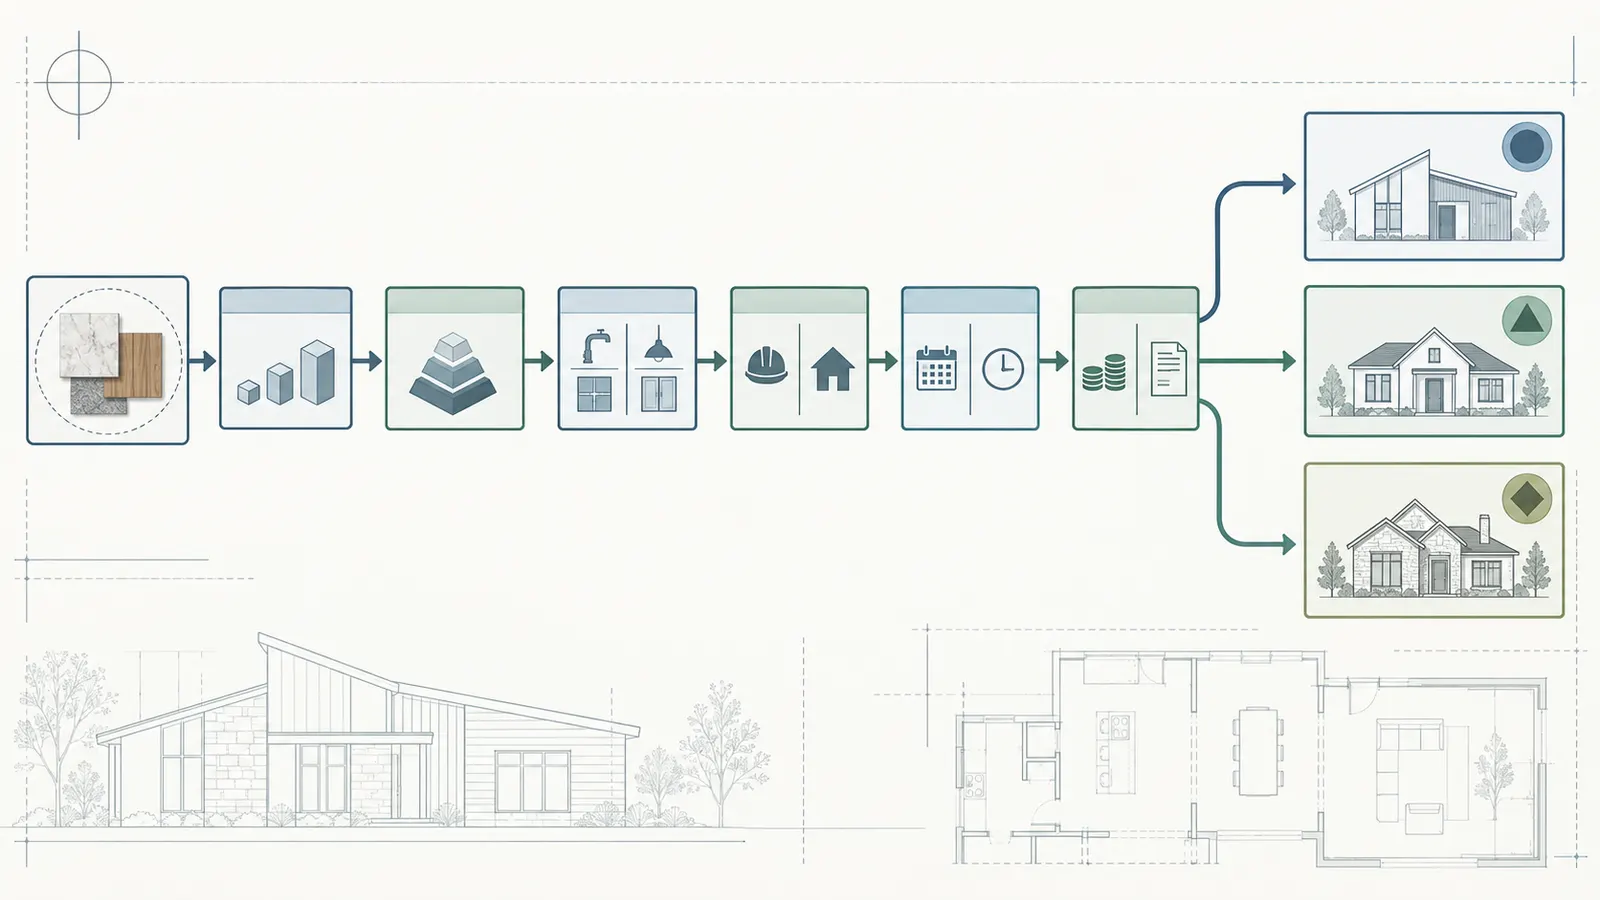
1. Decide whether the allowance is usable before comparing dollars #
An allowance is usable as written only when you can identify what quantity or unit it covers, what quality or model tier it assumes, which costs are included, who performs or pays for the remaining work, and when the decision must be made. If any of those answers is missing, classify the line as scope undefined, not as a cheap price.
What an allowance is—and what it is not
For this article, an allowance is a contract budget line for a finish or fixture that has not been finally selected. The Oregon Construction Contractors Board’s allowance guidance gives a useful state example: it describes an allowance as a line item for a specific fixture or appliance with an estimated cost and says the homeowner pays the difference if the item costs more than the contract amount. That is not a nationwide legal definition, but it captures the practical exposure: the number is a budget limit or estimate inside a larger agreement, not evidence that the entire installed assembly has been priced.
The word “allowance” can refer to at least four different bases:
- A material-only credit, such as $8 per square foot for flooring.
- A supply budget for a named category, such as one kitchen range, dishwasher, refrigerator, and microwave.
- A complete installed package, where product, delivery, labor, setting materials, and cleanup are included.
- A design or selection budget, where the builder carries a number but the contract later applies a credit, markup, or change order when the owner selects a product.
Those bases are not interchangeable. A $12,000 cabinet allowance may be reasonable for cabinet boxes and fronts but unusable if the homeowner assumes it includes fillers, panels, crown, hardware, delivery, installation, and finished end panels. A $12,000 appliance allowance may be sufficient for supply-only models but inadequate if the same line is expected to include delivery, haul-away, custom panels, gas conversion, electrical changes, and installation.
The first action is therefore not to search for a “normal” allowance. It is to ask the builder to rewrite each line as a scope statement:
Provide, deliver, protect, install, connect, test, and warranty [quantity] of [named product or quality tier] in [room/location], including [listed accessories and labor], excluding [listed exclusions], with owner responsible for [specific responsibility], and with changes priced under [named contract rule].
If the builder will not define the line, you have already found the decision: increase the allowance only if the scope is otherwise clear, or make the scope a contract exhibit before signing. Increasing an undefined number can hide the same omission at a higher dollar value.
The five tests for a usable line
Run these tests for every category.
| Test | Usable answer | Red flag | Next action |
|---|---|---|---|
| Quantity | “42 linear feet of base cabinets, 1 range, 860 square feet of flooring” | “Kitchen cabinets” or “flooring” | Measure or mark the plans and write the unit |
| Quality | Named model, series, finish, grade, or performance tier | “Standard,” “builder grade,” or “allowance” alone | Get a product schedule or written tier description |
| Scope | Supply, freight, tax, storage, installation, accessories, cleanup, and testing are stated | “Included” with no inclusions list | Split included and excluded costs into worksheet columns |
| Responsibility | Builder, cabinet firm, owner, electrician, plumber, or tile installer is named | “By others” or silence | Assign the handoff and require a price or credit |
| Timing | Selection, rough-in, order, delivery, and payment deadlines are known | Selection postponed until after rough-in | Add decision dates to the schedule and lender file |
An allowance can be financially adequate and still be contractually unusable. For example, a $20,000 flooring allowance may cover your likely materials, but if the contract does not say whether floor preparation, transitions, stair nosings, baseboard removal, adhesive, acclimation, waste, and installation are included, you cannot compare it with a retailer’s installed quote. Conversely, a smaller allowance can be usable when every exclusion is explicit and separately budgeted.
Distinguish an allowance from an estimate, fixed price, and credit
Ask the builder to label the line with one of these terms:
- Allowance: a budget line that changes when the selected item or defined package costs more or less under the contract’s rule.
- Estimate: a forecast of an amount that may still vary because quantity, labor, or conditions are not final.
- Fixed price: a defined scope at a stated price, subject to expressly listed changes, escalation provisions, or concealed conditions.
- Credit: the amount removed from the contract if the builder’s included scope is replaced, omitted, or supplied by the owner.
Do not assume a credit equals the retail price you see online. It may be the builder’s internal cost, a subcontract price, a package value, or a number reduced by management, procurement, or markup rules. Ask for the exact formula in the contract.
Oregon CCB’s homeowner guide makes the comparison principle concrete: bids should be based on the same scope and materials, and a homeowner should find out whether a category is an estimate or an allowance. It specifically warns that a higher-end carpet or dishwasher can cost more when the category is an allowance. Use that as a process lesson, not as a rule that Oregon law governs your project.
The usable / increase / redefine decision
After the five tests, place the line in one of three decision buckets.
Use as written. Choose this only when the likely selection fits the stated quantity and tier, the installed scope is complete, and the contract says how the final amount is reconciled. Keep a small sensitivity case for price movement or selection drift.
Increase the allowance. Choose this when the scope is complete but the number is plainly below the price of a selection that fits the plans. The increase should be tied to a dated model, quote, or documented product tier. An increase without a quantity or scope change is not a full correction.
Redefine scope and responsibility. Choose this when the price is not comparable because labor, tax, freight, rough-in work, accessories, or owner supply is unclear. A written scope change is usually more valuable than a larger budget line. The contract should say who orders, receives, stores, inspects, protects, installs, connects, tests, warranties, and pays for the item.
The next decision after this chapter is simple: can you populate one complete row for the allowance? If not, stop comparing totals and request the missing scope from the builder, architect, cabinet designer, appliance vendor, or trade.
2. Build one normalized row for every finish #
The correct comparison unit is not “allowance versus shopping-cart subtotal.” It is the cost of the same usable, installed result under the same quantity, location, and responsibility assumptions. A normalized row makes the hidden scope visible before it becomes a change order.
Use the worksheet fields in this order
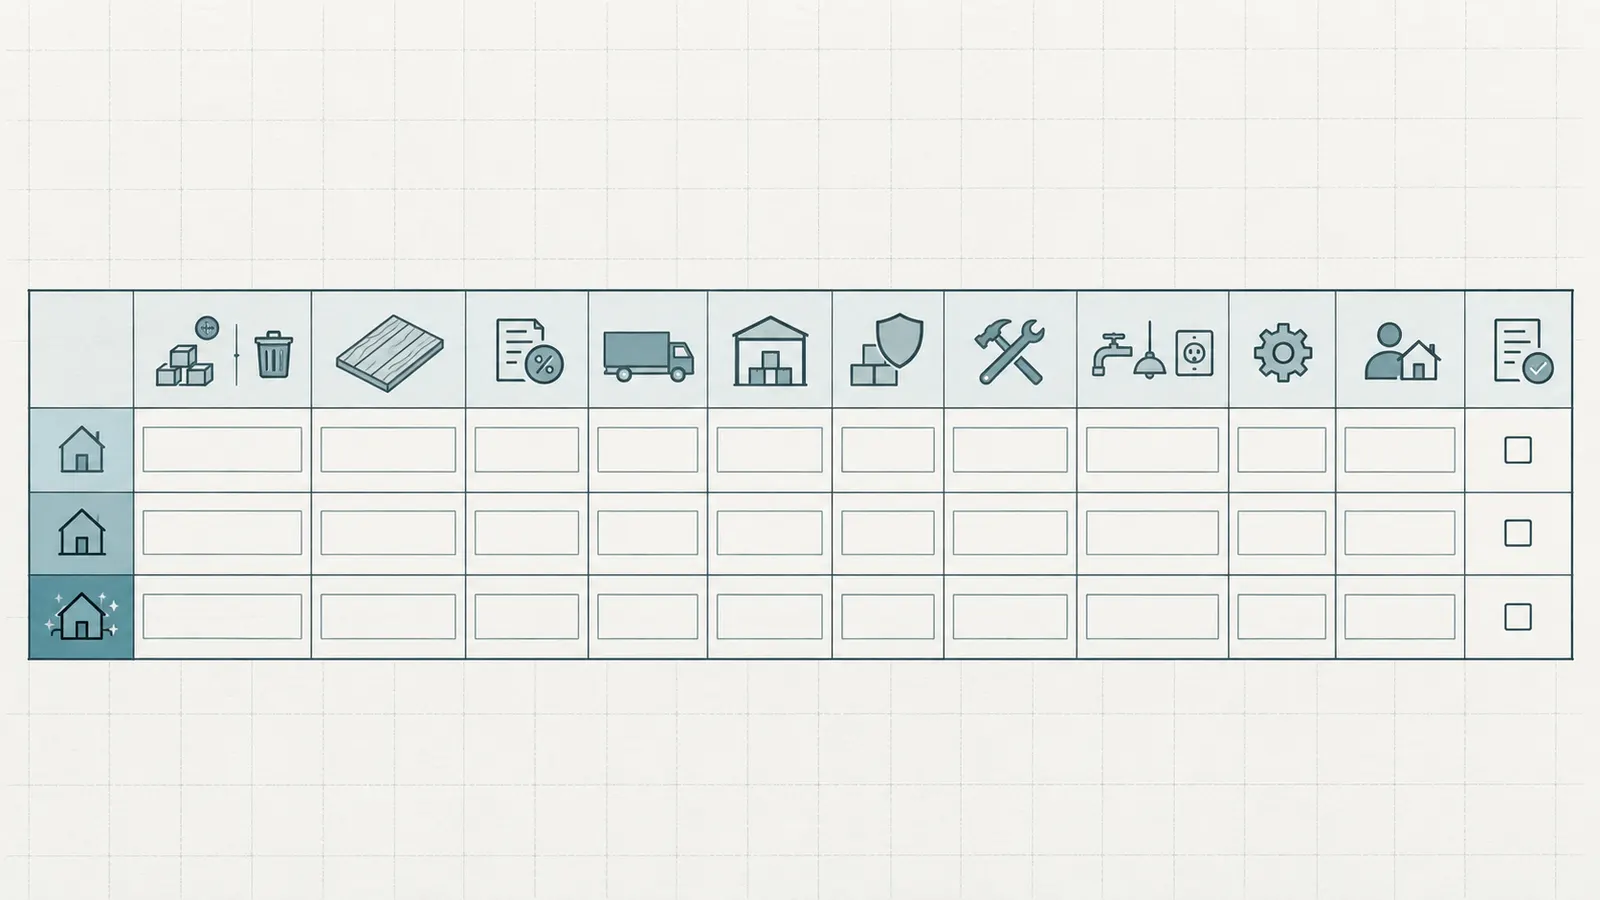
Copy one row for each distinct item or package. Separate a kitchen appliance package into individual appliances when models, rough-ins, or delivery dates differ. Separate a bathroom group when the tub, valve, trim, sink, faucet, toilet, accessories, and installation have different owners.
| Field | What to enter | Example input | Verification owner |
|---|---|---|---|
| Row ID | Stable identifier | KIT-03-RANGE | Homeowner |
| Room / location | Plan reference and elevation | Kitchen, A-3.2, north wall | Homeowner + designer |
| Quantity | Count or measured amount | 1 each; 42 linear feet; 860 sq ft | Designer / trade |
| Unit | Each, linear foot, square foot, square yard, box, lot | sq ft | Homeowner + builder |
| Allowance basis | Material-only, supply-only, installed package, or unclear | $8/sq ft material-only | Builder |
| Exact model or quality tier | SKU, series, grade, or written tier | Whirlpool washer, exact SKU pending | Homeowner + vendor |
| Product price | Dated price for required quantity | $1,200, dated 2026-09-08 | Homeowner / vendor |
| Waste / overage | Percentage or measured extra quantity | 10% tile waste | Tile installer |
| Tax | Rate and taxable base, or “to verify” | Local rate × taxable items | Builder / accountant |
| Freight / delivery | Delivery, liftgate, inside delivery, haul-away | $180 illustrative | Vendor / builder |
| Storage / protection | Receiving, dry storage, damage inspection, protection | $0 only if written included | Builder |
| Installation labor | Installer, labor unit, prep, setting, trim | $2,800 illustrative | Trade |
| Accessories / consumables | Adhesive, grout, edge, panels, hardware, valves | $450 illustrative | Trade |
| Rough-in / upgrade work | Electrical, plumbing, framing, ventilation, blocking | $900 illustrative | Licensed trade |
| Builder fee / markup | Procurement, coordination, overhead, percentage or flat fee | 10% of defined base | Builder |
| Owner-supplied responsibility | What the owner orders, receives, stores, delivers, or warrants | Owner supplies faucet by date | Contract parties |
| Decision deadline | Selection, rough-in, order, delivery, install | Model by 2026-10-15 | Builder |
| Draw eligibility | Whether lender accepts the cost and proof at a draw | Confirm with lender | Borrower + lender |
| Evidence date and record | URL, quote, plan, specification, or email | Vendor page + dated PDF | Homeowner |
| Status / next handoff | Open, verified, change order, selection complete | Builder confirms scope | Named next party |
The table is intentionally more detailed than a typical allowance schedule. The extra fields answer why a line exceeded its allowance and who could have prevented the gap. If you omit a field because it does not apply, enter “not applicable” rather than leaving the omission ambiguous.
Convert units before converting dollars
Unit mismatch is one of the easiest ways to make a false comparison. Use formulas that preserve the physical quantity:
Required material quantity = measured quantity × (1 + waste rate)
Material subtotal = required material quantity × unit price
For 860 square feet of flooring at a 10% waste assumption:
Required quantity = 860 sq ft × 1.10 = 946 sq ft
If a dated product source shows an illustrative $6.25 per square foot, then:
Material subtotal = 946 sq ft × $6.25/sq ft = $5,912.50
This does not establish that $6.25 is a market price or that 10% is suitable for your pattern, room geometry, or installer. It only shows the method. Ask the flooring installer to confirm waste, stair material, transitions, acclimation, and whether the quoted unit includes tax or delivery.
For tile, the unit may be square feet of tile but the installed result also needs grout, mortar, waterproofing, backer or substrate preparation, edge profiles, movement joints, niches, trim, sealant, and labor. For cabinets, “linear feet” may omit islands, tall units, panels, finished ends, fillers, scribes, valances, crown, toe-kicks, hardware, and modifications. For countertops, square feet may omit templating, sink cutouts, edge profiles, seam count, supports, backsplash, faucet holes, delivery, and installation.
Preserve evidence dates and price bases
Every price input needs a date and a basis. “Online price” is not enough. Save the model number, configuration, finish, seller, availability, delivery option, and whether the number is before tax. A manufacturer’s product guide can help establish category and feature differences, but it does not prove your local installed price.
For example, Whirlpool’s buyer guidance says washing-machine cost varies by brand, model, style, and features and gives a manufacturer-specific range of about $550 to $1,600 for Whirlpool machines on the page reviewed. That range is useful as bounded product context, not as a custom-home appliance allowance or installed-cost benchmark. Use the Whirlpool washing-machine guidance to record why the chosen model tier matters, then obtain the actual model, seller terms, delivery, installation, and warranty path.
The same rule applies to builder specification sheets. A Copper Builders sample specification sheet shows how one builder describes allowances and categories: its sample references quartz countertops, built-in appliances, faucets and plumbing fixtures, custom cabinetry, flooring locations, and recessed lighting separately in the electrical package. That is a valuable prompt for questions. It is not evidence that the same items are included in your contract.
Assign a status to every assumption
Use four statuses:
- Documented: appears in the signed contract, specification, plan, vendor quote, or lender writing.
- Confirmed verbally: someone said it, but the document has not been updated.
- Modeled: you entered a working assumption to test exposure.
- Unknown: neither the value nor the responsible party is established.
Only documented values should be treated as contract scope. Confirmed verbal statements belong on the question log until added to the contract or an accepted change order. Modeled values belong in scenario totals, clearly labeled illustrative. Unknown values should not be buried inside contingency.
Responsibility is part of cost
The row is incomplete until responsibility is named. Consider a refrigerator. The product price may be owner-supplied, while the builder provides the cabinet opening, electrician provides the receptacle, plumber provides the water connection, appliance installer levels and connects it, and the owner owns the warranty call. If the refrigerator is deeper than the model assumed, the cabinet panel, filler, outlet location, or floor protection may change. “Appliance allowance” alone cannot resolve this.
Write the handoff as an event:
- Homeowner selects and approves the exact model.
- Designer confirms dimensions, clearances, panel requirements, hinge swing, and finish.
- Builder confirms rough-in and opening responsibility.
- Vendor confirms availability, delivery access, damage policy, and installation scope.
- Lender confirms whether the cost is inside the approved project budget and how evidence is required.
- Builder receives or coordinates delivery, records condition, protects the product, and schedules connection.
- Homeowner verifies model and finish before installation and records warranty documents at handover.
The next decision is whether the normalized row can be priced with a scope-complete scenario. If not, the missing field is the next question—not a reason to substitute a national average.
3. Calculate low, base, and scope-complete scenarios #
Use at least three scenarios because a single finish total conceals the difference between a product that fits the allowance and a package that can actually be delivered and installed. The scenario labels describe planning conditions, not confidence levels or guaranteed outcomes.
The three scenario definitions
Low scenario is the least-cost selection that still meets the stated design, performance, dimensions, code-related requirements, and contract quality tier. It must include every cost that is truly unavoidable. It is not a clearance item that cannot arrive before the construction milestone.
Base scenario is the most likely selection or a selected model/package supported by a dated price record and a defined install scope. It is the number you carry into the working budget after the builder and relevant trades review the row.
Scope-complete scenario is the base selection plus costs that are often omitted from allowances: tax, freight, storage, protection, accessories, preparation, installation, rough-in changes, builder coordination, and owner-supply cash obligations. If a cost is included in the contract elsewhere, enter it as zero here with the document reference; do not double-count it.
The core formula
For each row, use:
Scope-complete cost = product + waste/quantity adjustment + tax + freight + storage/protection + installation + accessories/consumables + rough-in/upgrades + builder fee + owner-supplied cash costs
Then compare the scope-complete cost with the allowance on the same basis:
Allowance variance = scope-complete cost − contract allowance
If the allowance is already an installed package, do not add installation a second time. Instead, verify what the package includes and enter included components as zero with a citation to the contract section. The formula is a reconciliation tool, not permission to charge every category twice.
Worked example: a modeled flooring row
The following is an illustrative modeled example, not a quote, measurement, test, or collected market observation. Assume a contract lists:
- 860 square feet of engineered wood flooring;
- an allowance of $8.00 per square foot;
- installation included, but tax, delivery, transitions, and floor preparation are unclear;
- a 10% waste assumption for the selected layout;
- a low-scenario product input of $5.55 per square foot, so the required-product calculation is 946 sq ft × $5.55/sq ft = $5,250.30;
- a $6.25 per square foot product input dated September 8, 2026;
- a scope-complete sensitivity product input of $8.00 per square foot, so the required-product calculation is 946 sq ft × $8.00/sq ft = $7,568.00;
- $180 illustrative freight;
- $450 illustrative transitions, adhesive, and consumables;
- $1,100 illustrative floor preparation;
- $2,800 illustrative installation labor;
- a builder coordination fee modeled as 10% of product, freight, accessories, preparation, and labor;
- tax modeled at 8% of product and freight only, to be replaced by the actual jurisdictional treatment.
First calculate the allowance basis:
Allowance = 860 sq ft × $8.00/sq ft = $6,880
Then calculate required product:
Required product = 860 sq ft × 1.10 = 946 sq ft
Product = 946 sq ft × $6.25/sq ft = $5,912.50
Now calculate the modeled scope-complete total:
| Component | Low | Base | Scope-complete / sensitivity input |
|---|---|---|---|
| Required product | $5,250.30 at $5.55/sq ft | $5,912.50 at $6.25/sq ft | $7,568.00 at $8.00/sq ft |
| Freight | $0.00 if written included | $180.00 | $300.00 |
| Tax input | $420.02 illustrative | $487.40 illustrative | $629.44 illustrative |
| Accessories and transitions | $250.00 | $450.00 | $650.00 |
| Floor preparation | $0.00 only if verified acceptable substrate | $1,100.00 | $2,000.00 |
| Installation labor | $2,200.00 | $2,800.00 | $3,500.00 |
| Builder coordination fee | $770.03 at modeled 10% of product, freight, accessories, preparation, and labor, excluding tax | $1,044.25 at modeled 10% of product, freight, accessories, preparation, and labor, excluding tax | $1,401.80 at modeled 10% of product, freight, accessories, preparation, and labor, excluding tax |
| Modeled total | $8,890.35 | $11,974.15 | $16,049.24 |
| Variance from $6,880 allowance | $2,010.35 | $5,094.15 | $9,169.24 |
The low column is not automatically safe. It assumes floor preparation is zero and freight is included, two assumptions that must be proven. The base column reveals that the “$8 per square foot” allowance is not comparable to the complete installed result. The scope-complete sensitivity column tests a higher product price, higher freight, more preparation, and higher labor; it is not a prediction.
The builder should now answer four separate questions:
- Is the contract allowance $8 per square foot for material only or for the installed flooring package?
- Is the builder already carrying installation labor elsewhere in the base contract?
- Who pays for floor preparation if the substrate fails the installer’s written requirements?
- Is the builder fee applied to owner-selected upgrades, and if so, to which cost categories?
If installation is already in the base contract, remove the modeled $2,800 and any related markup from the variance. If the contract includes a flooring package with transitions and ordinary adhesive, remove those too. The worksheet is useful because it exposes the double-counting question before you negotiate the number.
Sensitivity formulas
Use sensitivity to find which unresolved input can change the decision. For a unit-priced item:
Unit sensitivity = quantity × change in unit price
In the flooring example, a $1.00 per square-foot change applied to 946 square feet changes product cost by $946 before tax, markup, and any changed installation requirements. A $500 change in floor preparation changes the scope-complete total by $500 plus any contractually applicable builder fee. A 5% change in labor changes a $2,800 modeled labor input by $140.
For an appliance package, sensitivity may be driven by model tier rather than quantity. For a cabinet package, quantity and configuration often dominate. For tile, waste and substrate conditions can dominate the material unit price. For lighting, the fixture price may be less important than whether the electrical package includes the box, switch, trim, dimmer, controls, and labor.
Use dated escalation context correctly
A dated index can tell you why a six-month-old price record deserves rechecking, but it cannot turn into a local installed quote. The BLS May 2026 Producer Price Index release reports category-level producer-price changes, including flooring and floor-coverings retailing, hardware/building-materials retailing, and major household-appliance retailing. It is market context for a dated assumption, not a direct adjustment to your contract. It does not include your sales tax, freight route, installer labor, waste, builder fee, or availability.
If you use an index for a planning sensitivity, show the exact input and do not label the result “expected cost.” For example:
Recheck trigger = dated input × (1 + chosen sensitivity rate)
If the base product input is $5,912.50 and you run a purely illustrative 5% recheck sensitivity:
Sensitivity product = $5,912.50 × 1.05 = $6,208.13
The 5% is a scenario parameter, not a forecast derived from BLS. Record the BLS release date and category next to it, then replace the model with a current vendor quote before contract lock.
Carry uncertainty separately from contingency
Contingency is not a substitute for omitted scope. If you know tax is excluded, model tax. If you do not know whether installation is included, resolve the contract. If floor preparation is an unknown site condition, obtain the installer’s criteria and create a bounded condition allowance or a written change-order rule. A generic 10% contingency may be useful for a lender or owner budget, but it should not hide a responsibility dispute.
For each unresolved field, record:
- the missing input;
- the person responsible for confirming it;
- the date by which it matters;
- the low and high modeled impact;
- whether it affects the contract price, owner cash, loan amount, draw timing, or all four;
- the document that closes the uncertainty.
The next decision is whether the base and scope-complete numbers fit the home’s total budget after all finish rows are added. Do not decide category by category without looking at the portfolio; ten small underages can exceed one dramatic appliance upgrade.
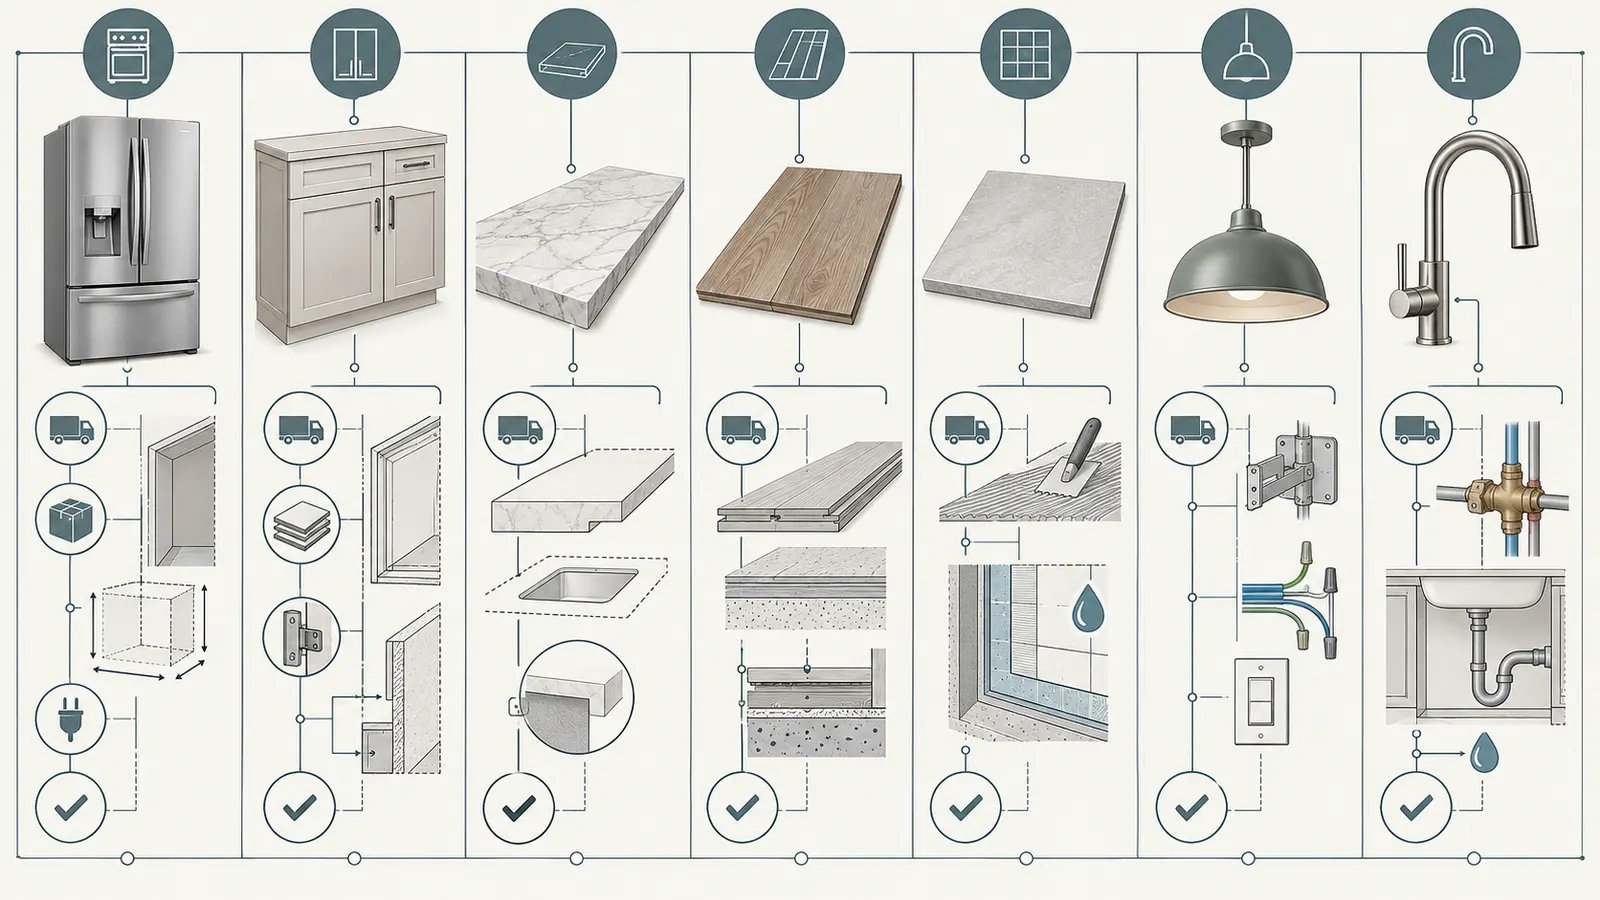
4. Compare appliances, cabinets, countertops, flooring, tile, lighting, and plumbing fixtures by scope #
The seven finish groups are comparable only after you identify the physical result and the trade handoffs each one requires. Start with the item that has the earliest rough-in or procurement deadline, not necessarily the most expensive item.
Appliances: compare the connected, dimension-compatible result
An appliance allowance is usable when it states the number of appliances, model or tier, required dimensions, finish, panel treatment, delivery, installation, connections, testing, haul-away, and warranty responsibility. A supply-only product price is not an installed appliance price.
Create one row per appliance for at least:
- range or cooktop;
- hood or ventilation insert;
- wall oven or microwave;
- refrigerator;
- dishwasher;
- washer and dryer;
- specialty appliances such as wine storage, ice maker, steam oven, or outdoor equipment.
For each appliance, record width, height, depth, hinge or door clearance, rough opening, electrical voltage and amperage, gas or electric requirement, ventilation requirement, water or drain connection, panel requirement, and access path. Do not infer that a replacement model with the same nominal width has the same rough-in or ventilation needs. The designer, builder, electrician, plumber, and appliance vendor must confirm compatibility.
The Whirlpool appliance guidance illustrates why product tier matters: the manufacturer says cost varies with brand, model, style, and features and lists a broad manufacturer-specific washer range. In your worksheet, that means “washer allowance” is inadequate. Specify front-load, top-load, stacked, capacity, controls, dimensions, finish, pedestal or stacking kit, delivery, installation, venting, drain, shutoff, and whether the builder’s rough-in already covers the selected configuration.
Failure case: the homeowner buys an owner-supplied refrigerator after the cabinet shop has released drawings. The refrigerator is deeper and needs a wider door swing. The cabinet filler changes, the outlet must move, and the delivery route requires additional protection. The product may fit the allowance, but the installed result does not fit the scope. Safest next step: freeze owner-supplied models before cabinet shop drawings and obtain written approval from the designer, builder, and relevant trades.
Cabinets: compare the designed cabinet package, not linear feet alone
Cabinet rows should reference the plan and elevations. Record base cabinets, wall cabinets, tall units, island, pantry, appliance panels, finished ends, fillers, scribes, toe-kicks, crown or light rail, valances, hardware, drawer construction, finish, interior accessories, glass, trash pullouts, rollout shelves, lighting channels, delivery, installation, and touch-up.
Ask whether the allowance includes design and field measurement. A cabinet layout may change after appliance models, countertop overhangs, window trim, plumbing locations, or structural posts are confirmed. If the cabinet allowance is based on linear feet, request the assumed mix of base, wall, and tall cabinets. Forty linear feet of base cabinetry is not equivalent to forty linear feet containing tall pantry units, glass doors, finished panels, and deep drawer stacks.
The Copper Builders sample is a useful scope prompt because it describes custom designed and built cabinetry, ceiling-height or soffit conditions, glass-front accents, a designed hood, hardware, finishes, and bathroom layouts instead of presenting cabinetry as an unexplained dollar line. Read its sample specification sheet as one builder’s example, not as an industry package.
Failure case: the allowance includes “custom cabinets” but the plans show a finished island back and paneled refrigerator. The cabinet quote covers doors and boxes but excludes the panels. Safest next step: mark every visible side and appliance panel on the elevation, get the cabinet designer to price the complete layout, and write the accepted scope into the contract or change order.
Countertops: compare fabrication and installation attributes
Countertop comparisons need material, thickness, slab or sheet basis, color tier, edge profile, backsplash height, seam assumptions, cutouts, sink type, faucet holes, support requirements, templating, delivery, installation, and disposal. A square-foot allowance is not a finished countertop package unless those attributes are defined.
Ask who owns slab selection and whether the allowance is based on a number of slabs. A layout with a waterfall edge, book-matched seam, large island, or low-yield pattern may require more slab material than the measured top area suggests. Record the number and location of seams, the edge length, sink cutout count, and any structural support required for overhangs.
Failure case: the allowance covers quartz material but not the waterfall panels or sink cutout. A lower retail material price can still produce a higher installed total. Safest next step: have the fabricator draw the slab layout and list every cutout, edge, seam, support, and install task before the selection deadline.
Flooring: compare surface area, substrate, transitions, and sequencing
Flooring rows should distinguish hardwood, engineered wood, tile, resilient flooring, carpet, stair work, and specialty surfaces. Record measured area by room, waste, direction or pattern, transitions, stair noses, baseboard interaction, moisture or substrate requirements, acclimation, removal, floor preparation, adhesive or underlayment, installation method, protection, and final cleaning.
Do not compare a retailer’s product price with a builder’s allowance that includes labor. Do not assume the word “installed” includes substrate correction, moving stored materials, removing temporary protection, or repairing a damaged subfloor. Ask the installer for written substrate tolerances and a price or rule for work outside those tolerances.
The BLS release can be used to flag a dated flooring input for review, but not to establish your installed price. Its category data is a broad U.S. producer-price measure, while your project depends on product availability, local labor, room geometry, and the contract’s package. Keep the BLS source beside the date field, not in place of a quote.
Failure case: the flooring selection is delayed until after drywall, then the chosen product needs a different transition height and underlayment. The cost problem is now a sequence problem. Safest next step: set the selection deadline before door heights, cabinetry, and trim details become irreversible; have the builder confirm the transition and protection sequence.
Tile: compare the water-management and substrate scope
Tile is especially prone to false allowance comparisons because the visible tile is only one component of the finished assembly. Record the tile quantity and waste, grout, mortar, backer or approved substrate, waterproofing system, niches, benches, curbs, drains, slopes, movement joints, trim, edge profiles, sealant, layout, prep, installation labor, cleanup, and cure or protection requirements.
A tile allowance that covers “bathroom tile” may include floor and shower wall tile but exclude waterproofing, shower pan, niche, trim, or labor. Those exclusions can be major scope items. Ask the builder to identify the waterproofing assembly and the qualified trade responsible for installing and verifying it. The homeowner can compare drawings, selections, and written scope; waterproofing and code compliance should be handled and verified by qualified professionals under the rules of the project jurisdiction.
Failure case: the owner selects a large-format tile within the allowance, but the existing assumed labor and substrate scope does not support the layout. Safest next step: ask the tile installer to confirm size, substrate flatness, pattern, edge treatment, and labor before approval. Do not trade away required waterproofing or substrate work to preserve a finish allowance.
Lighting: separate fixture supply from the electrical system
Lighting rows should identify decorative fixtures, recessed fixtures, lamps, drivers, trims, junction boxes, switches, dimmers, controls, low-voltage components, ceiling reinforcement, special circuits, and installation. Confirm whether the electrical package includes standard recessed lights separately from the lighting allowance. The Copper Builders sample explicitly places recessed lighting in its electrical package rather than the allowance in the cited specification, showing why the boundary must be checked in your own documents.
Record fixture weight, mounting method, ceiling type, location, switching, dimming, control protocol, color temperature if specified, and whether the fixture is supplied by the builder, electrician, lighting vendor, or owner. An owner-supplied pendant may require a listed box, support, compatible dimmer, field assembly, and a delivery inspection.
Failure case: a decorative fixture price fits the allowance, but the fixture arrives without the required canopy, driver, mounting plate, or compatible dimmer. Safest next step: submit the cut sheet before the electrical rough-in and have the electrician confirm the box, wiring, control, and installation scope.
Plumbing fixtures: compare trim, valves, rough-ins, and finish coordination
Plumbing fixture rows should split the visible fixture from concealed or rough-in components. Record toilets, sinks, faucets, shower valves, trim, diverters, hand showers, tubs, tub fillers, drains, supply stops, carriers, accessories, shutoffs, specialty connections, finish, delivery, installation, testing, and warranty responsibility.
Ask whether the allowance includes rough-in valves and carriers or only surface-applied fixtures. A faucet change may affect the sink configuration, countertop hole drilling, supply connections, escutcheon, or backsplash clearance. A tub may require framing, floor reinforcement, drain relocation, access, and a compatible filler. A shower package may require a valve and diverter set that was not included in the visible trim budget.
Failure case: the owner selects a rainhead and hand shower with a diverter after plumbing walls are closed. The fixture cost is small compared with opening the wall, changing blocking, waterproofing, and trim. Safest next step: approve the complete plumbing fixture schedule before rough-in and require the plumber to mark concealed components and testing responsibility.
The next decision across all seven groups is the earliest irreversible handoff: cabinet drawings, plumbing rough-in, electrical rough-in, slab layout, waterproofing, or lender budget lock. Place the decision deadline before that handoff, not at the moment the product arrives.
5. Assign money, work, timing, and risk to the right party #
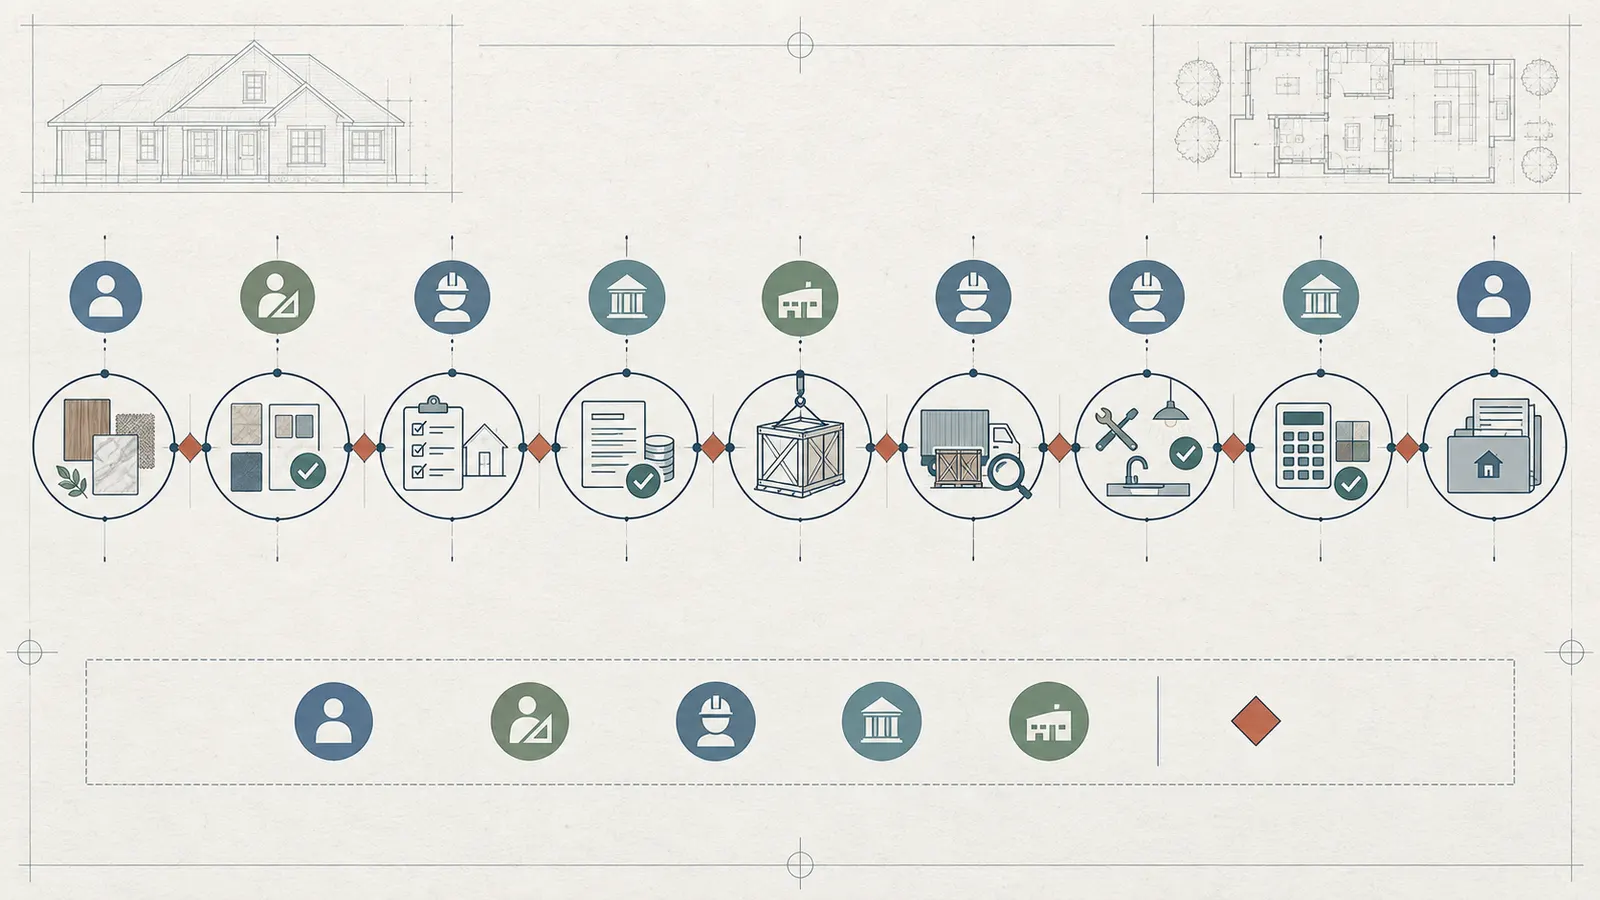
The homeowner, builder, architect or designer, specialty trades, vendor, and lender each control different parts of an allowance. A comparison is complete only when every row has a responsible person, a deliverable, and a verification event.
The responsibility map
| Decision or task | Homeowner | Builder / construction manager | Designer / architect | Specialty trade or vendor | Lender |
|---|---|---|---|---|---|
| Choose style and quality tier | Approves | Confirms contract tier | Checks design fit | Explains product options | Usually does not choose |
| Confirm quantity | Reviews plans | Coordinates | Measures/designs | Verifies field condition | Uses approved budget |
| Confirm rough-in | Supplies model/cut sheet | Schedules and coordinates | Resolves design conflict | Confirms technical requirements | May review budget impact |
| Order product | If owner-supplied | If builder-procured | Advises | Provides availability and terms | May require evidence |
| Receive and inspect | If owner-supplied | Protects jobsite process | Not usually | Records damage under vendor policy | Not usually |
| Install and connect | Rarely, unless expressly agreed | Coordinates | Reviews design intent | Performs trade work | Not responsible |
| Price change | Approves funding | Prices and documents | Advises design impact | Prices technical work | Confirms loan treatment |
| Verify completion | Checks selected model/finish | Signs off scope | Reviews design | Tests and warrants work | Reviews draw documentation |
This matrix is a planning tool, not a substitute for the contract. For a custom home, the builder may delegate procurement to a designer or trade, and some lenders may require invoices, inspections, lien waivers, or other records. The contract and loan agreement control.
Owner-supplied items need a full protocol
Owner supply is not just a lower price. It transfers ordering, storage, damage, delivery delay, compatibility, warranty, and sometimes labor coordination to the owner. If the homeowner supplies a faucet, write:
- exact product and acceptable substitute rule;
- purchase deadline and who verifies availability;
- delivery address and receiving party;
- inspection and damage-notice period;
- storage and protection responsibility;
- cut sheets and rough-in approval;
- installation party and price;
- what happens if the item is late, wrong, damaged, or discontinued;
- warranty owner and service contact;
- credit calculation and any builder fee.
The same applies to lighting, appliances, tile, cabinet hardware, mirrors, and specialty plumbing trim. If the builder will not install owner-supplied items, do not leave the row at “owner supplied.” Price the resulting gap in schedule and cash flow.
Change orders close decisions; emails preserve questions
Use a written change order or contract amendment when the approved selection changes scope, price, responsibility, schedule, or warranty. The Oregon CCB guidance says a change order should describe the change to original scope, be signed by both parties, and include the cost impact when the project total changes. That is an Oregon consumer-contract example, not a universal rule, but it is a strong recordkeeping practice for any U.S. project.
The Oregon CCB allowance and change-order guidance also reinforces the difference between a budget line and a documented scope change. Use the record to show:
- original allowance and basis;
- selected product or revised tier;
- additions and credits separately;
- tax, freight, labor, markup, and rough-in impacts;
- schedule effect and decision deadline;
- responsible payer;
- lender-budget effect;
- signatures and date.
An email that says “we should be okay” is a question record, not a priced change. Keep it in the decision log until the contract file is updated.
Compare bids only after scope is aligned
If you ask a cabinet shop, tile installer, countertop fabricator, or lighting vendor for a price, send the same plans, quantities, finish schedule, cut sheets, and exclusions to each bidder. The Oregon CCB contractor guide says more detail makes bids more accurate and advises understanding whether a category is an estimate or allowance. It also notes that bids should use the same scope and materials.
Create a bid comparison with columns for included, excluded, allowance basis, labor, taxes, freight, lead time, warranty, payment milestone, and assumptions. Do not rank the lowest total until you know whether one bidder omitted substrate preparation, delivery, installation, or coordination. An apparently higher bid may be the only scope-complete bid.
The local-rule boundary
There is no single national rule that determines whether an allowance includes tax, who must sign a change order, how owner-supplied goods are treated, or what permit fees cost. Name the jurisdiction for every legal or municipal question. For contract language, have a construction attorney licensed in the project’s state review terms you do not understand. For technical work, use qualified local trades and the authority having jurisdiction.
The homeowner’s safe task is to collect the contract, drawings, specifications, vendor documents, dates, and questions. The builder and qualified trades should confirm technical compatibility, code-required work, installation, testing, and inspection. The lender should confirm underwriting and draw treatment. Do not treat this article as legal, engineering, tax, or lending advice.
The next decision is whether the row’s responsibility is documented before you ask the lender to lock the project budget. If the builder says “we will figure it out in the field,” the line is not ready for lock.
6. Reconcile the normalized finish budget with the construction loan #
Treat the allowance worksheet as a project-budget handoff, not a promise that the lender will fund each retail receipt. A construction loan may release money in advances, and the eligible cost, timing, documentation, and borrower cash obligations depend on the lender’s program and agreements.
Separate four numbers the loan file may use
For each finish, track:
- Contract amount: the price or allowance in the signed builder agreement.
- Scope-complete project cost: your normalized planning total including items not already covered elsewhere.
- Borrower cash timing: the money you must pay before reimbursement, outside the loan, or under owner-supply terms.
- Loan budget and draw treatment: whether the lender includes the cost, when it can be advanced, and what proof is required.
These numbers can differ without anyone making a mistake. A lender may finance a construction budget but not reimburse a retail purchase made outside the approved process. A builder may carry installation in the base contract while the owner carries the appliance itself. A product may be eligible only after delivery or installation. Get the lender’s answer in writing.
The CFPB construction-loan explanation describes construction loans as short-term funds for building or rehabilitating a home and says funds are typically provided in a series of advances as construction progresses. That supports a practical warning: a finish decision can affect not only the final total but also the month in which cash is required and the evidence needed for a draw.
Do not infer your lender’s process from one lender’s FAQ
Normandy’s published FAQ states that its loans are typically disbursed in five to six draws based on completed work, that draws typically take five to seven business days, and that it may customize the number of draws subject to approval. It also says draws are typically released to the borrower, who pays the builder or subcontractor directly; partial draws are allowed. Those are the terms of one lender’s programs, not a national standard. Review the Normandy construction-loan FAQ only as a dated example of the questions to ask your own lender.
Ask your lender:
- Is an owner-purchased finish eligible for the construction budget?
- Must the builder purchase the item, or can the borrower purchase it directly?
- Does eligibility require an invoice, paid receipt, inspection, lien waiver, delivery confirmation, or installed condition?
- Are sales tax, freight, storage, installation, permits, and builder fees eligible separately or only within the contract amount?
- Are credits returned to the contingency, removed from the loan, or available for another finish category?
- What is the draw request deadline and review period?
- Does a late selection change the draw schedule or create borrower cash exposure?
- How are change orders approved after closing or after the budget is locked?
- Is there an interest reserve, and how is it calculated and replenished?
Do not spend a construction-loan dollar based on a general article, a builder’s verbal assurance, or a vendor’s “we work with lenders” statement. The loan documents and lender’s written instructions control.
Understand construction cost, reserves, and interest separately
The CFPB trial disclosure materials describe estimated construction cost as the sum of all costs associated with the project and show how construction cost, loan amount, closing costs, borrower funds, deposits, and other credits can connect in a cash-to-close calculation. The material is a disclosure example, not a universal underwriting policy, but it supports the worksheet structure: a finish underage or overage can affect construction cost, funds from the borrower, and the amount of cash needed at a particular stage.
Regulation Z Appendix D addresses multiple-advance construction loans where the amounts or timing of advances may be unknown at consummation. It also explains that a creditor may establish an interest reserve so interest can be paid as it accrues, with specific disclosure treatment. Read the current CFPB Appendix D for the federal disclosure context, then ask the lender how your product works. An interest reserve is not a general finish contingency, and it does not make an omitted finish scope disappear.
Normandy’s FAQ gives a concrete example of why timing matters: it states that payments are interest-only based on funds advanced and that it may consider or require an interest reserve based on qualifications. Again, that is one lender’s published policy. The safe planning move is to model when the finish money leaves the loan and when interest or borrower payment could begin, without calculating personalized borrowing advice here.
Use a loan handoff packet
Give the lender a controlled packet, not a spreadsheet with unexplained edits:
- signed contract and allowance schedule;
- plans, elevations, finish schedule, and specification sections;
- normalized worksheet with source dates and assumptions;
- selected models, cut sheets, quantities, vendor quotes, and lead times;
- builder confirmation of included and excluded scope;
- change orders and credits, signed as required by the contract;
- draw schedule and requested evidence;
- owner-supplied list with purchase and delivery dates;
- open issues with responsible party and decision deadline.
Version the packet. If the kitchen allowance changes from $25,000 supply-only to a $31,500 scope-complete package, show the old row, new row, additions, credits, and who approved the change. Do not overwrite the previous number without a date and reason.
Seattle example: local permit fees are not a finish allowance
Permit and municipal fees should be carried in the project budget when they are part of the project, but never inserted as a generic national percentage. Seattle Department of Construction and Inspections’ 2026 materials say permit cost depends on project size and complexity, value of work, additional permits, review time, inspection fees, and technology fees. The Seattle 2026 fee summary gives a jurisdiction-labeled example of $6,853 for plan review and permit fees for a 1,500-square-foot single-family house with garage at the stated project value.
That amount is not a custom-home finish allowance, a national permit estimate, or a fee for another city. It shows why the worksheet needs a jurisdiction field. For a project in Seattle, verify the current fee estimator and permit category with SDCI. For a project elsewhere, identify the city, county, state, utility, or special district that actually charges the fee. Do not use the Seattle number outside Seattle.
The next decision is a funding decision: after scope normalization, do the base and sensitivity totals fit the lender-approved construction budget without relying on an unconfirmed credit, reserve, or future selection miracle? If no, revise scope before signing or lock the cash plan with the lender.
7. Verify before order, at delivery, and after installation #
Verification should happen at three different moments: before the order becomes irreversible, when the item arrives, and after the installed result is tested and documented. A finish allowance is not closed merely because the product was selected.
Pre-order verification gate
Before ordering, the homeowner should have a signed or otherwise contractually accepted selection record containing:
- item name, model, SKU, finish, dimensions, and quantity;
- room and plan reference;
- product price, date, seller, tax basis, freight, and lead time;
- installation and accessory scope;
- rough-in and opening confirmation;
- owner-supplied responsibilities;
- change-order or allowance reconciliation;
- lender eligibility and draw evidence;
- decision deadline and delivery milestone;
- warranty owner and service path.
The builder or designer should confirm that the selection fits the design, elevations, clearances, finish coordination, and sequence. The electrician, plumber, cabinet designer, flooring installer, tile installer, or other qualified trade should confirm technical requirements within their scope. The lender should confirm funding treatment. These approvals are different; one does not replace another.
Delivery verification gate
At delivery, verify the exact model, finish, quantity, dimensions, accessories, and visible condition before concealment or installation. Record serial numbers when available. Photograph packaging and damage according to the vendor’s policy, but do not treat photographs as proof of code compliance or installation quality.
For owner-supplied goods, the receiving protocol should say who inspects, where the item is stored, how it is protected, and who pays for a second delivery or damaged replacement. A product that sits in an unconditioned or unsecured location may create a warranty or damage dispute. The builder should confirm acceptable storage conditions for the specific material.
At this gate, compare the delivery record with the approved selection, not with memory. The Oregon CCB homeowner guide advises checking that fixtures and appliances arriving on site are the ones selected and catching an error before installation. Use the Oregon CCB guide as a state-published example of that verification practice.
Installation verification gate
After installation, verify the visible result and obtain the trade’s completion or test record where relevant. For appliances, confirm model, level, connection, operation, ventilation, and protection. For cabinets, inspect alignment, doors, drawers, panels, fillers, hardware, and touch-up. For countertops, inspect seams, edges, cutouts, support, and sealants. For flooring, inspect transitions, stairs, pattern, damage, and baseboard interface. For tile, use the qualified installer’s waterproofing and substrate records, then inspect layout, grout, trim, movement joints, and finish. For lighting, test switching, dimming, controls, and fixture installation. For plumbing fixtures, inspect leaks, operation, trim, drainage, and access.
Do not perform electrical, gas, structural, plumbing, waterproofing, or other regulated or hazardous work yourself unless you are qualified and authorized under the project jurisdiction. The homeowner’s role is to observe, compare to the approved schedule, record questions, and call the responsible builder or trade.
Close the allowance with a reconciliation statement
Every allowance row should end with one of these dispositions:
- Under allowance: documented credit or unused balance treatment;
- At allowance: selection and installed scope match the contract basis;
- Over allowance: signed change order with additions, credits, markup, and payment source;
- Transferred responsibility: owner-supplied or trade-supplied scope documented with a credit or revised price;
- Open dispute: do not close the row; preserve records and seek contract or legal review.
The reconciliation should state whether the difference is a product upgrade, quantity change, omitted scope, changed responsibility, site condition, market movement, or builder error. These causes matter for future decisions and warranty conversations.
Handover records
Store the final finish schedule with:
- invoices and receipts;
- model and serial records;
- approved change orders;
- installation and test records;
- care and maintenance instructions;
- warranty terms and contacts;
- spare material, paint, grout, tile, flooring, and hardware labels;
- photos of concealed access points where appropriate;
- lender and builder closeout records.
The next decision after verification is ownership: what must be maintained, replaced, registered, or serviced, and who holds the warranty? A product decision that saves $500 today may create a harder-to-source finish or undocumented service obligation later. Add that ownership consequence to the worksheet before final approval.
8. Fix the common failure cases and make the next decision #
The most expensive allowance failures are usually process failures: an undefined basis, a missed handoff, an unrecorded change, a late selection, or a funding assumption that was never checked. Use the failure table to route the problem instead of treating every overage as a homeowner preference.
| Failure case | What the homeowner observes | What it may mean | Safest next step | Bring to the professional |
|---|---|---|---|---|
| Allowance says “standard” | Multiple products appear “standard” at different prices | Quality tier is undefined | Request named model, series, grade, or performance criteria | Contract, schedule, product links |
| Allowance is per square foot | Retail quote is per box or installed quote is per room | Units and waste are mismatched | Convert all quantities to the same unit | Plans, measurements, waste assumptions |
| Product fits but package does not | Fixture needs panels, valves, trim, or special labor | Accessories or rough-ins are excluded | Split visible product from concealed and installation scope | Cut sheet, rough-in plan, vendor quote |
| Builder says labor is included | Vendor quote also includes installation | Possible double count or missing responsibility | Mark included scope and ask for contract section | Proposal, inclusions, exclusions |
| Owner supply is cheaper | Builder warns of delay or no warranty | Delivery, compatibility, and risk moved to owner | Write the owner-supply protocol and credit formula | Model, delivery terms, warranty |
| Selection is late | Rough-in or cabinet drawings are already released | Change order risk and rework | Stop release; obtain technical review before order | Schedule, drawings, cut sheets |
| Price changed after contract | Invoice exceeds allowance | Product, quantity, market, or omitted scope changed | Require itemized reconciliation and signed change order | Original allowance, dated price, invoice |
| Credit is unclear | Builder offers a credit lower than retail price | Credit may follow contract cost basis or markup rule | Ask for formula and contract authority | Contract, builder cost breakdown |
| Lender rejects receipt | Owner paid before confirming eligibility | Loan program or draw evidence differs | Pause additional purchases; ask lender in writing | Loan instructions, receipt, delivery proof |
| Permit or fee surprise | Municipal invoice is higher than budget | Jurisdiction or fee category was wrong | Verify with the named authority having jurisdiction | Address, permit category, fee notice |
| Damage at delivery | Wrong or damaged item is discovered at install | Inspection or claim deadline may have passed | Document condition and notify responsible party immediately | Photos, packing slip, purchase record |
| Scope is “by others” | No one will price or schedule the work | Responsibility gap | Name the party, price, and milestone in writing | Plans, exclusions, meeting notes |
When to increase the number
Increase an allowance only when all of the following are true:
- the line’s scope is complete or separately priced;
- quantity and unit are verified;
- the chosen quality tier is supported by a dated source or quote;
- tax, freight, installation, accessories, and rough-ins are allocated;
- the contract’s markup, credit, and change-order rules are understood;
- the lender confirms the budget and draw treatment;
- the resulting base and sensitivity totals fit the project’s funding plan.
If one condition fails, increase the definition before increasing the dollar amount.
When to consolidate or redesign the package
Consolidate closely related lines when separating them creates false precision. For example, treat a shower as one scope-complete package if the valve, diverter, trim, waterproofing, drain, niche, bench, tile, and labor are designed and procured together. Keep separate rows inside the package so you can still identify responsibility and sensitivity.
Redesign the package when a selection triggers disproportionate rough-in, structural, electrical, ventilation, access, or maintenance consequences. A premium range may affect hood capacity and electrical service. A heavy stone tub may affect structure and delivery. A large-format tile may affect substrate and labor. A full-height cabinet may affect soffits and mechanical access. The correct comparison is the complete decision, not the feature price.
A 15-minute decision review
Before the contract or budget lock meeting, ask the team to answer these questions for every finish:
- What exactly is being purchased or built?
- What is the quantity and unit?
- What quality tier or exact model is assumed?
- Is the allowance material-only, supply-only, or installed?
- What tax, freight, storage, installation, accessories, rough-ins, and builder fees are included?
- Who orders, receives, protects, installs, tests, and warrants it?
- What must be selected before the next irreversible handoff?
- What document proves the amount and responsibility?
- What is the low, base, and scope-complete scenario?
- What is the sensitivity if the item is delayed, discontinued, damaged, or changed?
- Is it eligible for the construction loan, and what draw evidence is required?
- What is the next decision, named owner, and date?
Compact originality brief and checking method
The Allowance-normalization worksheet is a reusable row-by-row record that turns an allowance into a comparable installed-cost scenario. Its method is to add the allowance basis to tax, freight, storage, installation, builder fee, rough-in work, and owner-supplied costs, then calculate low, base, and scope-complete totals with sensitivity. Its limitations are that modeled dollars are illustrative, not quotes; local tax, freight, labor, permits, lender rules, and contract language must be verified for the project jurisdiction.
Check the contribution by opening each row’s evidence date, source, plan reference, contract section, trade confirmation, and lender response. Recalculate the formulas from the entered units. Confirm that each included item appears once and that every excluded item has an owner and a budget. Compare the final worksheet with the signed contract and approved change orders. If the reader cannot reproduce the total or identify the responsible handoff, the row is not ready.
This worksheet does not promise that a finish will stay within allowance, that a lender will advance money, or that a local authority will accept a particular installation. It gives the homeowner a disciplined next decision: use the allowance as written, increase it with a documented basis, or redefine scope and responsibility before signing or ordering. Carry the signed decision record into the builder’s schedule, the lender’s budget file, and the home’s handover records.
Cite this guide
Brictale. “How to Compare Custom-Home Finish Allowances With Installed Costs.” Published 2026-10-06; updated 2026-10-06.
https://brictale.com/build/budgeting/compare-custom-home-finish-allowances-installed-costs · Read the Markdown version
Original contribution: Allowance-normalization worksheet. A reusable row-by-row record turns a finish allowance into a comparable installed-cost scenario.
Sources and scope
Evidence behind this page
- A construction loan generally provides funds in a series of advances as construction progresses, rather than making the entire construction balance available at once.
Consumer Financial Protection Bureau, United States consumer guidance; general construction-loan description, not a promise about any lender's draw policy.
Accessed · Link to this claim - For multiple-advance construction loans, CFPB Regulation Z Appendix D allows an interest reserve to be established, and explains that unknown advance amounts or timing can affect disclosure calculations.
Appendix D to Part 1026 — Multiple Advance Construction Loans
Current federal Regulation Z Appendix D; disclosure guidance and optional treatment, not individualized lending advice or a requirement that every lender use an interest reserve.
Accessed · Link to this claim - The CFPB trial disclosure materials describe estimated construction cost as the sum of all costs associated with the project and connect construction cost, loan amount, closing costs, and borrower funds in the cash-to-close calculation.
Trial Disclosure Sandbox Application
CFPB trial disclosure materials for construction and construction-to-permanent loans; a disclosure example, not a lender's universal underwriting rule.
Accessed · Link to this claim - Normandy publishes that its construction loans are typically disbursed in a five-to-six-draw schedule based on work completed, subject to approval and loan-specific customization.
One lender's published FAQ; applies to that lender's programs and is not a national construction-loan standard.
Accessed · Link to this claim - Normandy states that draws are typically released to the borrower, who pays the builder or subcontractor directly; it also describes interest-only payments based on funds advanced and says an interest reserve may be considered or required depending on qualifications.
One lender's published borrower, draw, and interest-payment terms; verify the final loan agreement and state-specific lien-waiver requirements.
Accessed · Link to this claim - The Oregon Construction Contractors Board describes an allowance as a line item for a specific fixture or appliance with an estimated cost, and says the contractor requires the homeowner to pay the difference when the item costs more than the contract amount.
Guide to Home Improvement Contracts, July 26, 2023 Board Packet
Oregon, United States consumer-contract guidance; an explicit state example, not a rule for every U.S. jurisdiction or every contract form.
Accessed · Link to this claim - The Oregon Construction Contractors Board says a change order documents a change to the original scope, should be signed by both parties, and should state the cost impact when the total project cost changes.
Guide to Home Improvement Contracts, July 26, 2023 Board Packet
Oregon, United States consumer-contract guidance; use only as the named state example and obtain local legal advice for another jurisdiction.
Accessed · Link to this claim - Oregon CCB advises that bids should use the same scope and materials, and that a homeowner should determine whether a category is an estimate or allowance because a higher-end selection can cost more.
Guide to Home Improvement Contracts
Oregon CCB homeowner guidance; the comparison principle is useful broadly, while licensing, contract and allowance rules remain jurisdiction-specific.
Accessed · Link to this claim - Seattle SDCI's 2026 fee materials show that permit cost depends on factors including project size and complexity, work value, additional permits, review time, inspections, and technology fees; its 2026 example lists a $6,853 plan-review and permit fee for a 1,500-square-foot single-family house with garage at the stated project value.
Seattle, Washington, United States; a 2026 municipal example only, not a national permit fee or a fee applicable outside Seattle.
Accessed · Link to this claim - The U.S. Bureau of Labor Statistics May 2026 PPI release reports producer-price changes by category, including flooring and floor-coverings retailing, hardware/building-materials retailing, and major household-appliance retailing; these indexes provide dated market context rather than a project quote.
Producer Price Index News Release — May 2026 Results
United States BLS PPI, May 2026; index movement and category context, not installed residential cost, local sales tax, freight, labor, or a builder allowance.
Accessed · Link to this claim - Copper Builders' sample on-your-lot specification sheet shows that an allowance can be described with product categories and scope details such as quartz countertops, built-in appliances, faucets and plumbing fixtures, custom cabinetry, flooring locations, and recessed lighting handled separately in the electrical package.
Copper Builders Standard Spec Sheet — Sample On Your Lot Specifications
One dated builder specification example; it illustrates how scope may be written and is not a national standard, price list, or promise about another builder's inclusions.
Accessed · Link to this claim - Whirlpool's buyer guidance says washer cost varies by brand, model, style, and features and gives a manufacturer-specific typical range of about $550 to $1,600 for Whirlpool washing machines on the page reviewed.
How to Choose the Best Washing Machine for You
Whirlpool manufacturer guidance for washing machines; the stated range is product-specific, time-sensitive, and supply-only context, not installed cost or a whole-appliance-package benchmark.
Accessed · Link to this claim